
Currently, Inventory Management is only supported in the NA markets which include the United States, Mexico and Canada. To access the tool, go to the Helium 10 dashboard and click on Operations.
Before you can set up Inventory Management, you’ll need to make sure that you have connected your MWS token. If your accounts are not connected, a button will appear at the top of the dashboard prompting you to connect your account.

To learn how to connect your Helium 10 account with your Amazon Seller Central account, follow the instructions in the article “How Do I Connect My Helium 10 Account to My Professional Amazon Seller Account?”
1. Inside Inventory Management, open up the Settings window, by clicking on the bottom icon in the left menu.
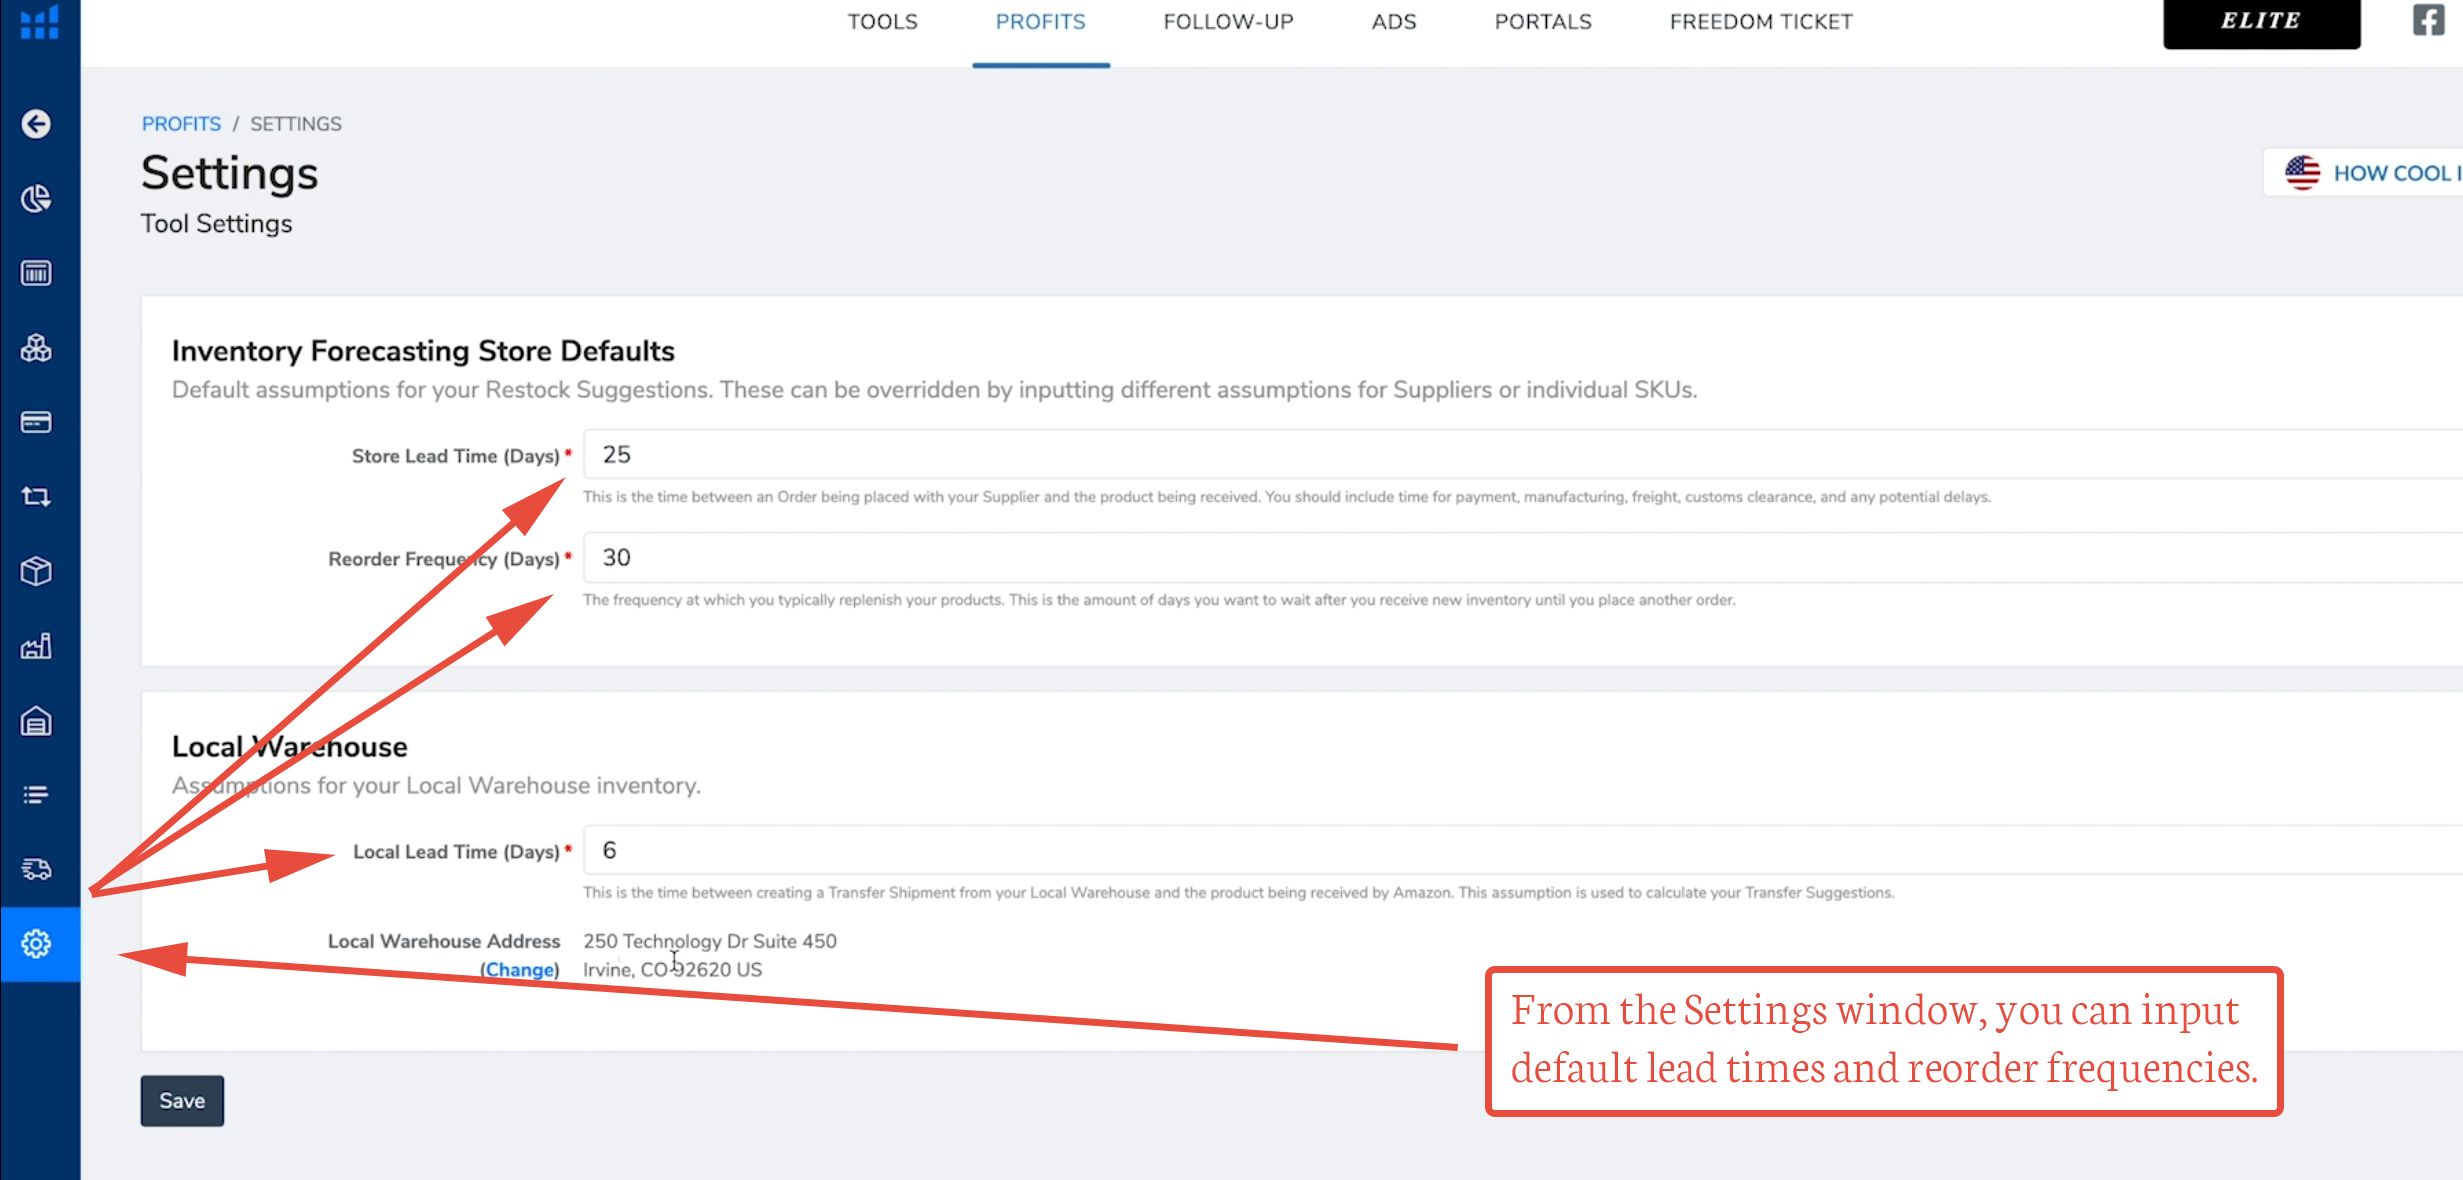
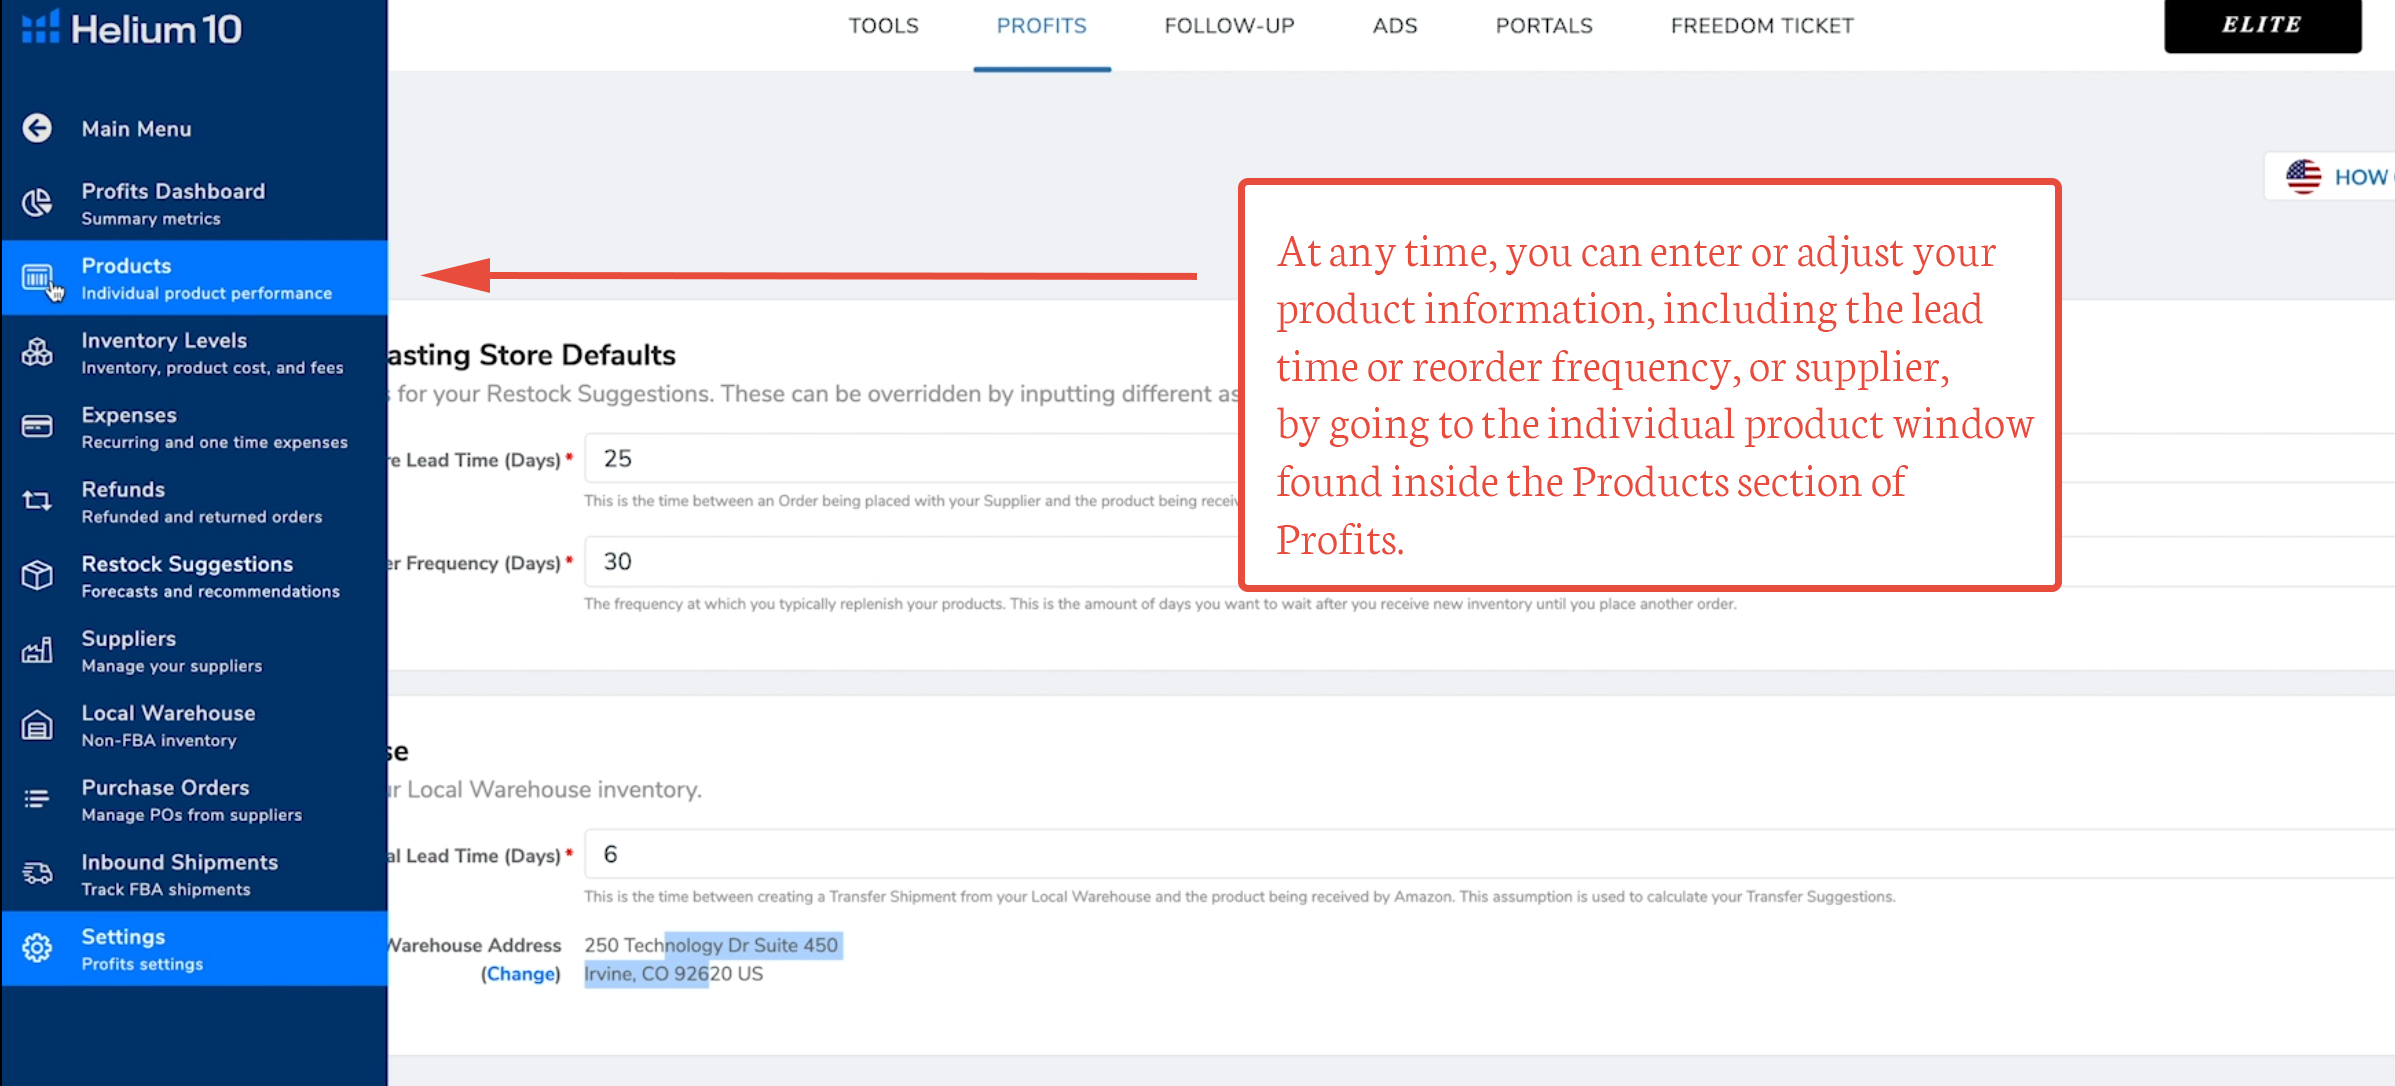
2. Set your Store Lead Time and Reorder Frequency. These will be the default settings for all of your Suppliers and Products. Lead Time is the number of days that it takes your suppliers to manufacture and ship your products (Helium 10 defaults this to 25 days). Reorder Frequency is the number of days of inventory you want ordered (Helium 10 defaults this to 30 days).
You can always override your default settings on either the Product window or the Supplier window before it’s time to reorder.
3. Set your Local Warehouse Lead Time and Local Warehouse address, if you have one. Local Lead time will be used to calculate when you should transfer units from your local warehouse to an Amazon fulfillment center.
4. Next, click on the Suppliers window to begin adding the names and contact information of your manufacturers.
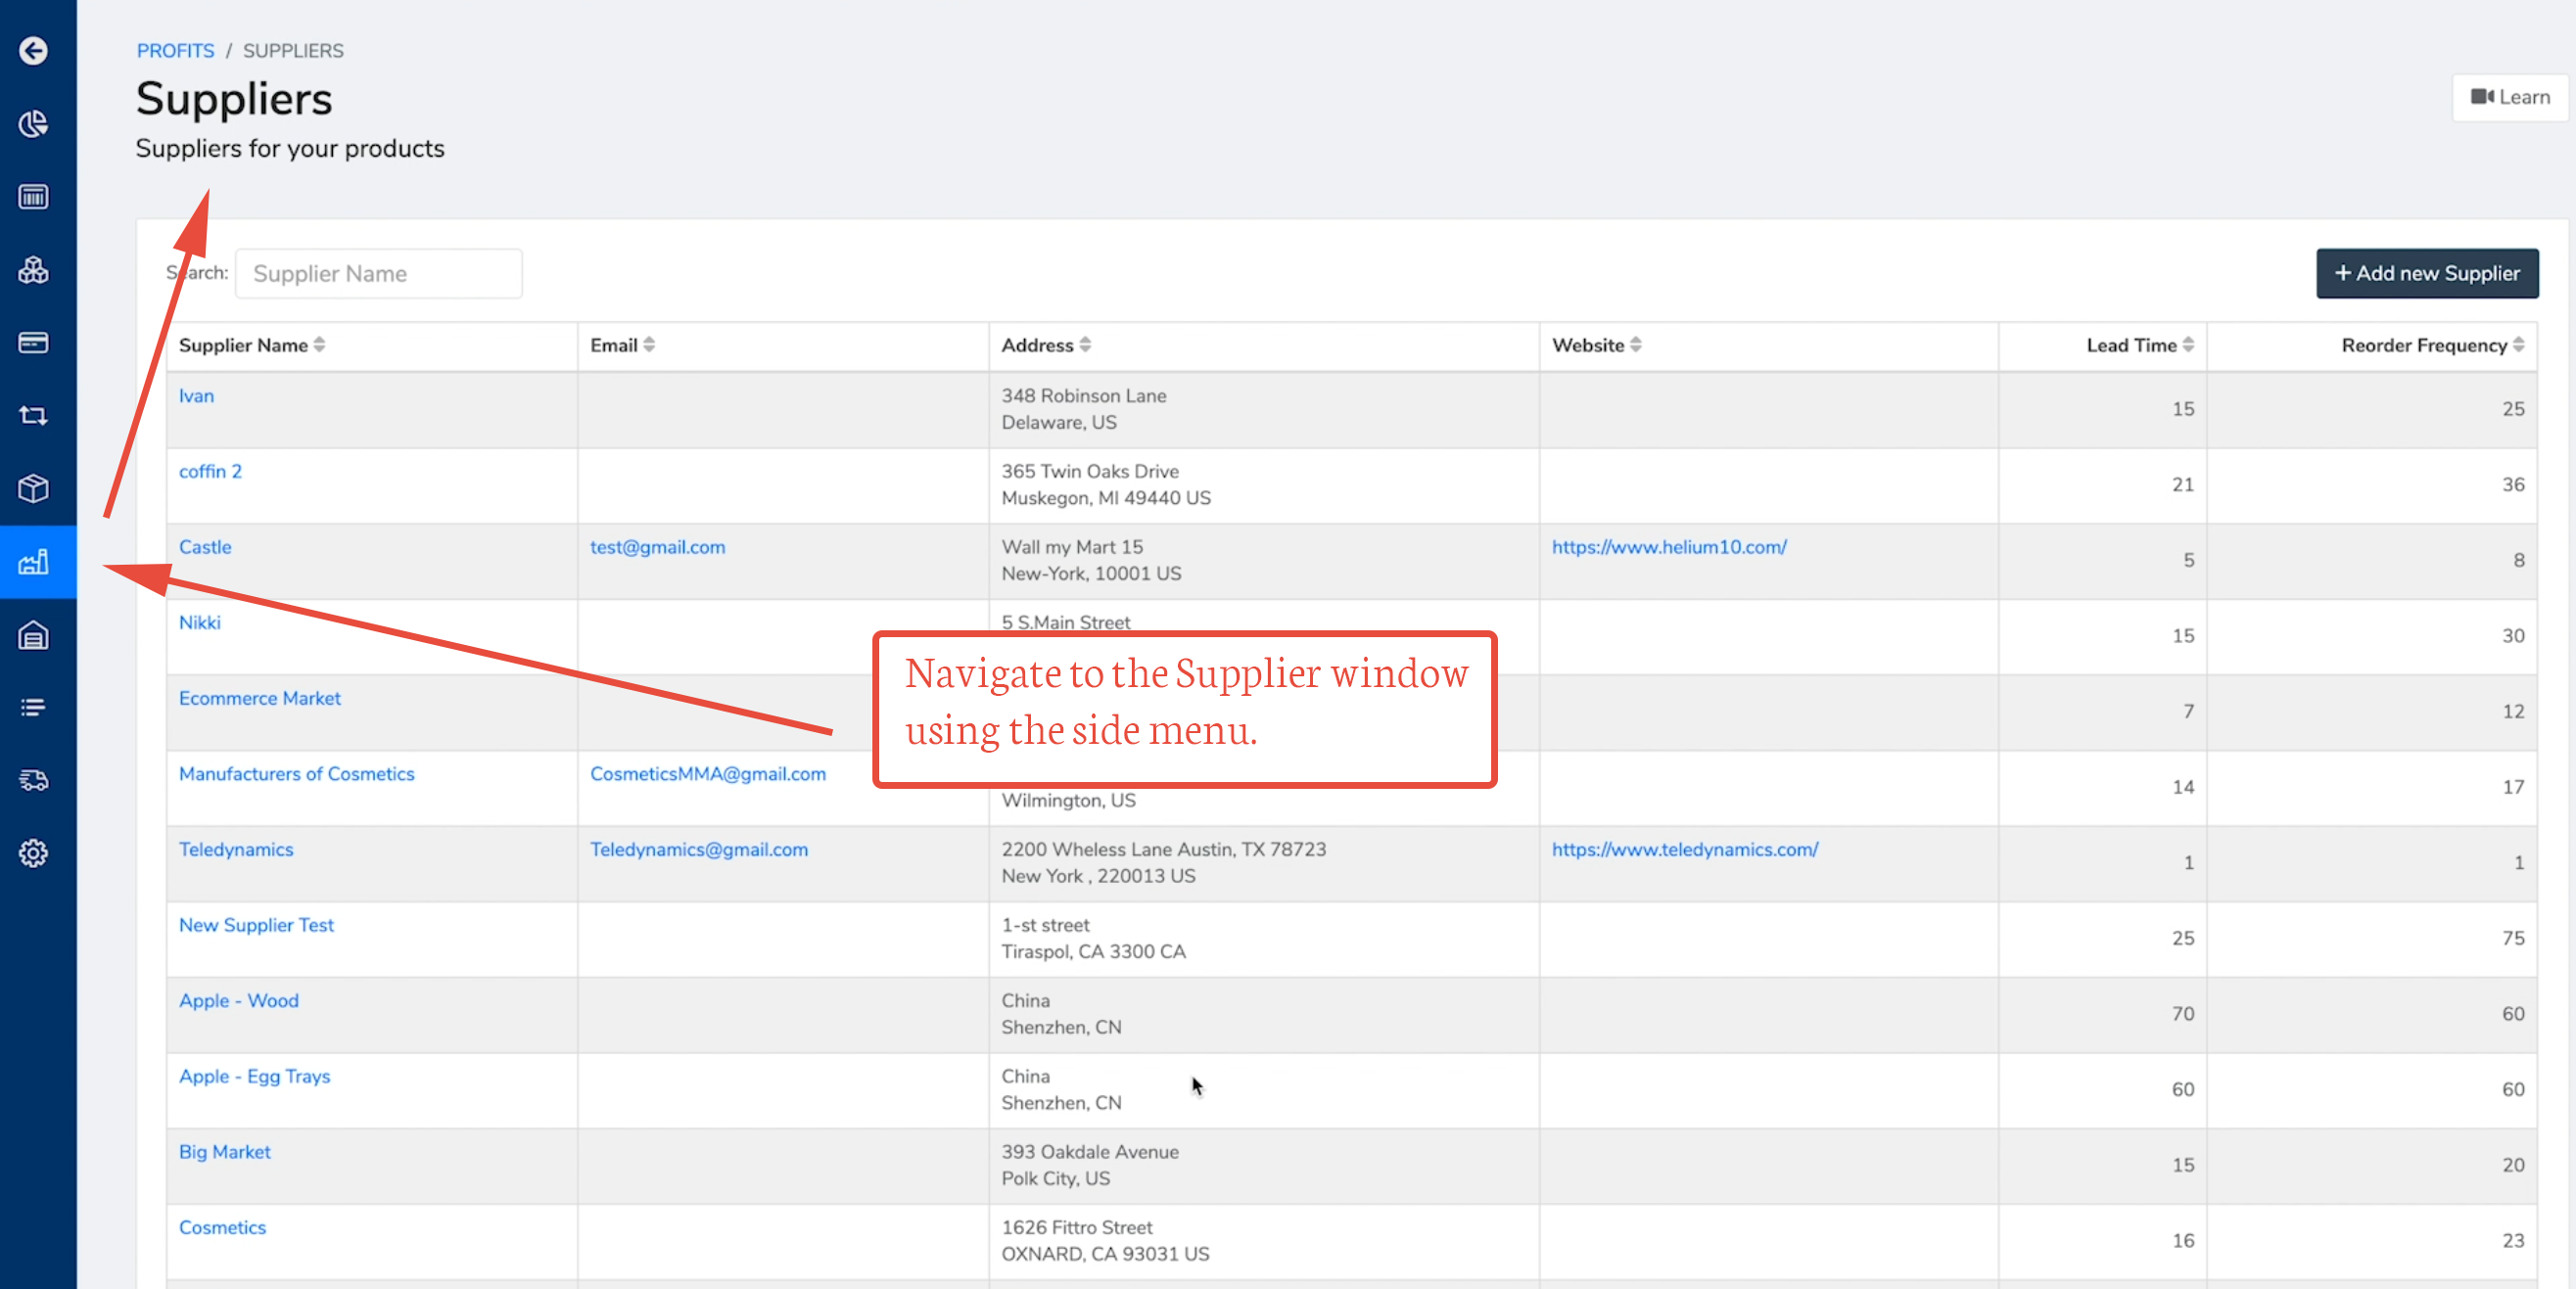
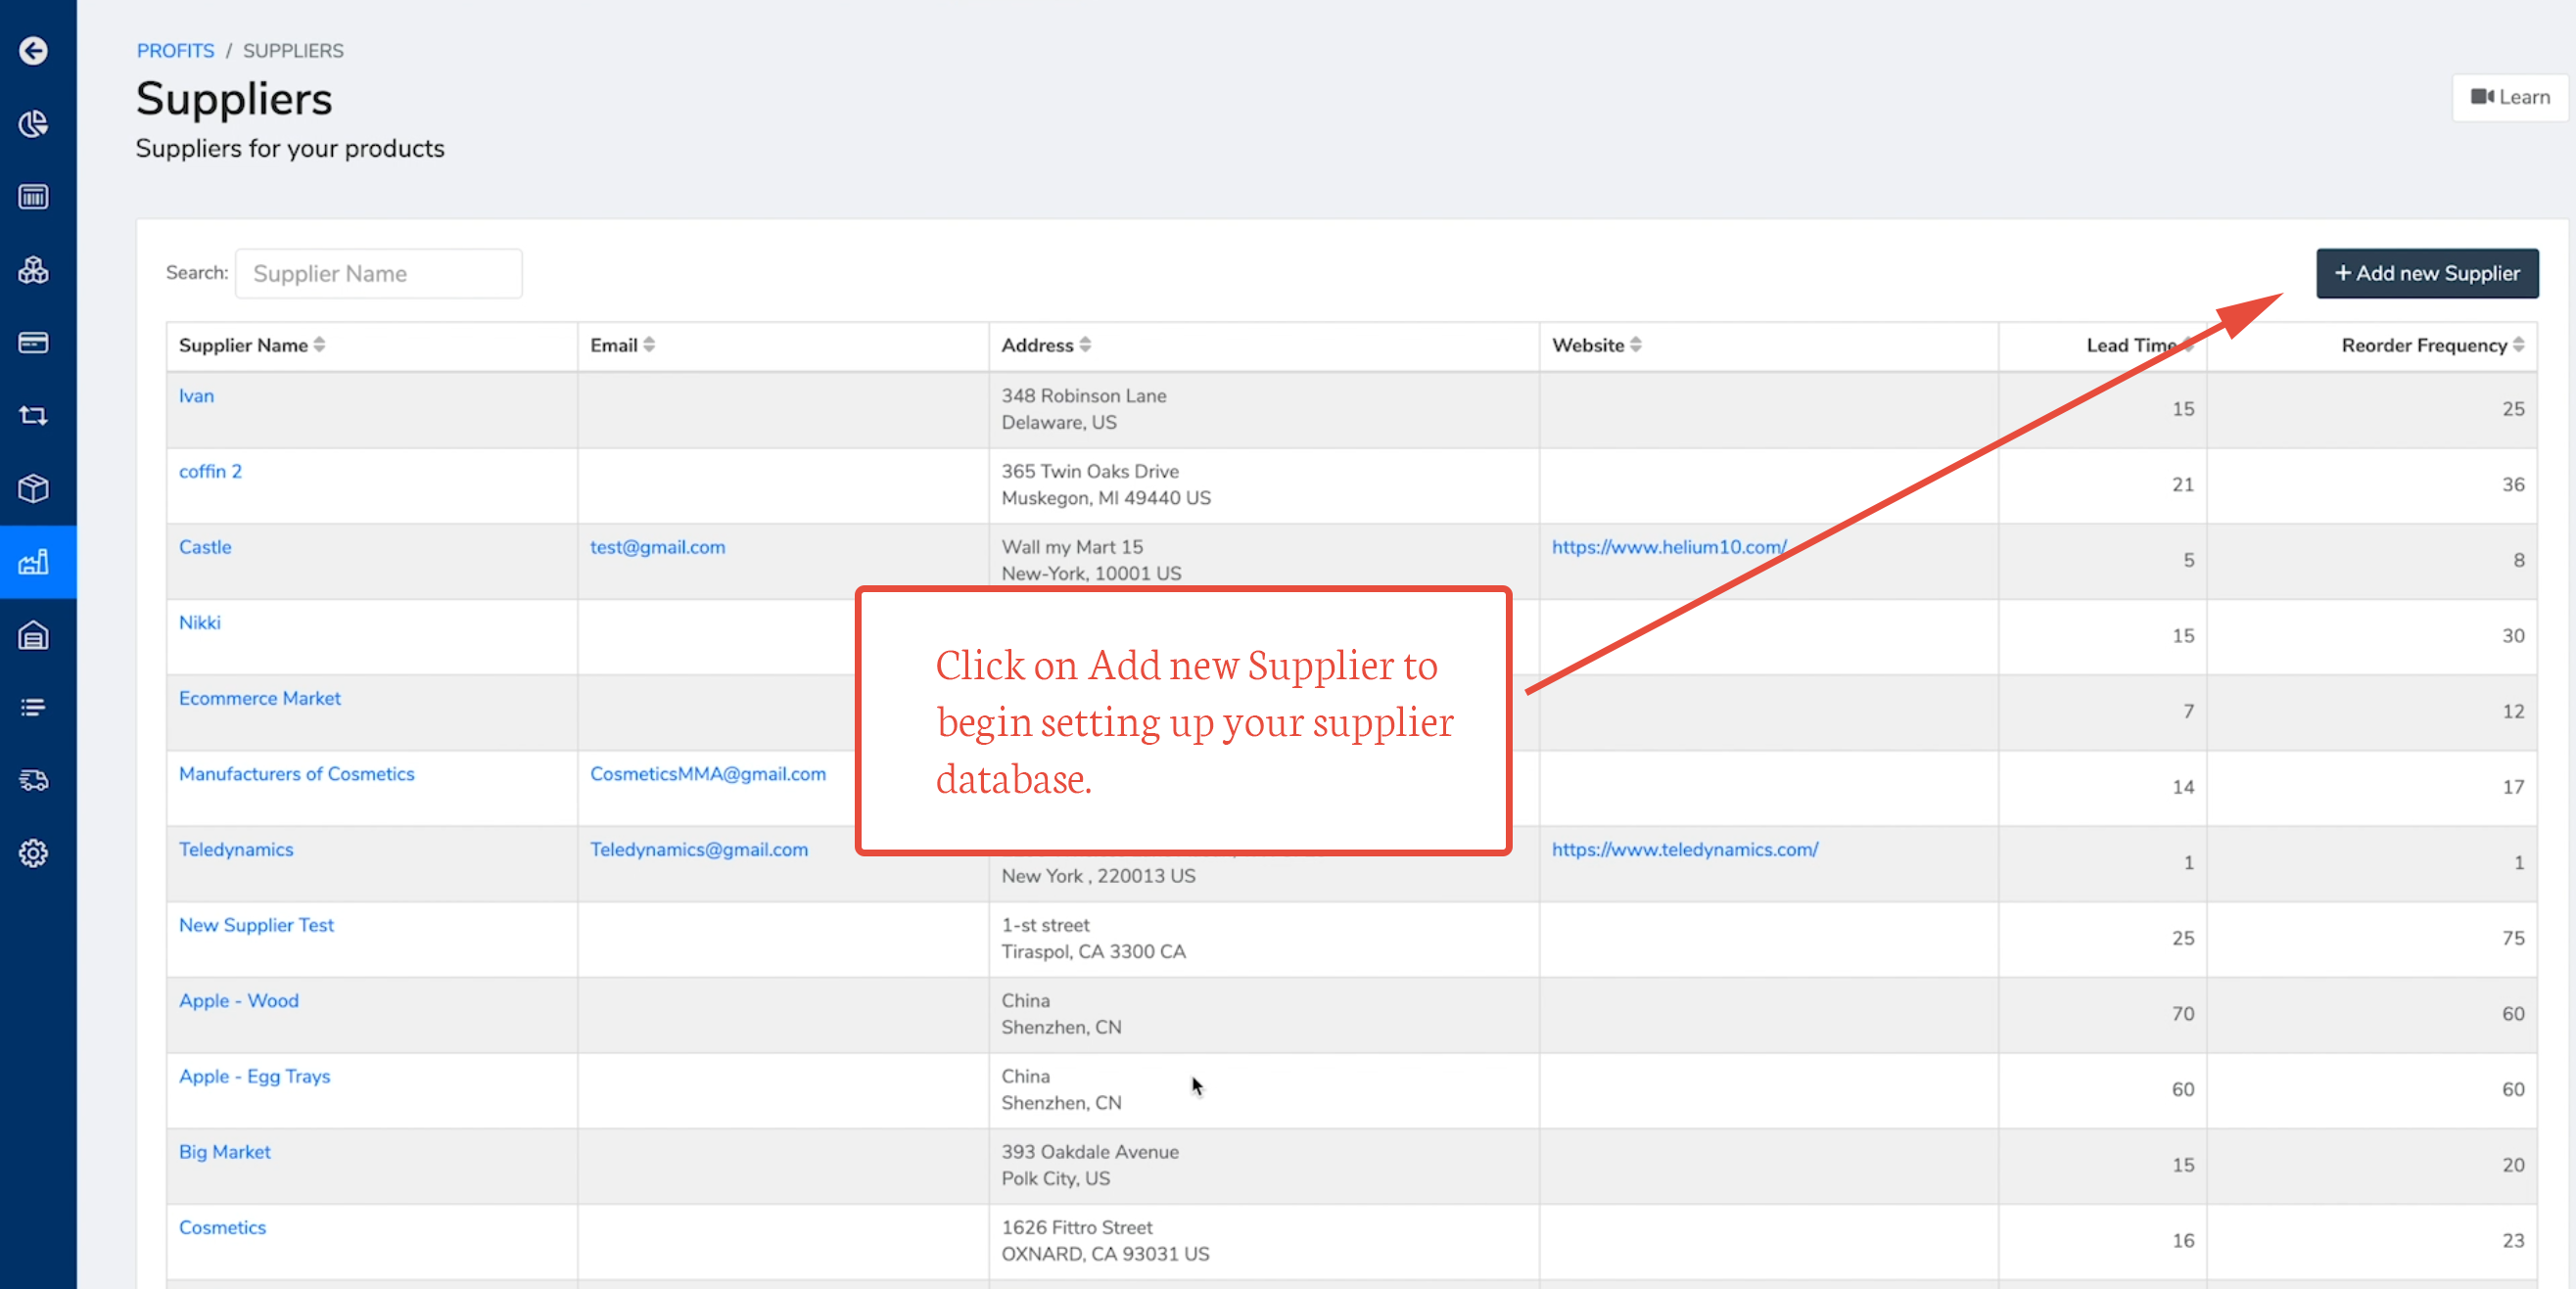
5. Click on the Add New Supplier button.
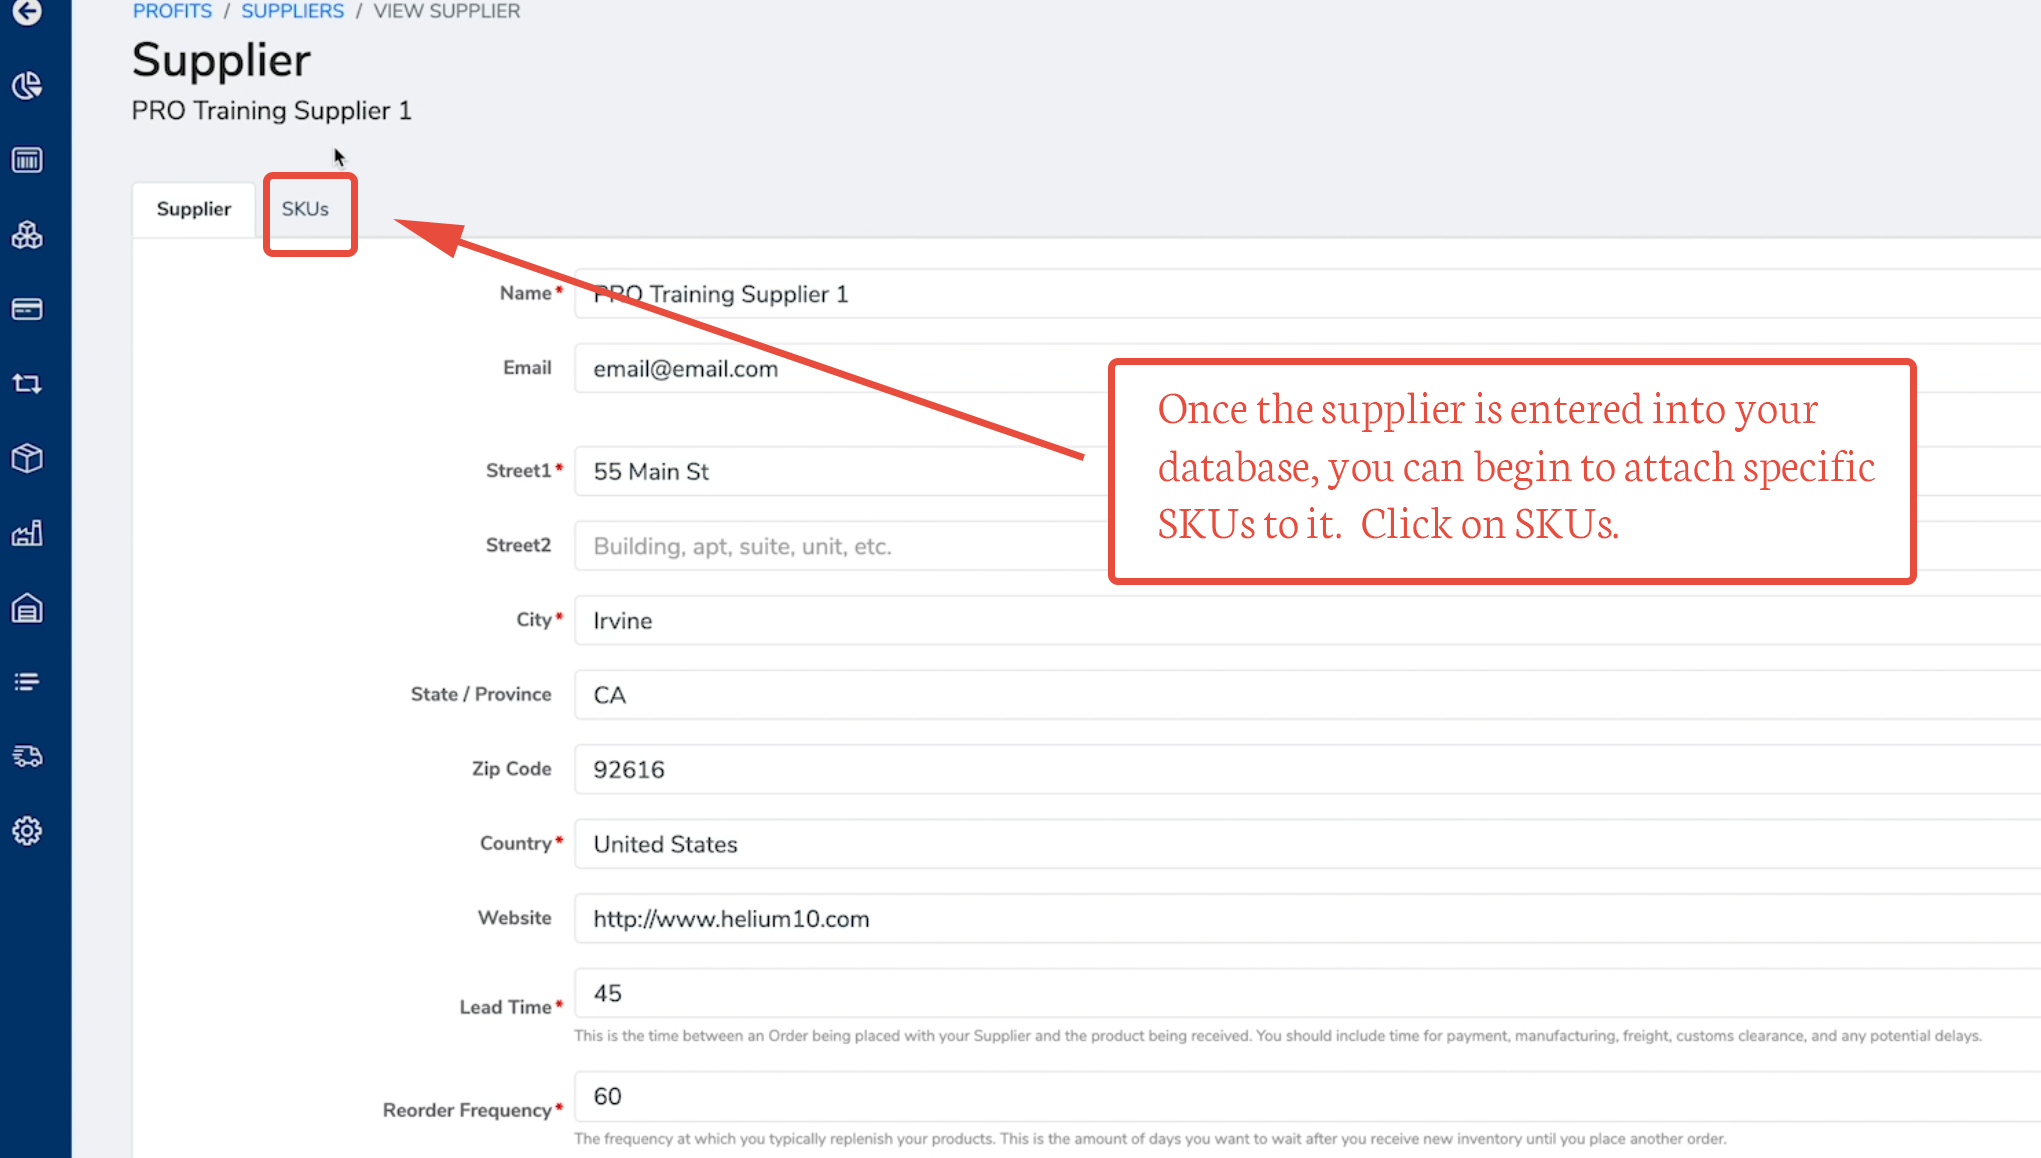
6. Complete all the information by typing it into the fields. All fields that have the red asterisk must be completed. If the lead time varies from your default (which you set up in the Settings window), you can change it here. Click the Save button.

7. Once you add a Supplier’s details, a second tab for SKUs appears. Click on the SKU tab for that supplier.
8. Now you can begin attaching your individual products by their SKU to specific suppliers. Click on the Assign SKU button.

9. Search for the SKU you want to connect to the supplier using the Search for SKU field.

10. Select the correct SKU and product that you want to assign to the supplier.


11. Click the Assign SKU button.

12. Once you have all your Suppliers and product SKUs entered, you’ll want to confirm your Local Warehouse information, if you keep stock in a location other than Amazon warehouses.
Navigate to the Local Warehouse window, using the side menu.
If you have not yet set up your Local Warehouse address, or ever need to change it, you can click on the Change link next to the Local Warehouse Address listed in the top right corner. In the pop-up window, enter the address information for your local warehouse. Click the Save button.

13. To set or change your Store Lead Time and Reorder Frequency by product, you can open the Product Performance window by clicking on a SKU from anywhere inside Inventory Manager, including the Products or Restock Suggestions page.
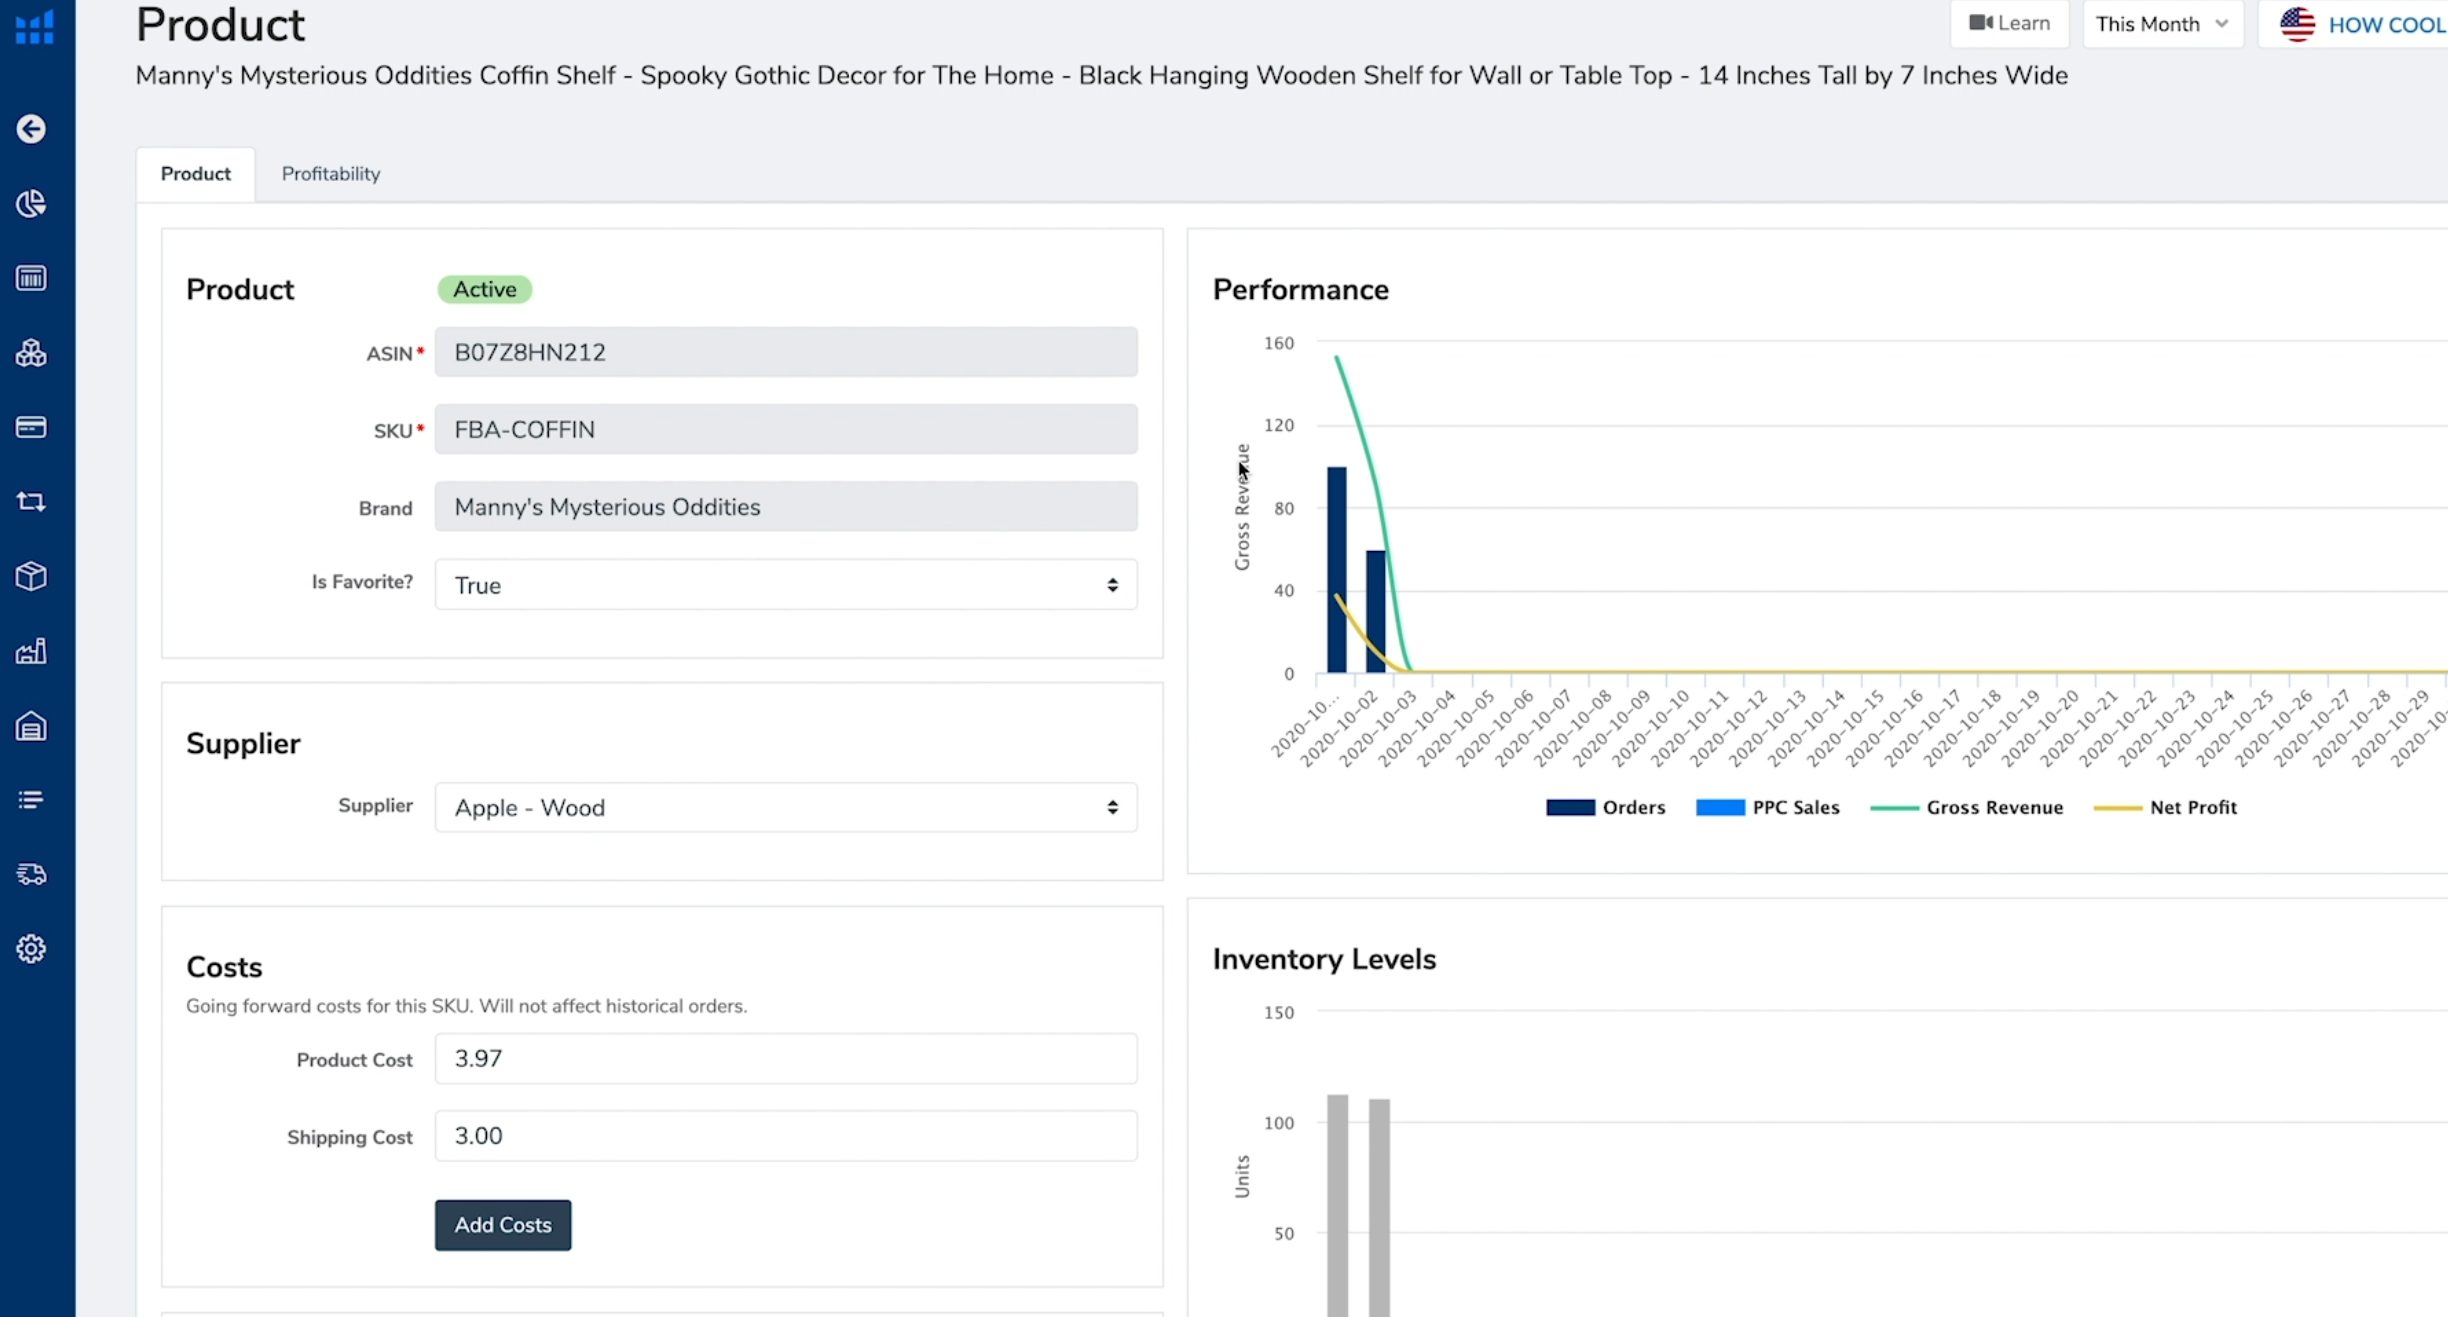
14. Under each product name, you can see the product ASIN, which links to the product’s Amazon page, and you can see the SKU, which links to the product page.

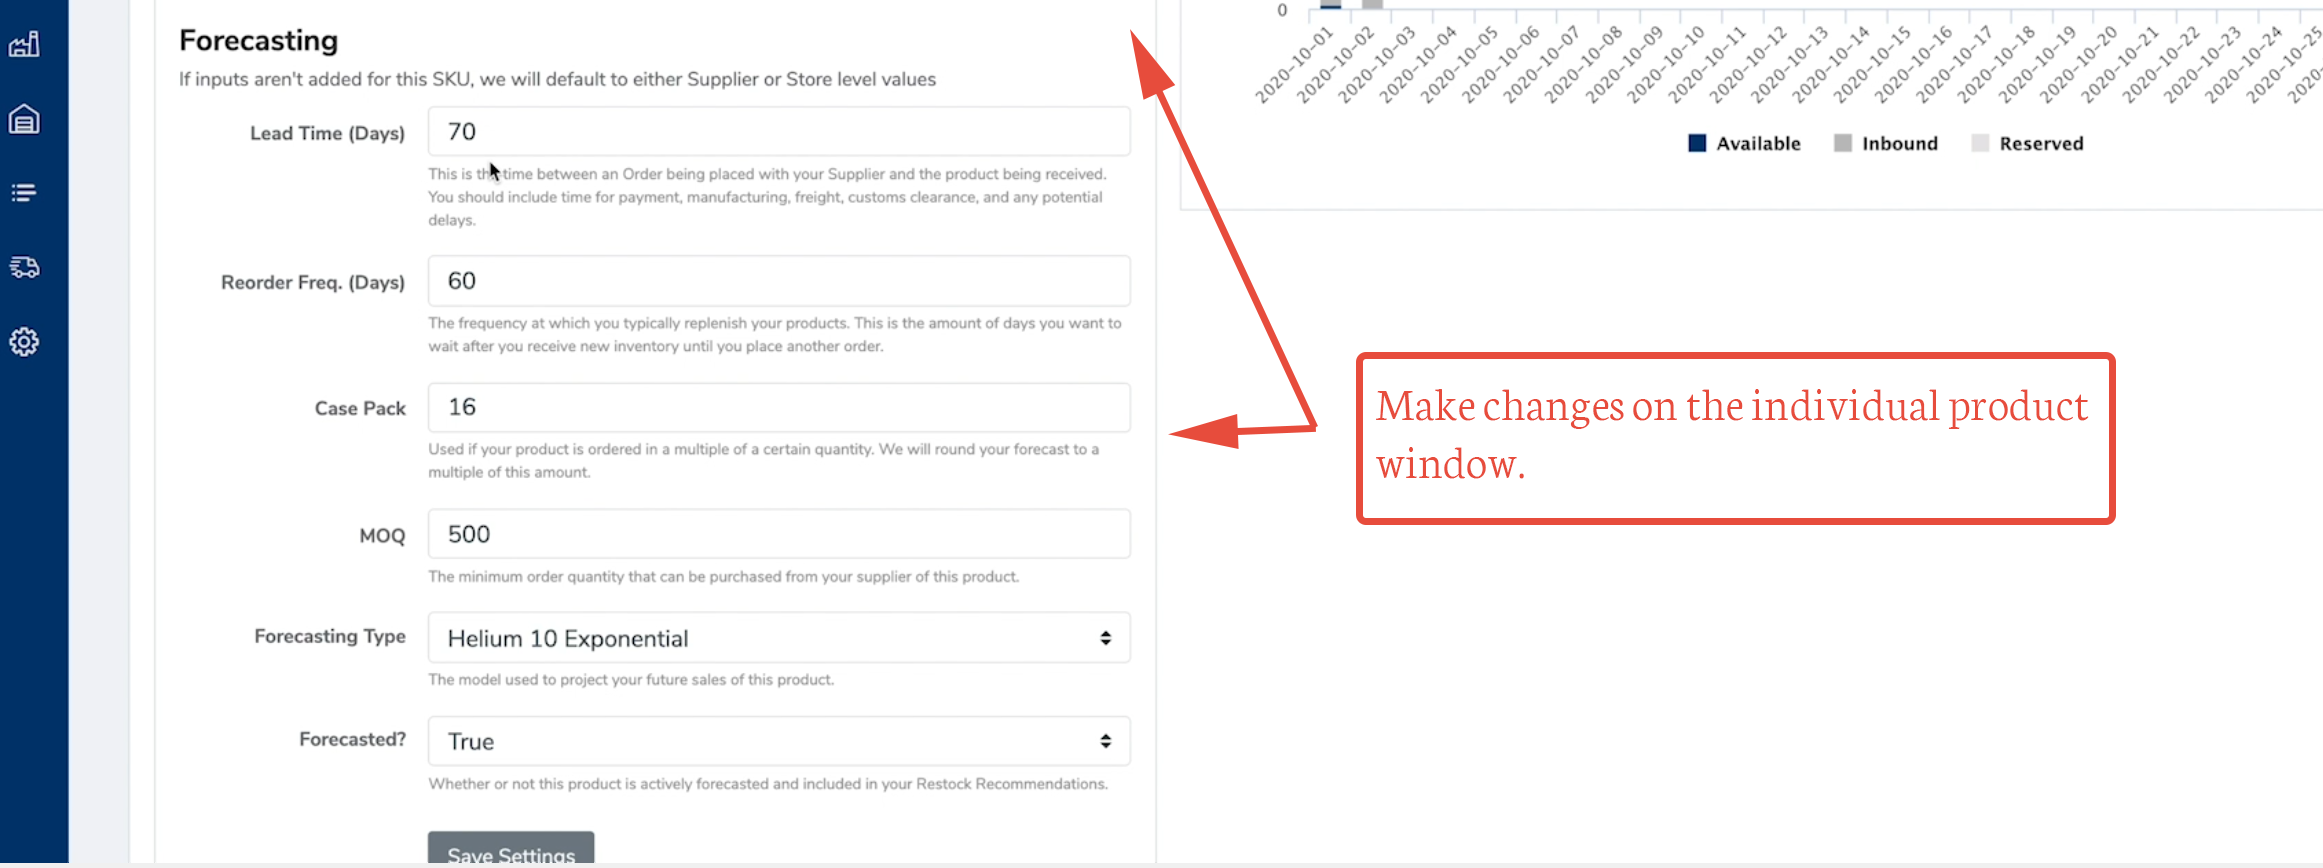
15. Click on the SKU to open the individual product window. Here you can change the supplier, the costs, and the forecasting information like Lead Time, Reorder Frequency, and Case Pack (required number of units per order from the manufacturer) and Minimum Order Quantity (MOQ).
Comments
Article is closed for comments.