
Welcome to Portals. What are the benefits of using Portals?
- Portals imports your Amazon listings directly, helping you create a landing page quickly and efficiently.
- Portals lets you activate a landing page for the duration of your ad campaign, then stores it for later reuse.
- Portals allows you to incorporate two-step urls to Amazon or other platforms.
- Portals helps you collect customer emails for subsequent campaigns.
- Portals tracks clicks, and lets you create deeper FB integration for your ads.
- Portals allows you redirect customers to multiple platforms where your product is sold.
- Portals lets you build short, medium, or long form landing pages, depending on the volume of information you want customers to see about your product.
- Portals helps you build your brand.
After reviewing the benefits gained in using Portals, let's find out just how easy it is to integrate Portals into your business.
Navigating the Dashboard
1. Sign into your Helium 10 account and, from the dashboard, click on the Portals link. The first time you open Portals, the data fields will be empty. Unlike some Helium 10 tools, you do not need to have an Amazon MWS Token to use Portals.
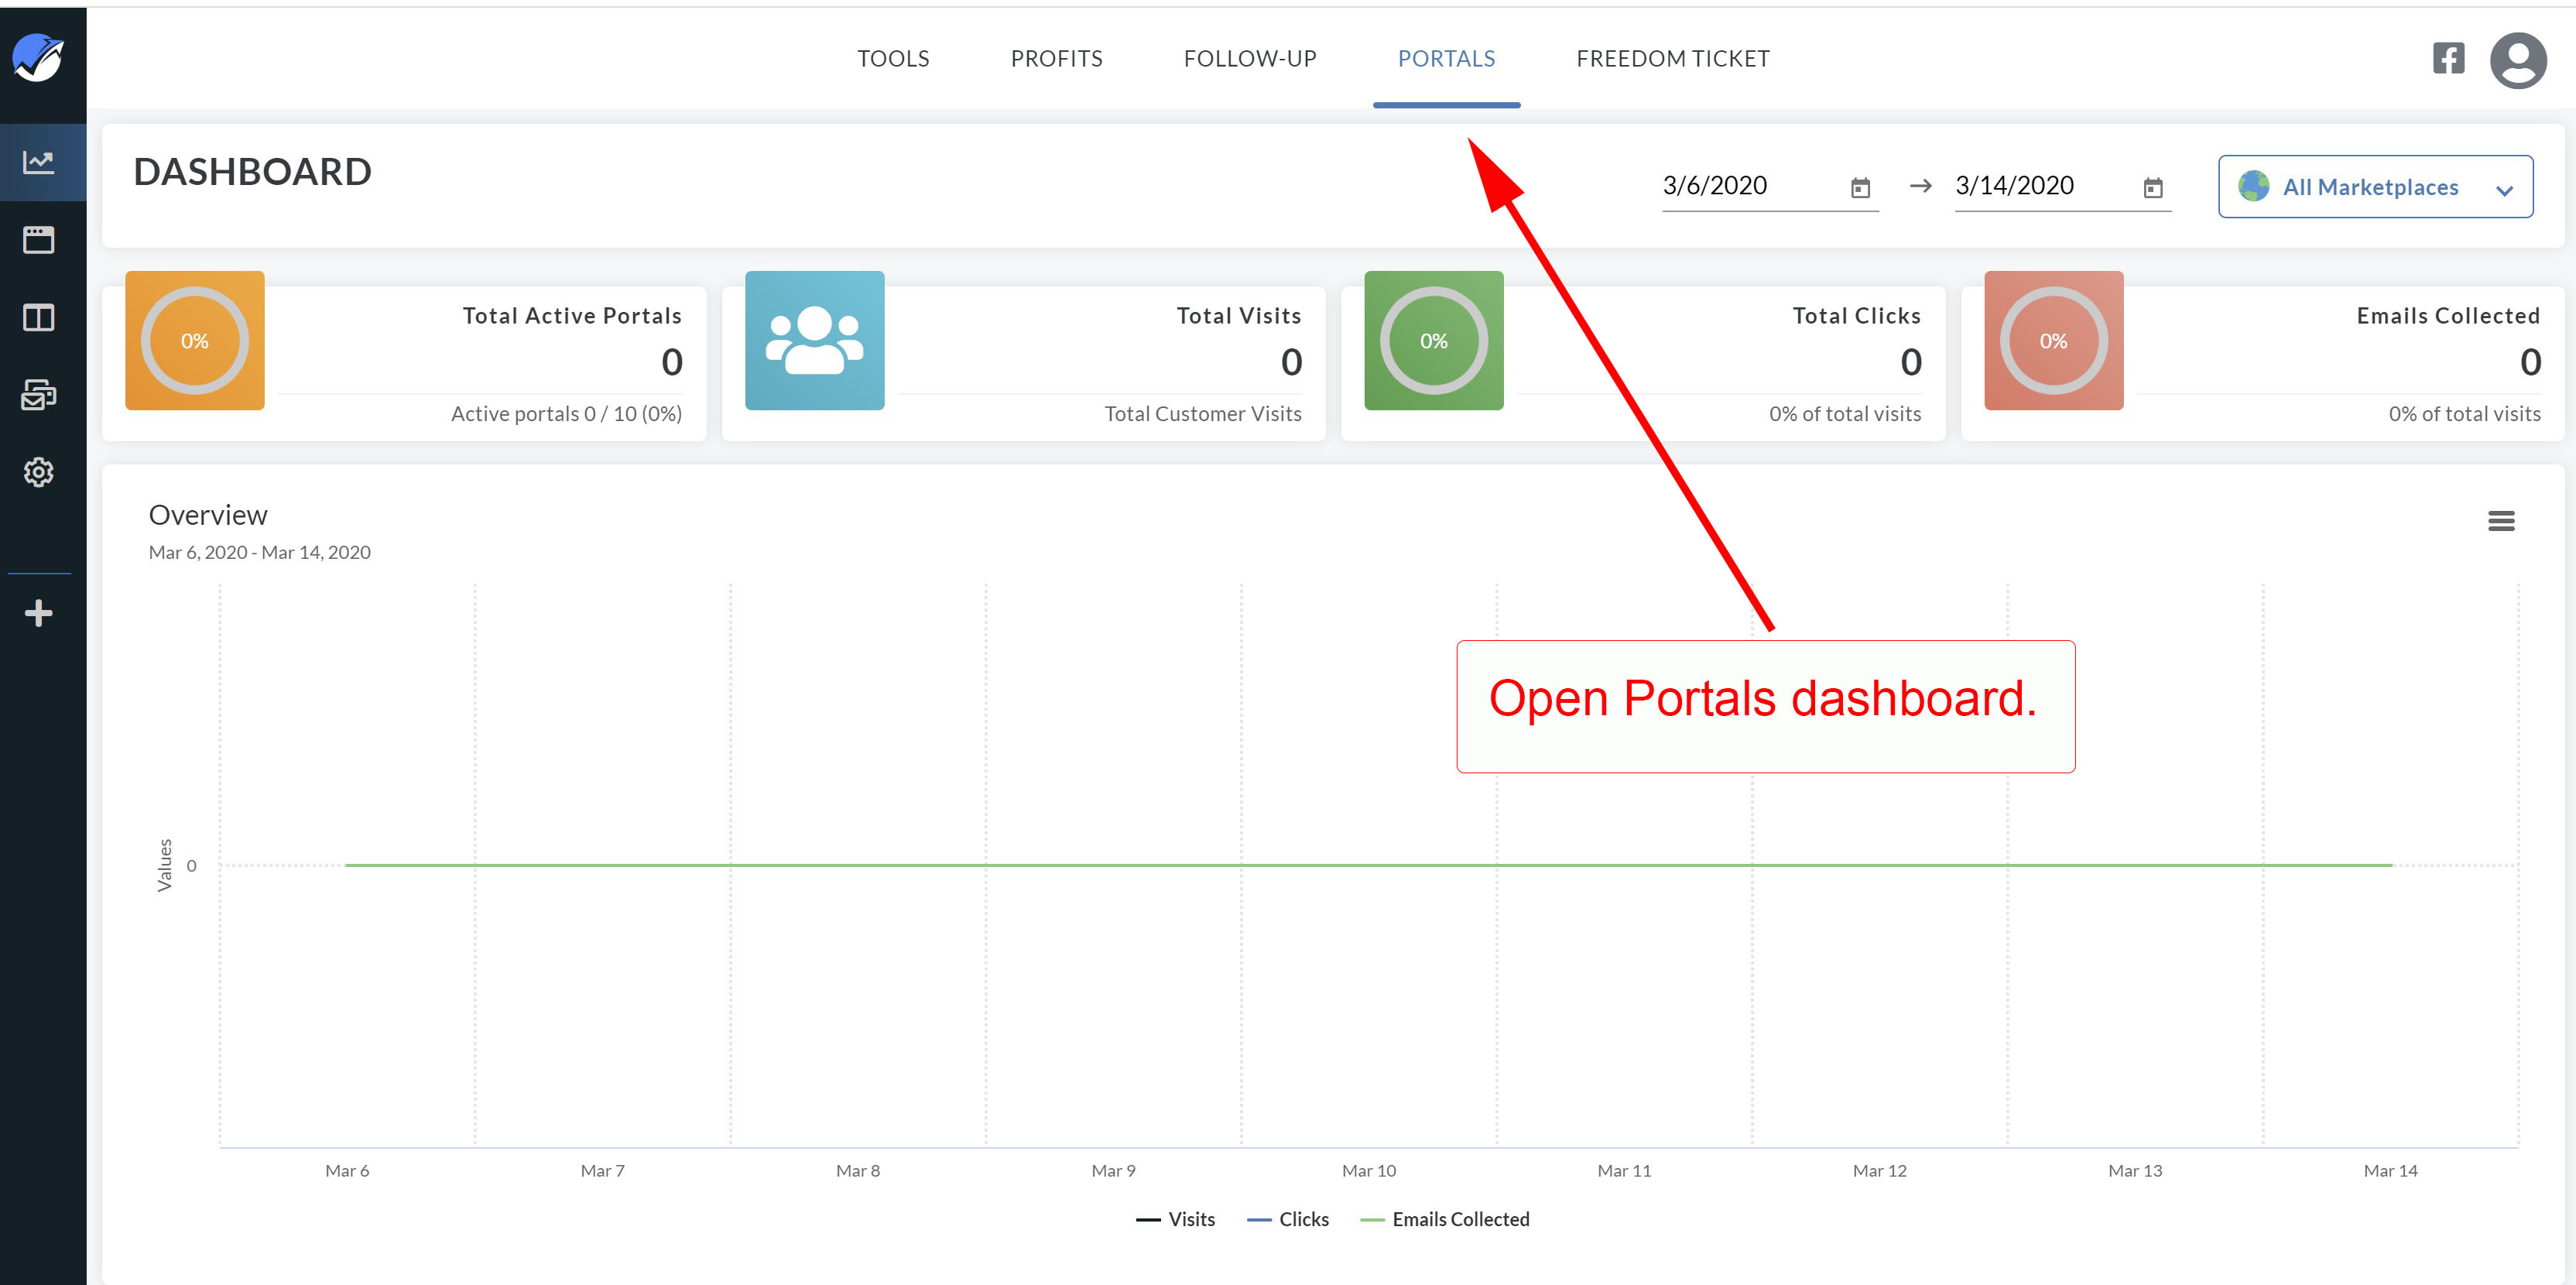
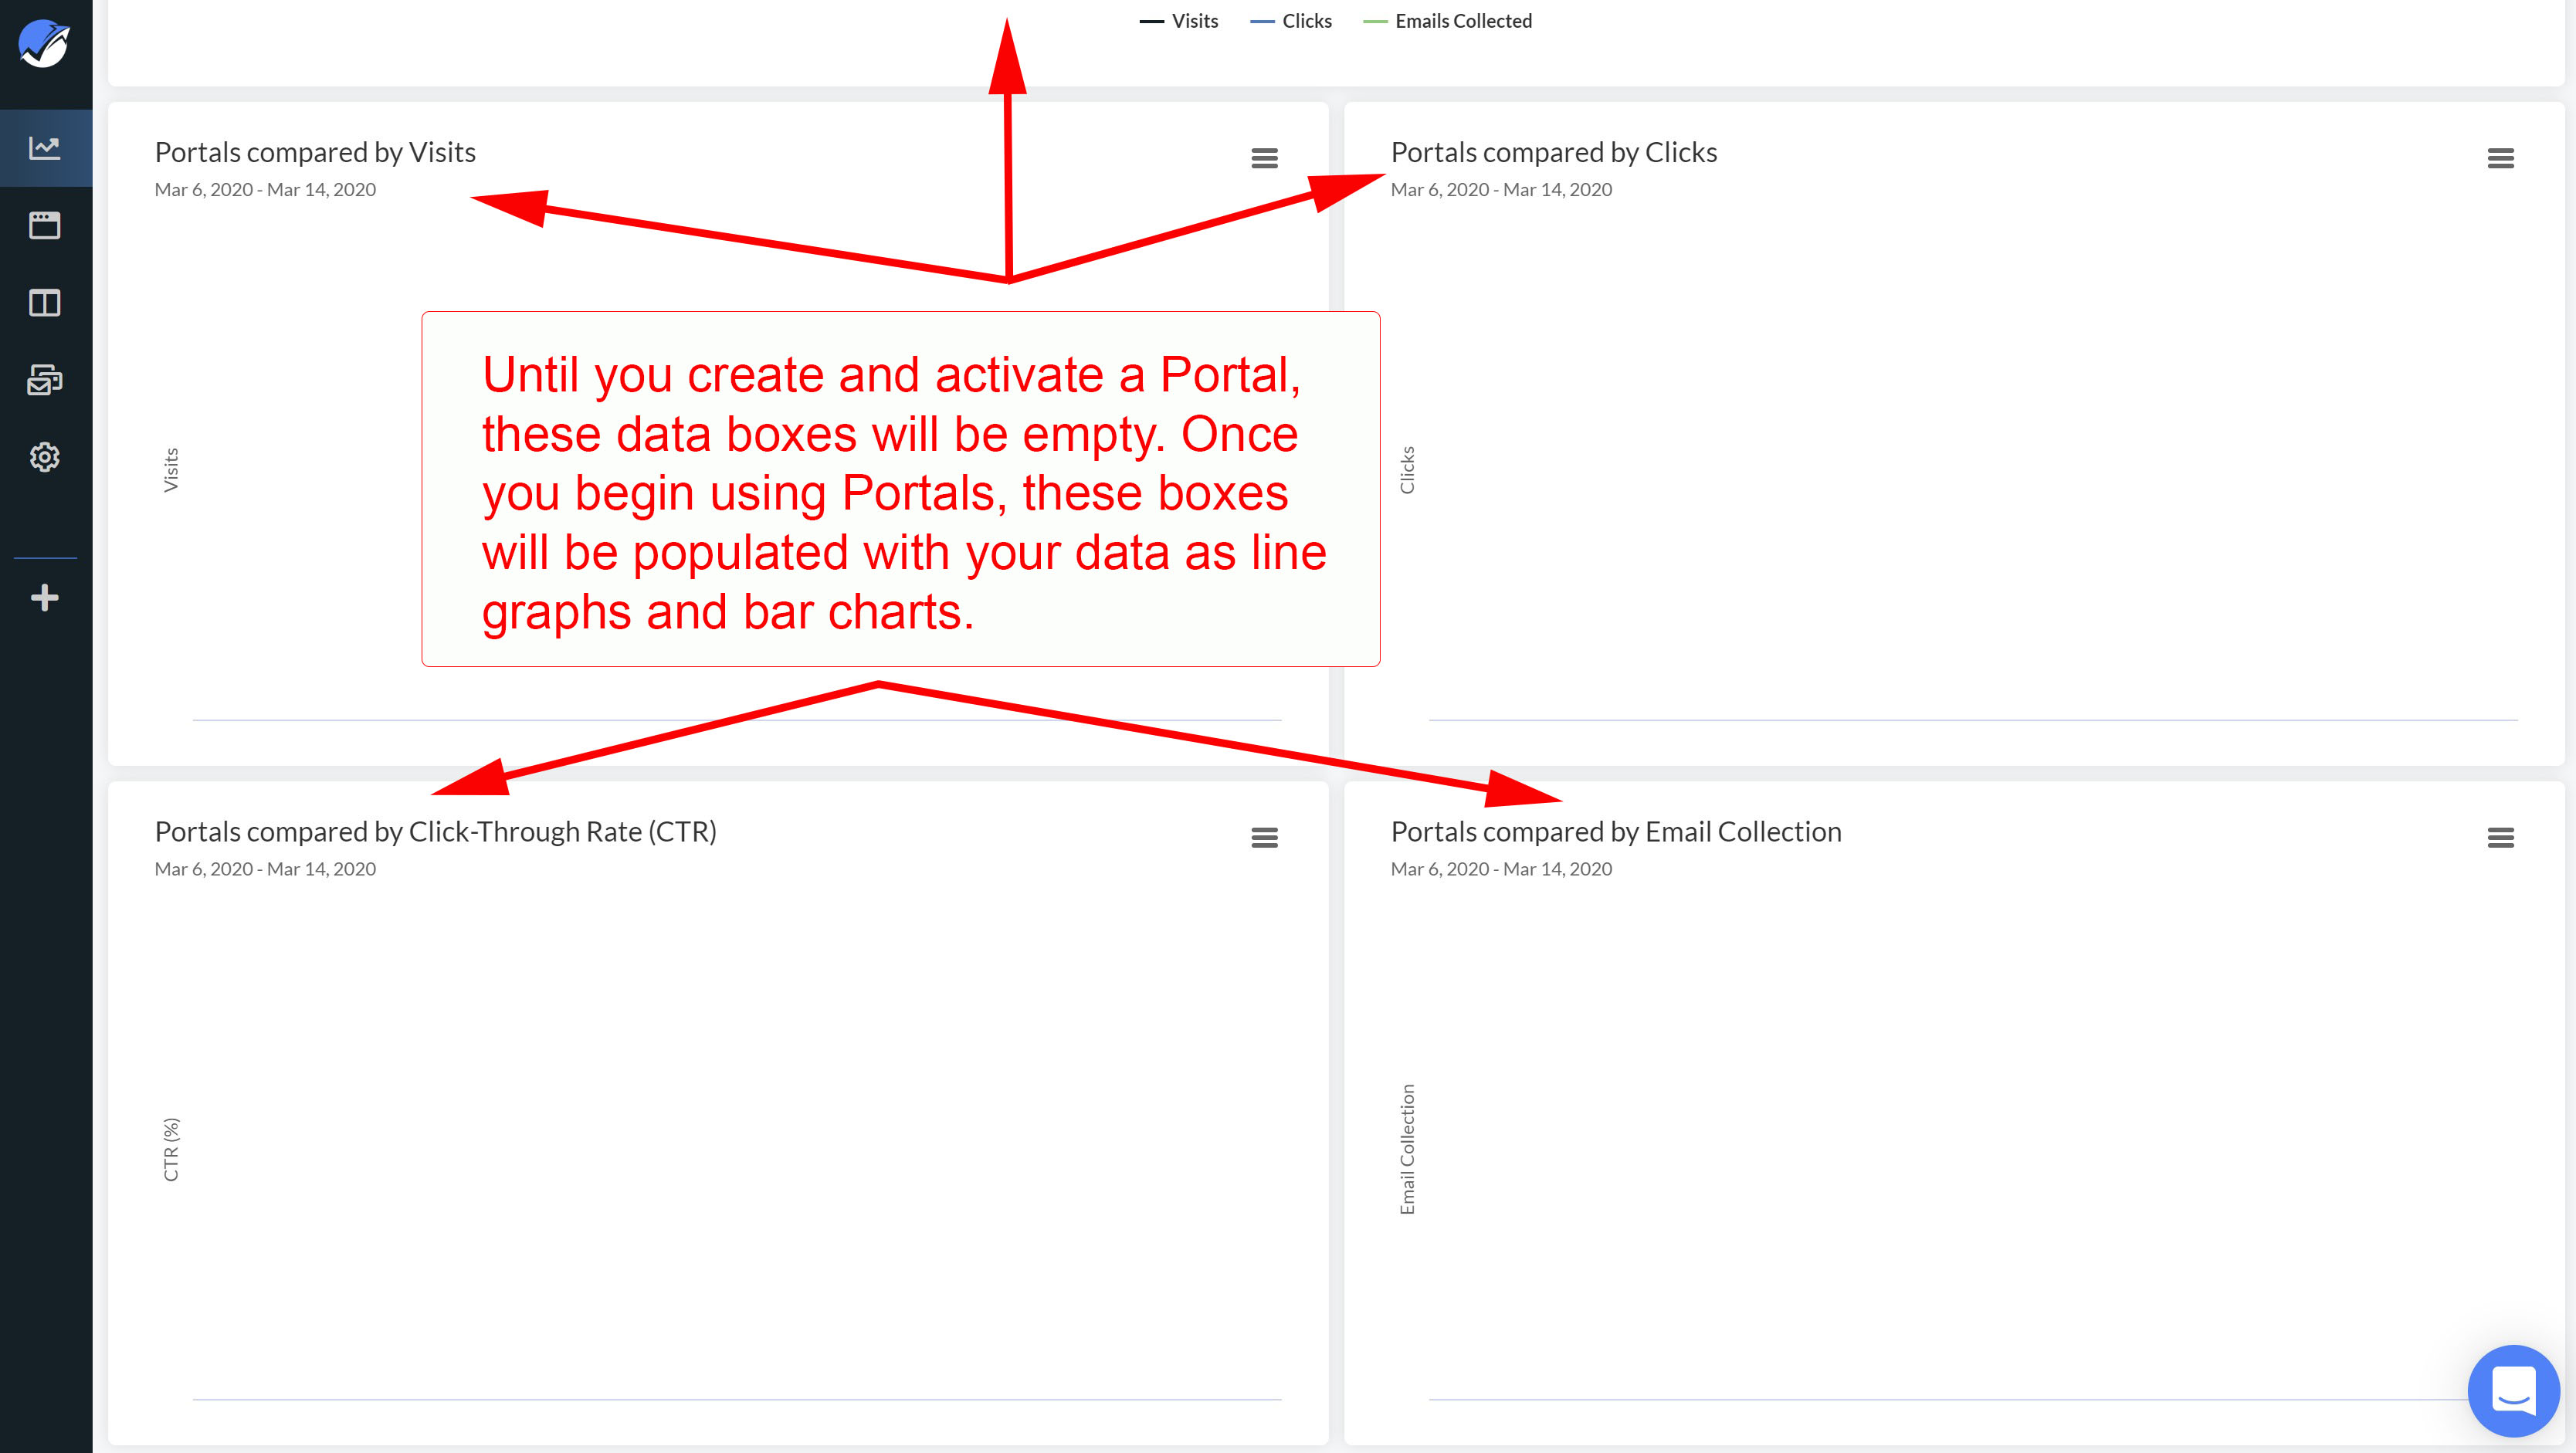
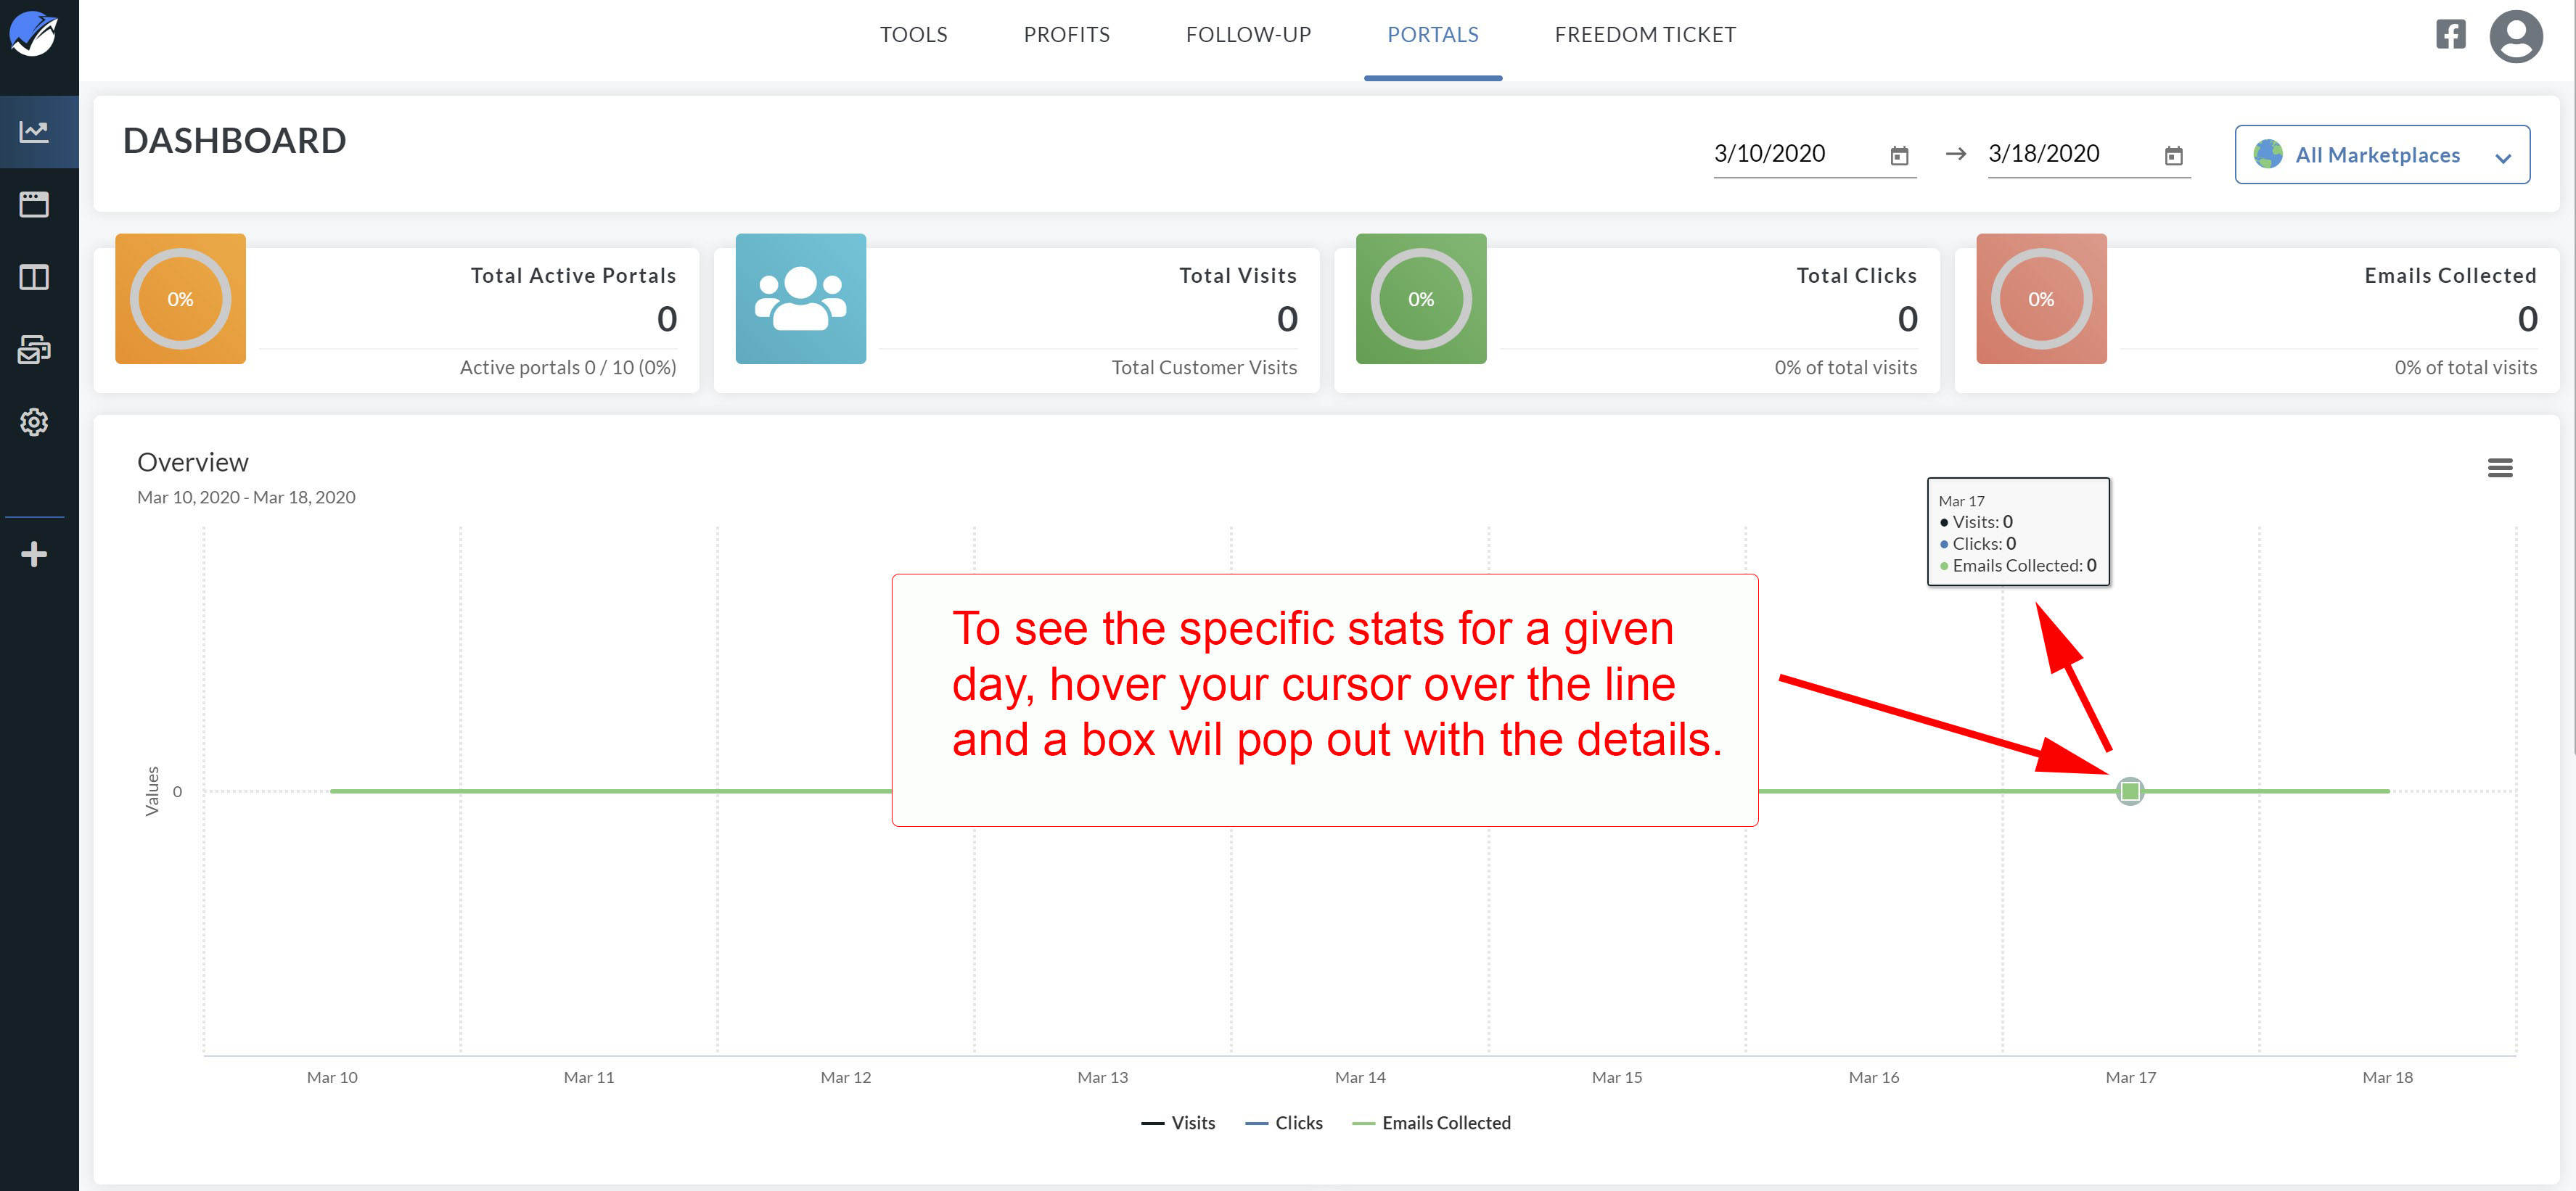
2. Let's review the dashboard shown above. This opening screen is where you can quickly check the results of a Portal activation. Once you set up a Portals landing page, activate it and use it in a campaign, the data for the total number of visits, total number of clicks, and the total number of emails collected will populate the screen.
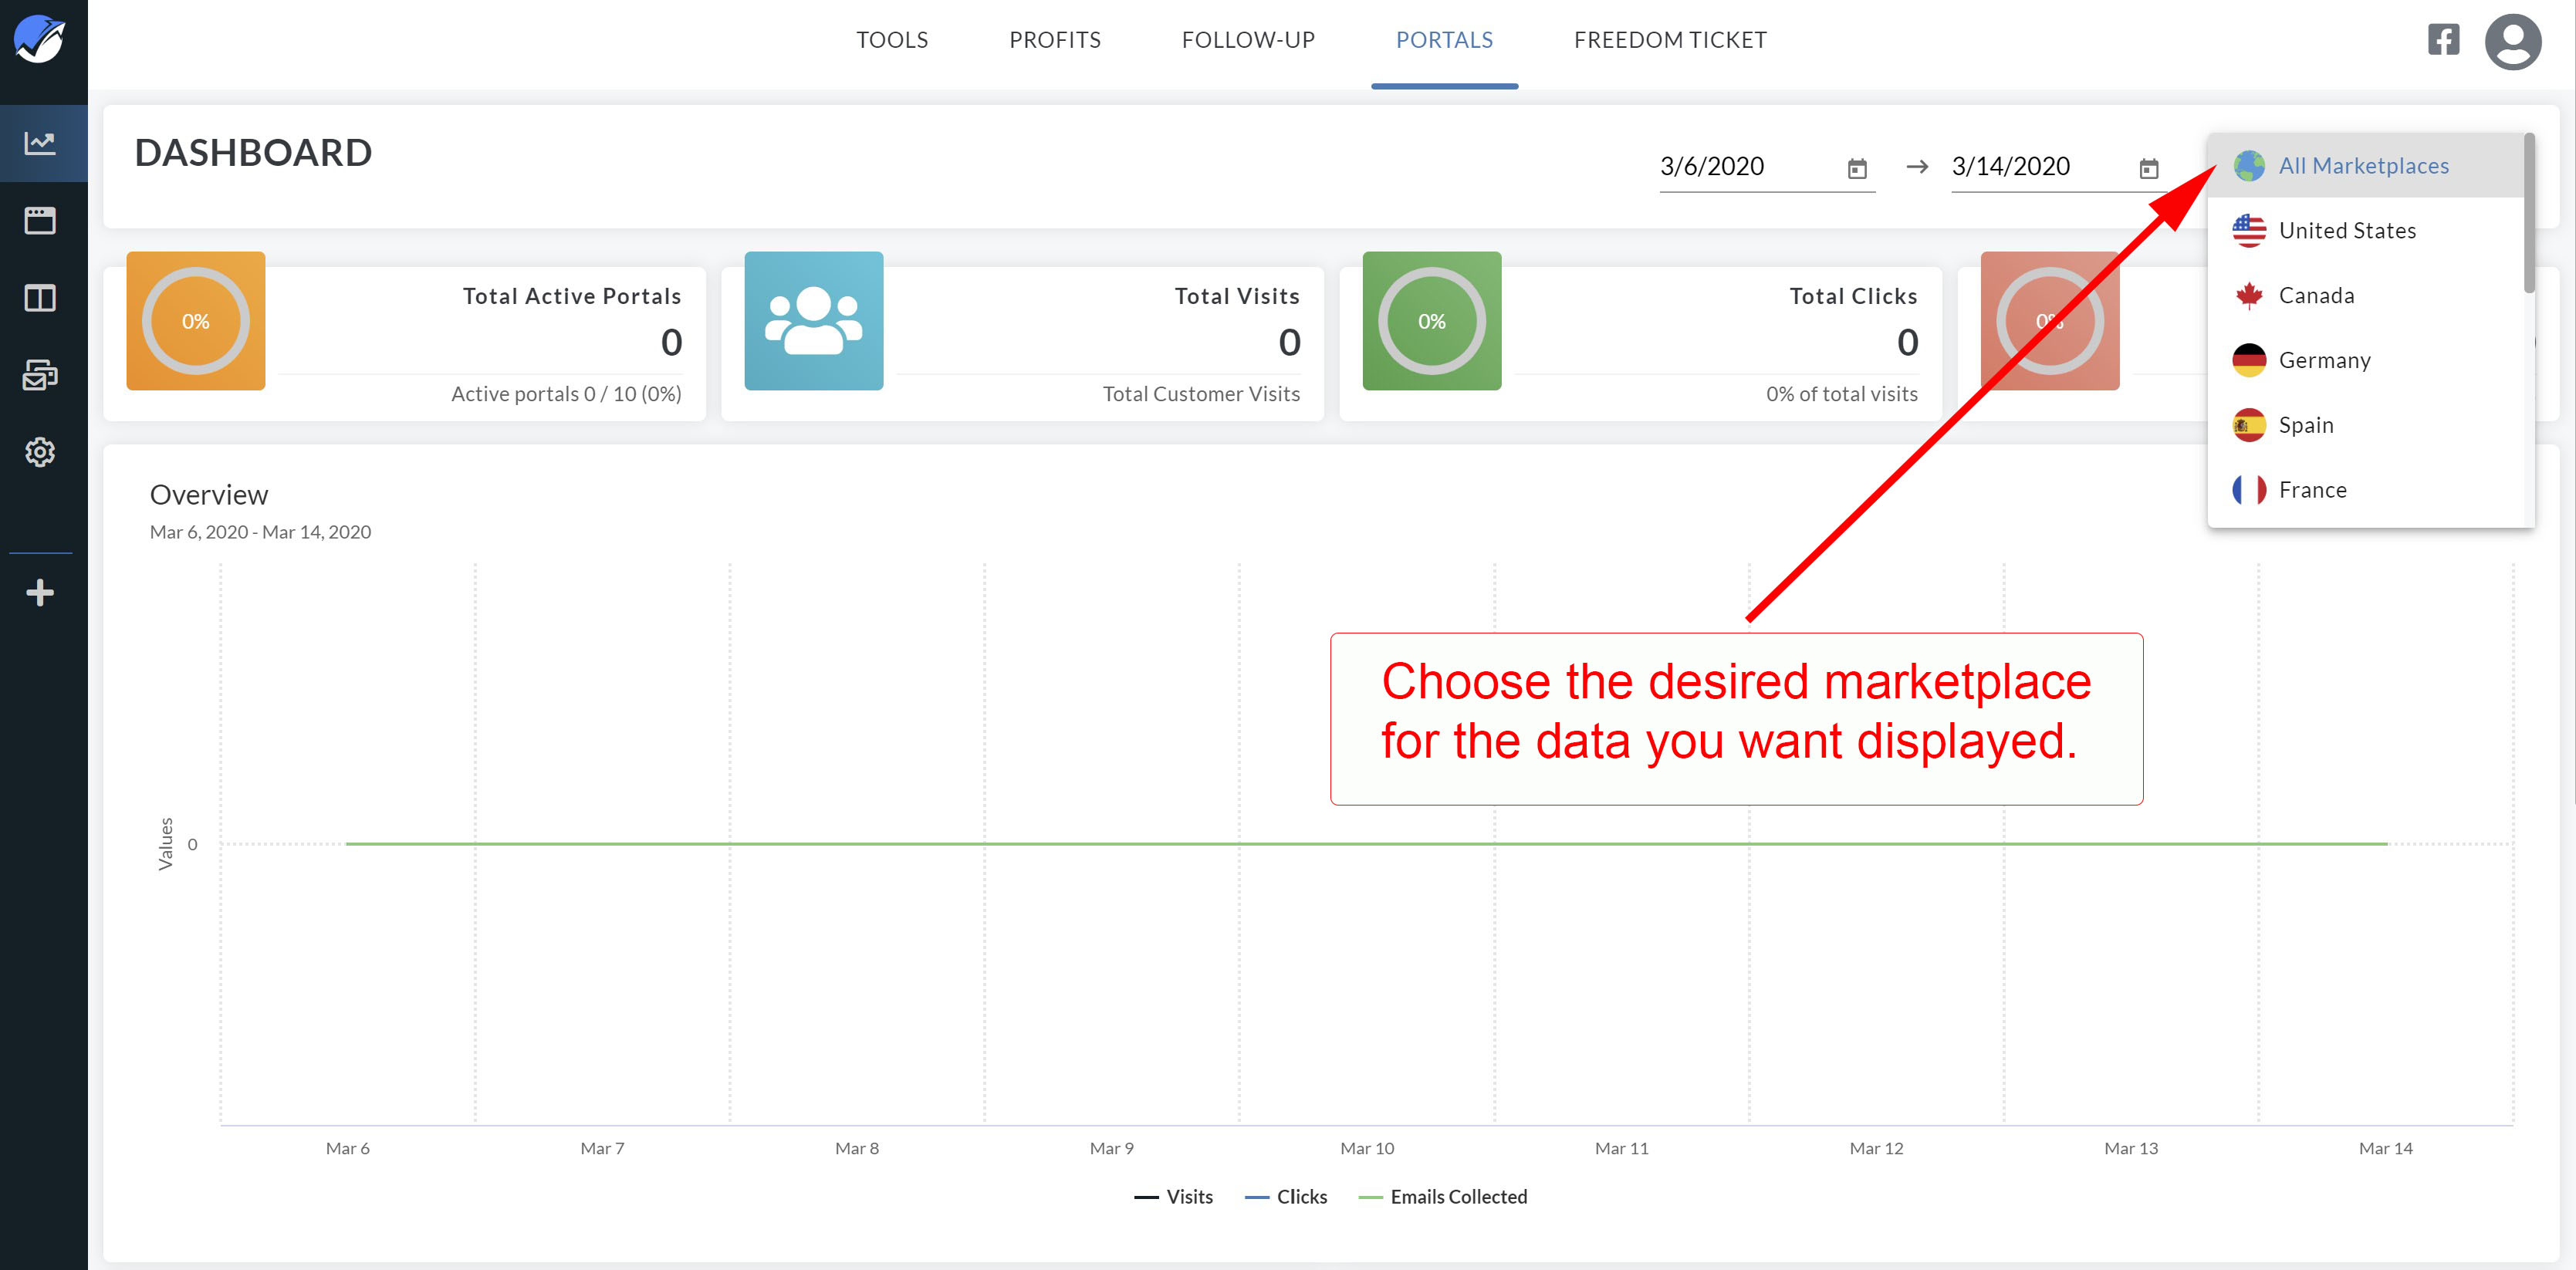
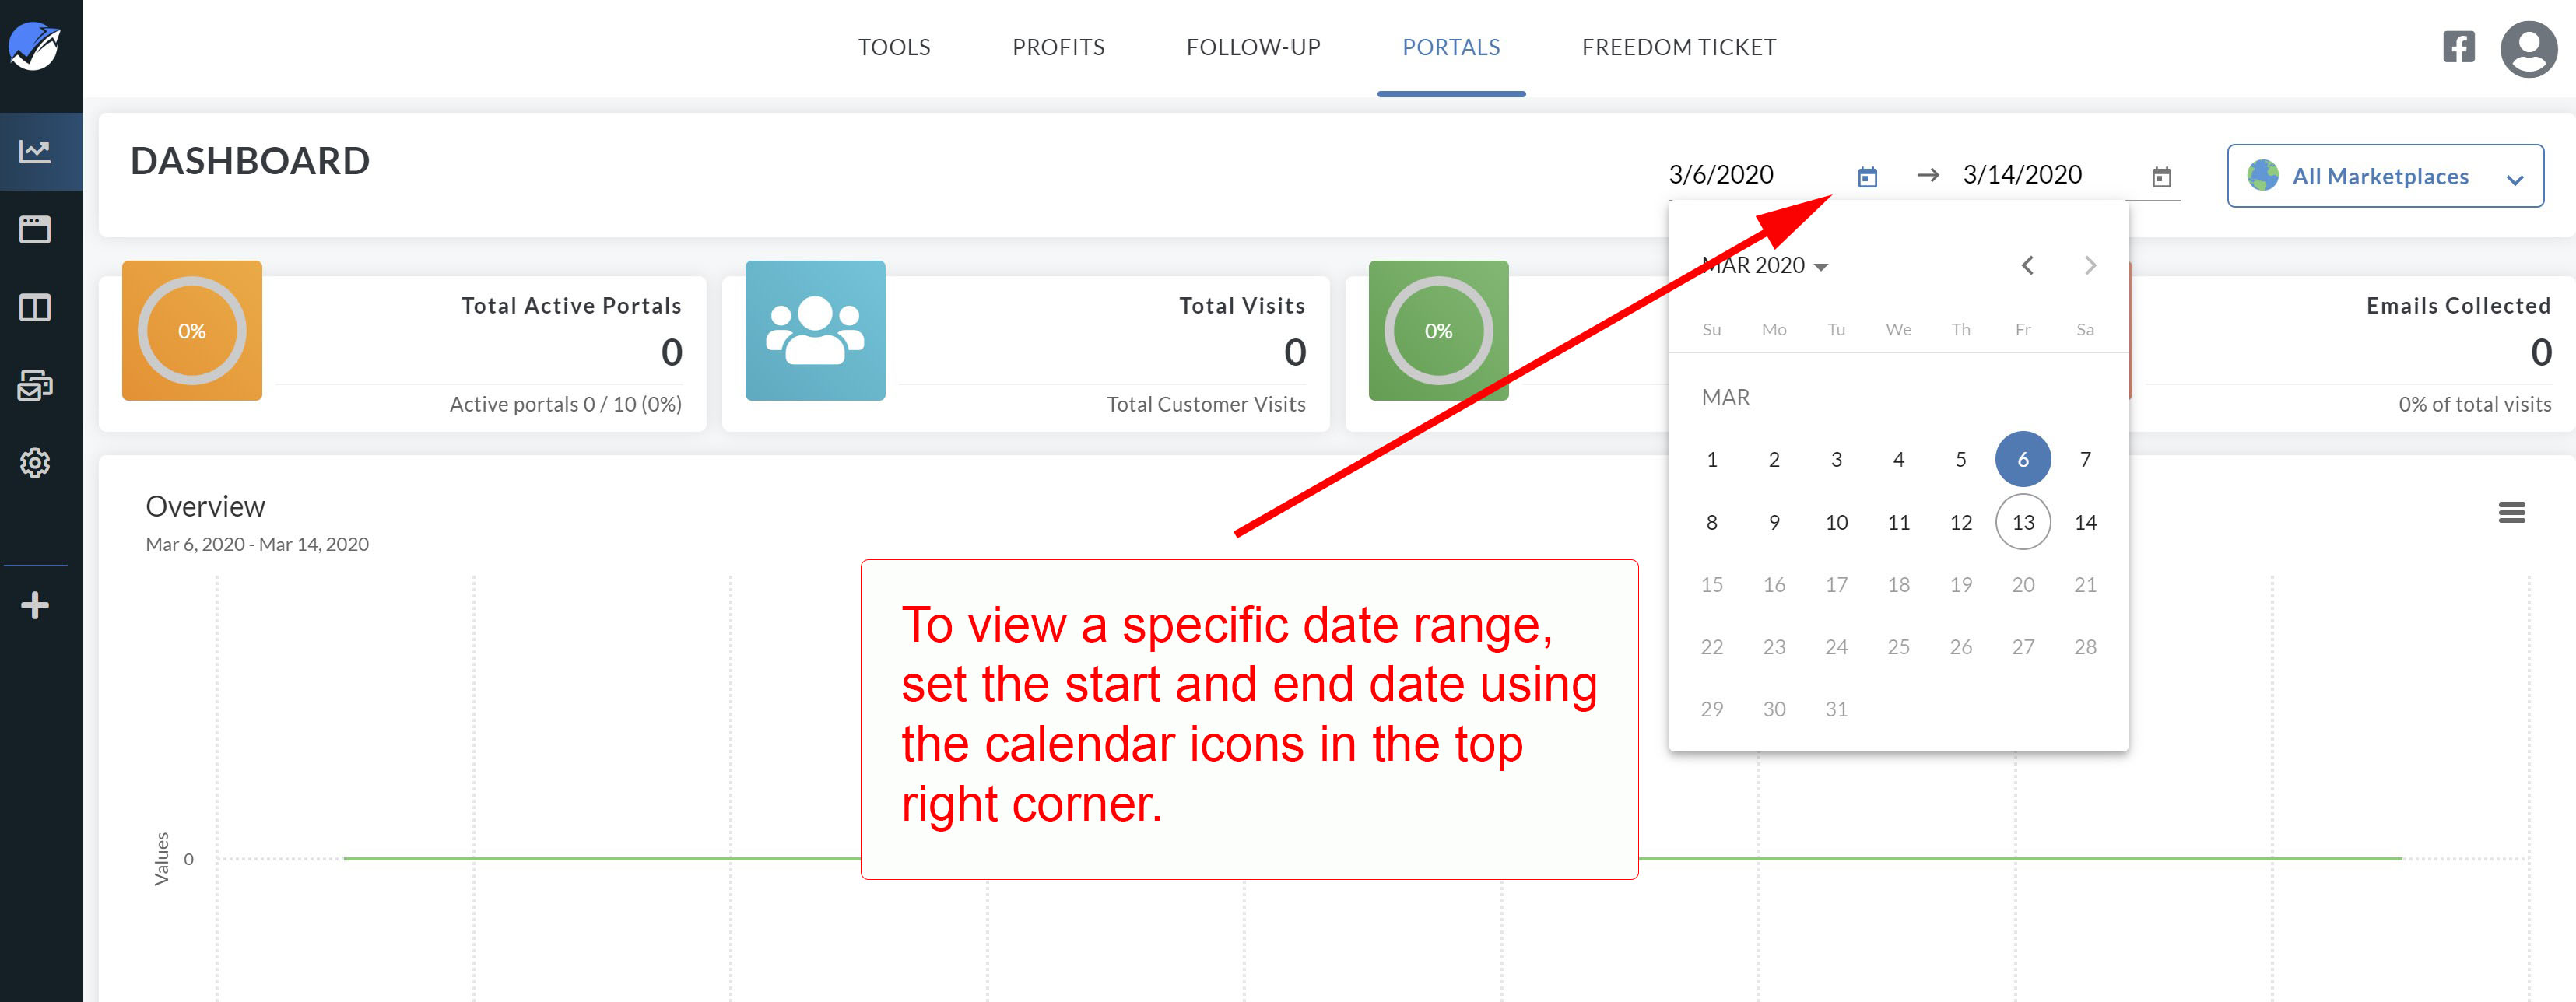
You can choose to view current or past activated portals for different markets by selecting the date range and the marketplace in the upper right side of the window. Choose the marketplace for the product you are promoting by clicking on the drop-down menu, labeled Marketplaces, and selecting the desired country. Choose the date range by opening the calendar icons for start and finish, and clicking on the desired dates.
 3. As you scroll down the dashboard, you'll see a section with a line graph. Portals plots the data from the selected date range and marketplace into this line graph. You can see the numbers for an individual day by placing your cursor on the bar graph. A small window will display the data.
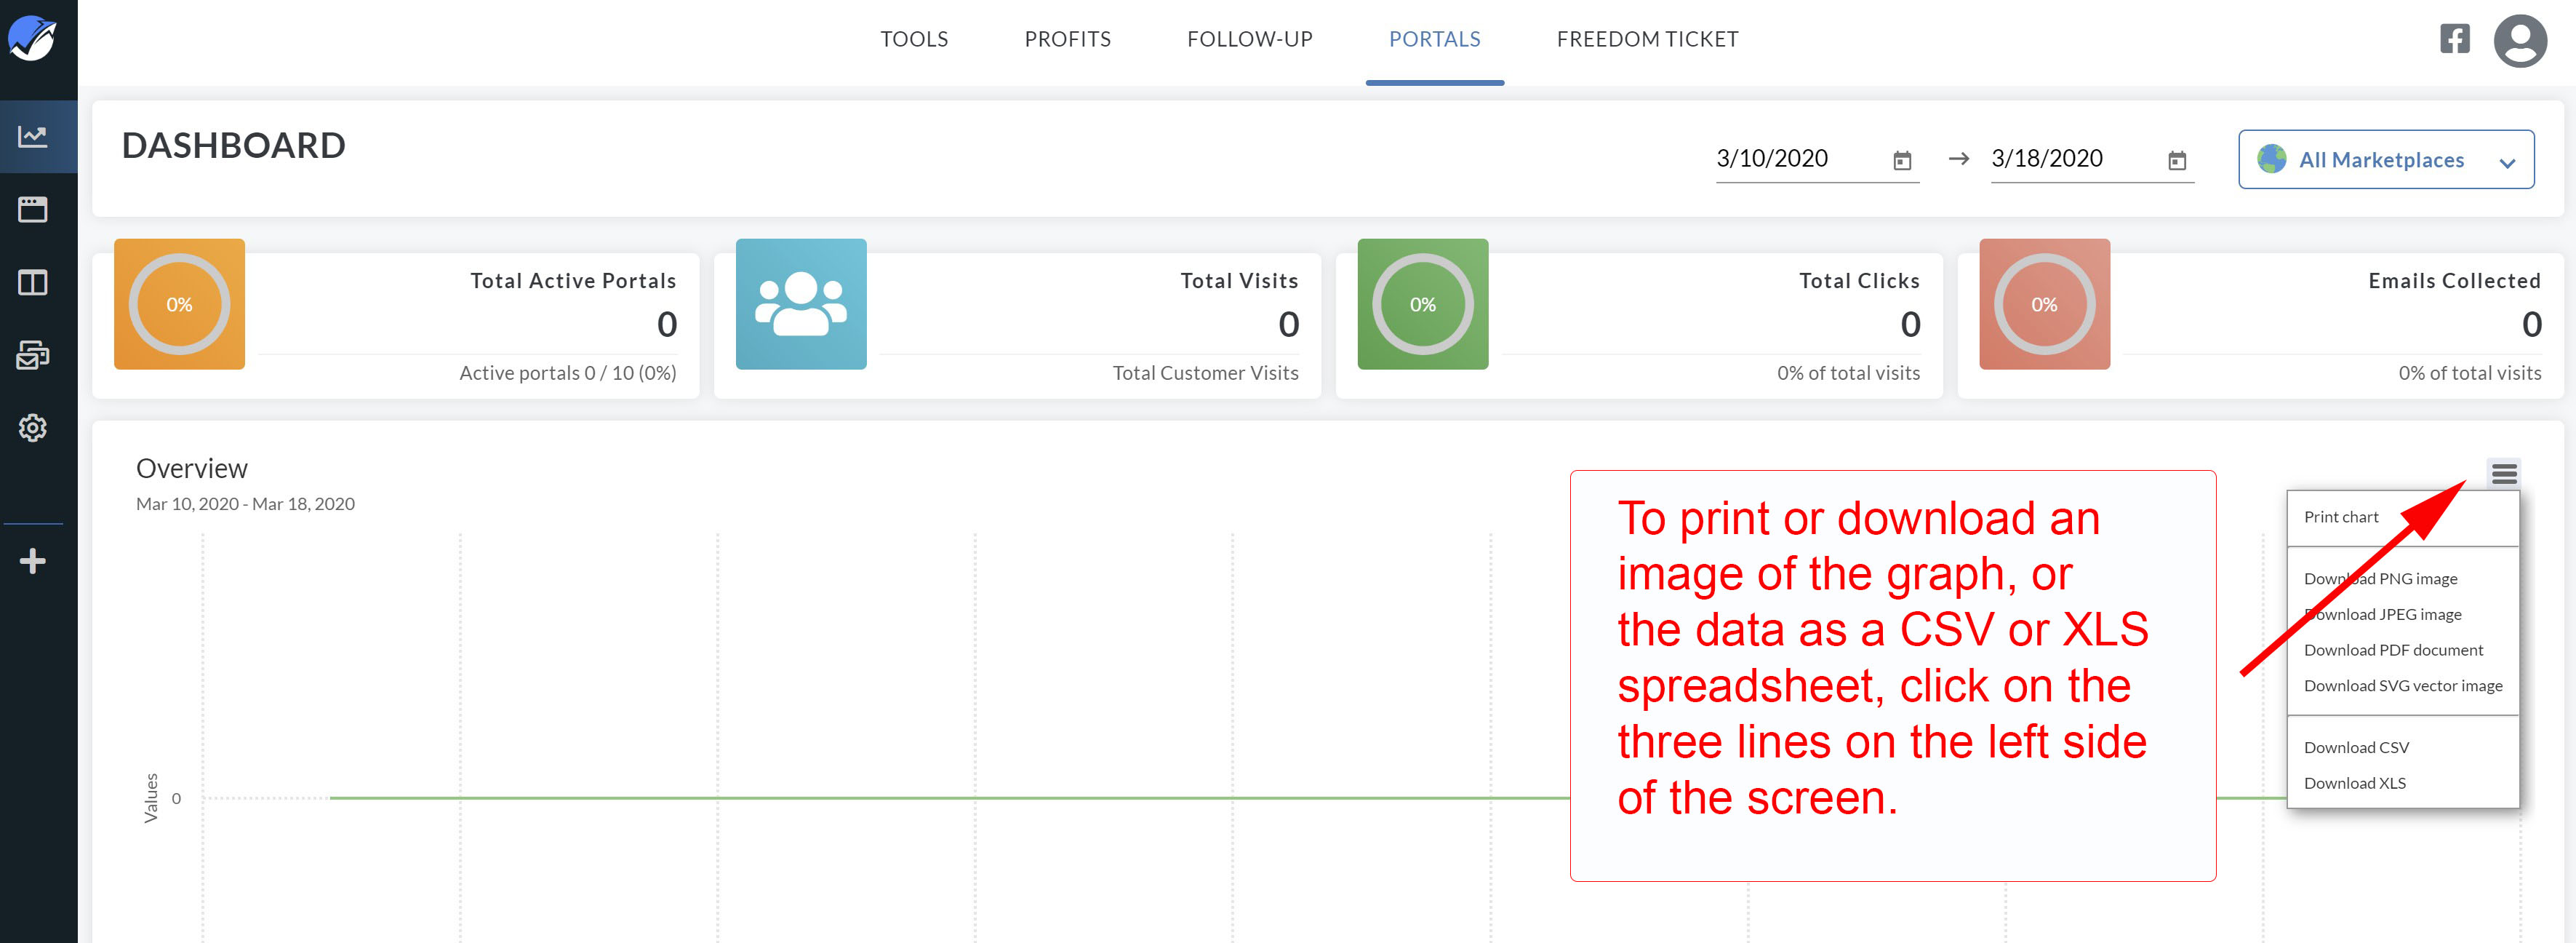
 If you want to print the chart, or download an image, or CSV or XLS file with the data, click on the three lines on the left to open the options window.
Managing Your Portals
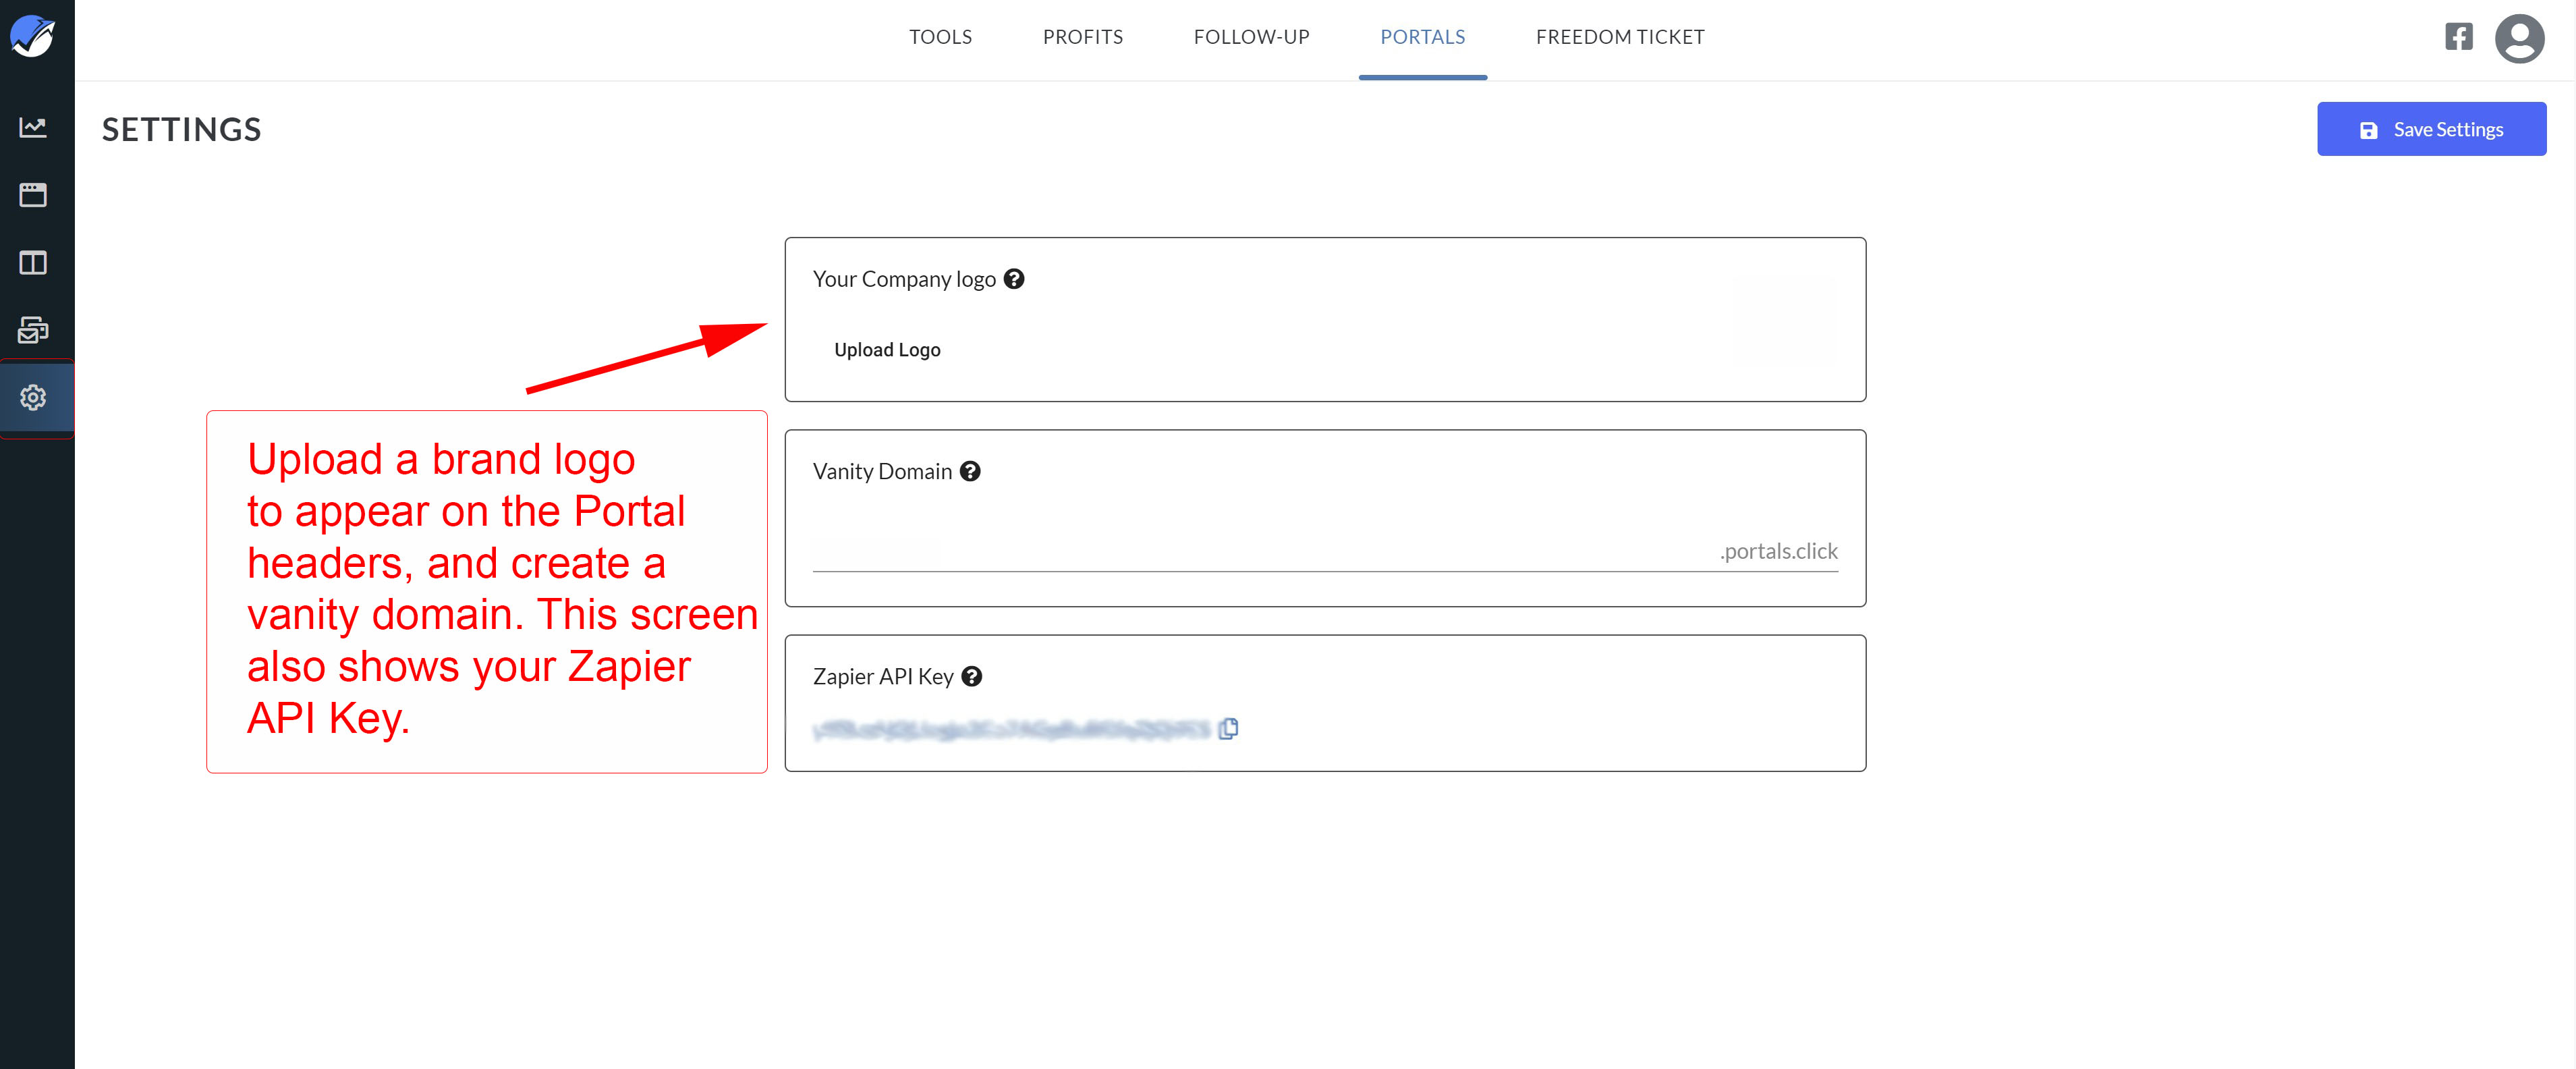
4. Before you create your first Portal, click on the Settings tab, located on the left side menu, at the bottom. This window allows you to upload the logo for your company and create a vanity domain. These aspects are static and will appear on all of your Portal pages. The settings window also shows your unique Zapier API key, if you choose to integrate your Portals with your ad accounts. When the Settings are the way you want them, click on the blue Save Settings button in the top left corner.
5. Now you're ready to create a Portal. Click on the second tab in the left side menu, which will take you to the main Portals window. When you go to the Portals window, you can either start a new Portal, or you can open a previously created Portal.
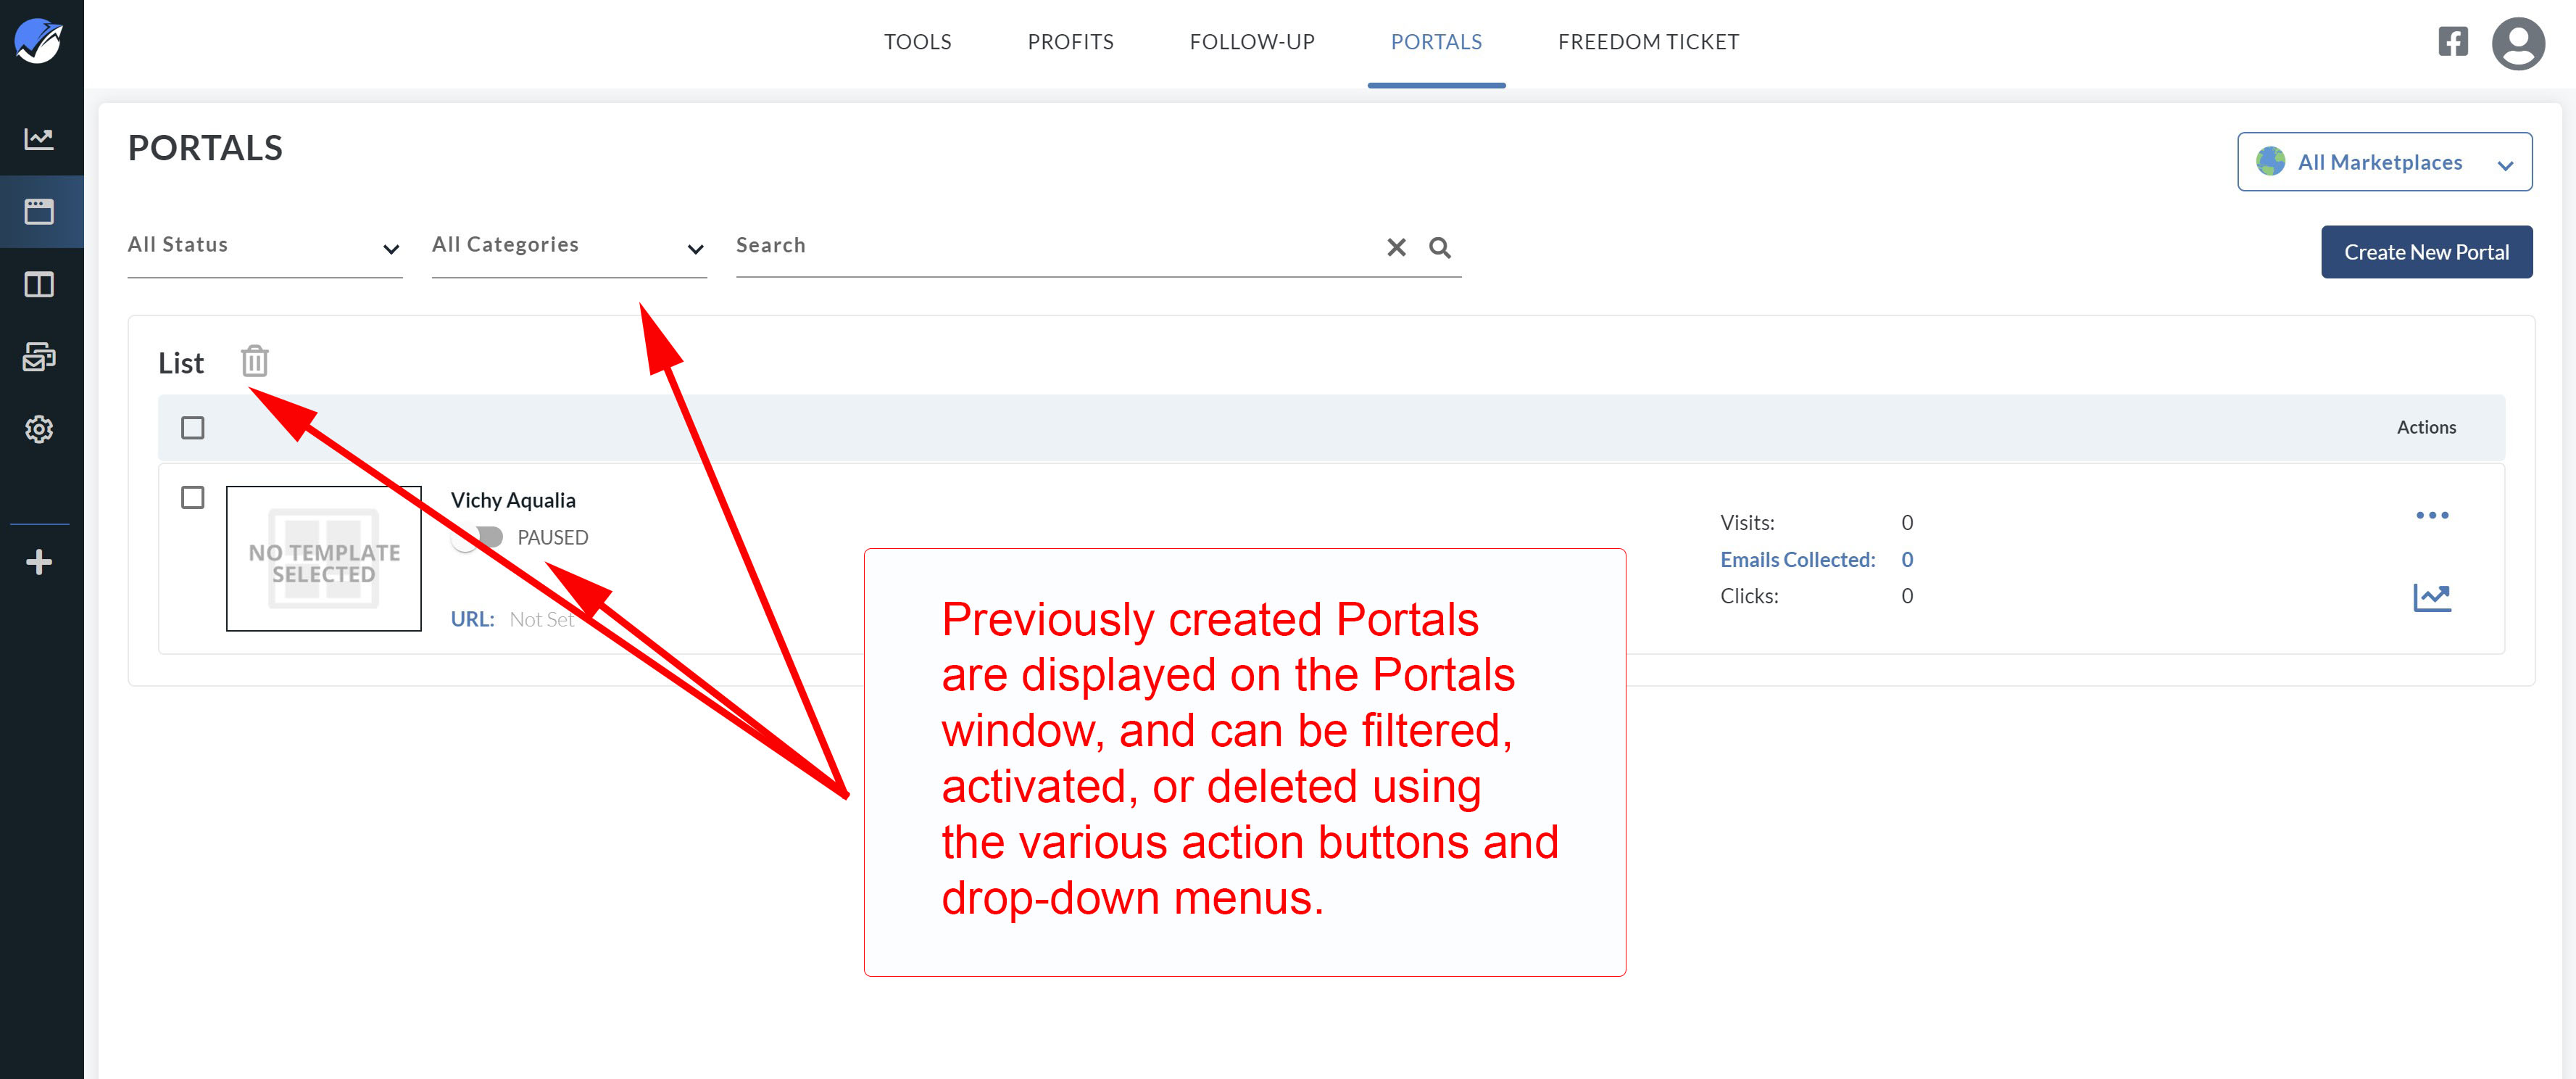
6. Use the provided filters to search for, or review, active or paused Portals. Click on the second tab in the left menu titled Portals. There are several filters to change what you see on the screen.
You can set the page to show all Portals, or only active Portals, or only paused Portals. Even though the number of active Portals allowed at one time is established by your plan, Helium 10 allows you to store and save previously created landing pages for future campaign activation. This allows you to create Portals in advance of a campaign, and/or to save them for reactivation at a later date.
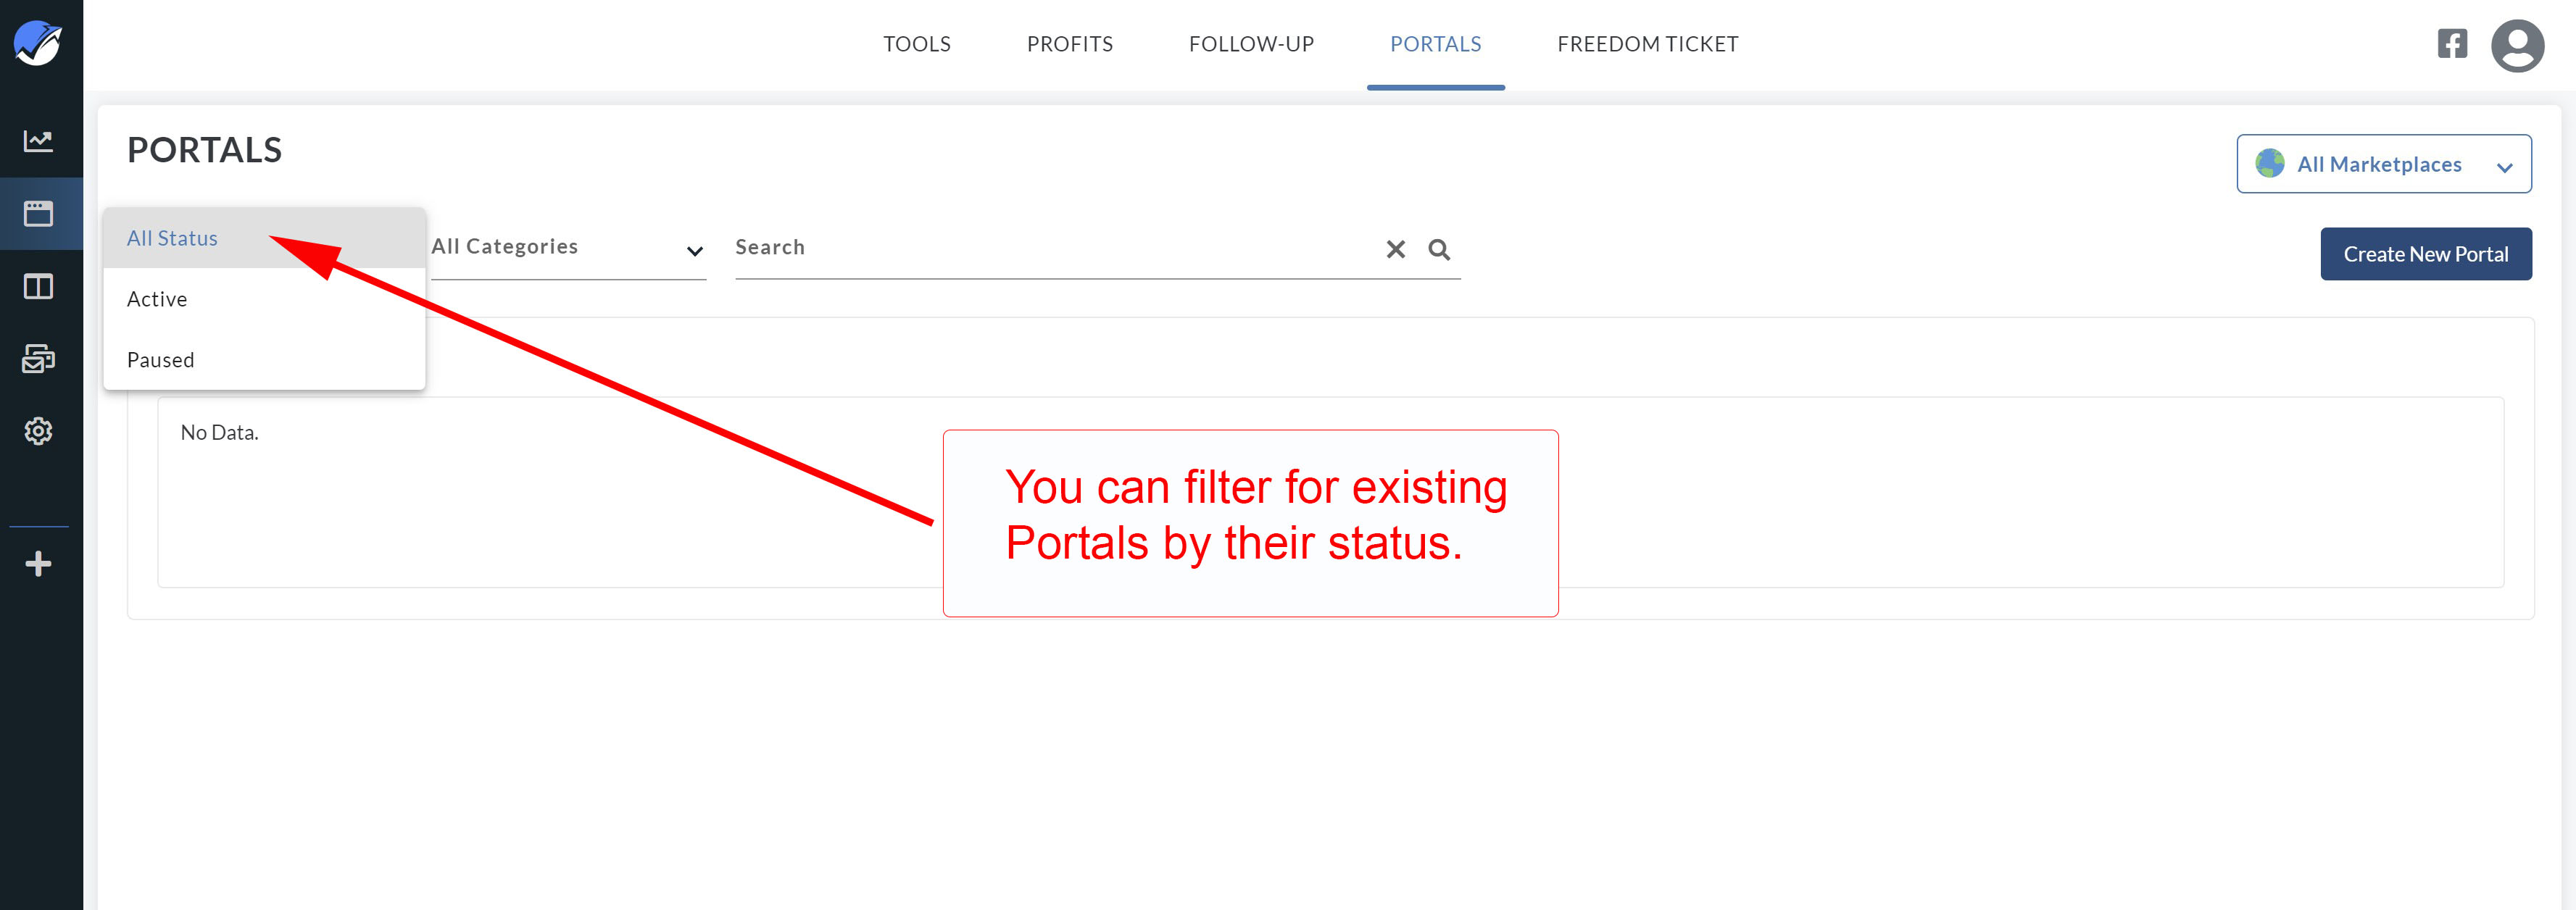
Similar to the dashboard window, the Portals window lets you select a specific Marketplace to view.

You can also sort and view your existing Portals by their category: product, thank you or email.

Finally, you can simply search for the name of an existing Portal using the search field.
Creating a Portal
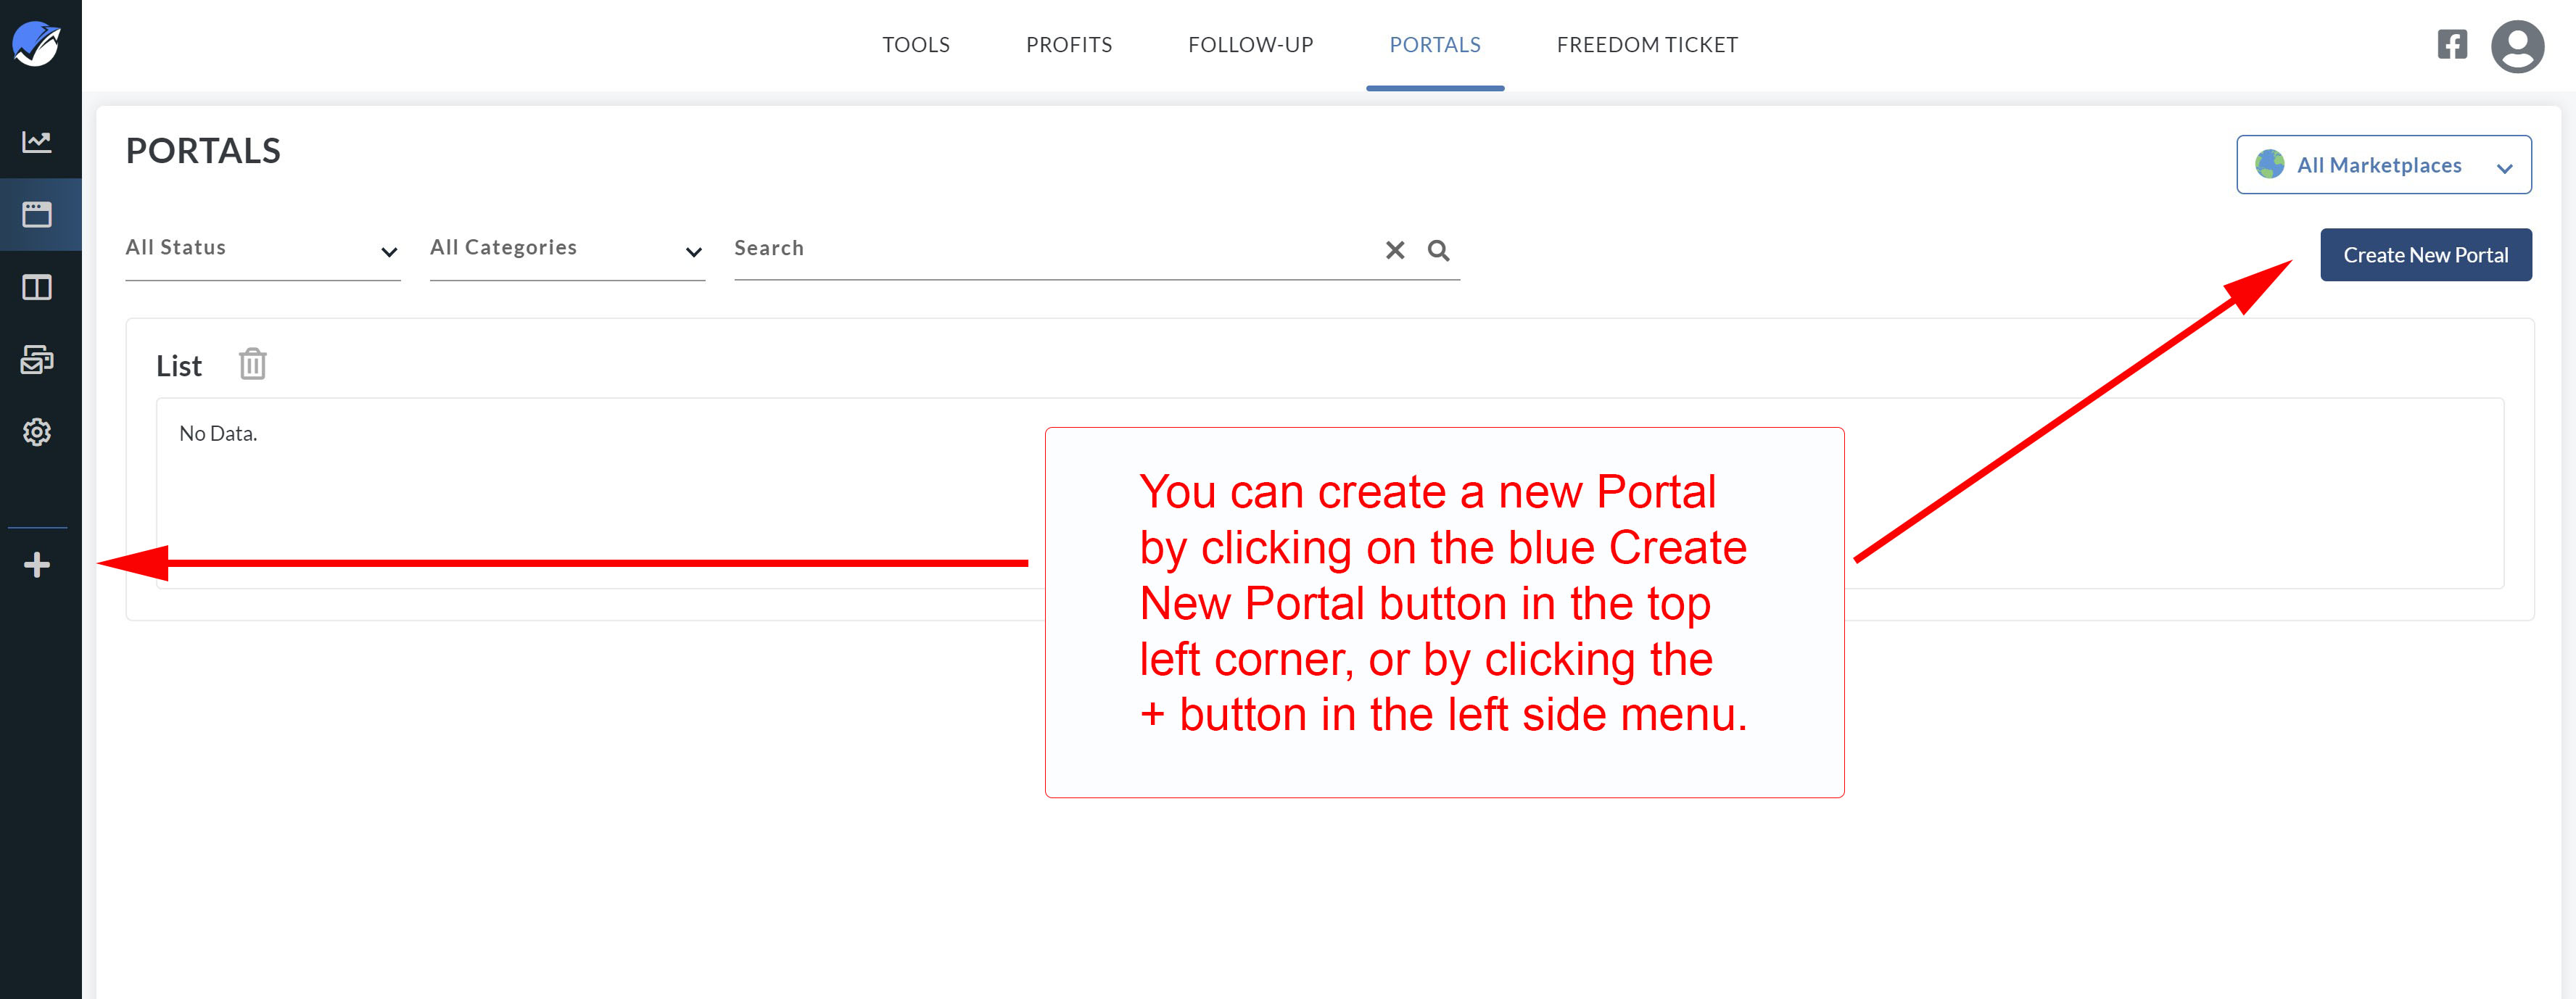
7. To create your first Portal landing page, click on the blue New Portal button located in the top, right corner, or from any window, click on the + tab located in the left side menu bar.
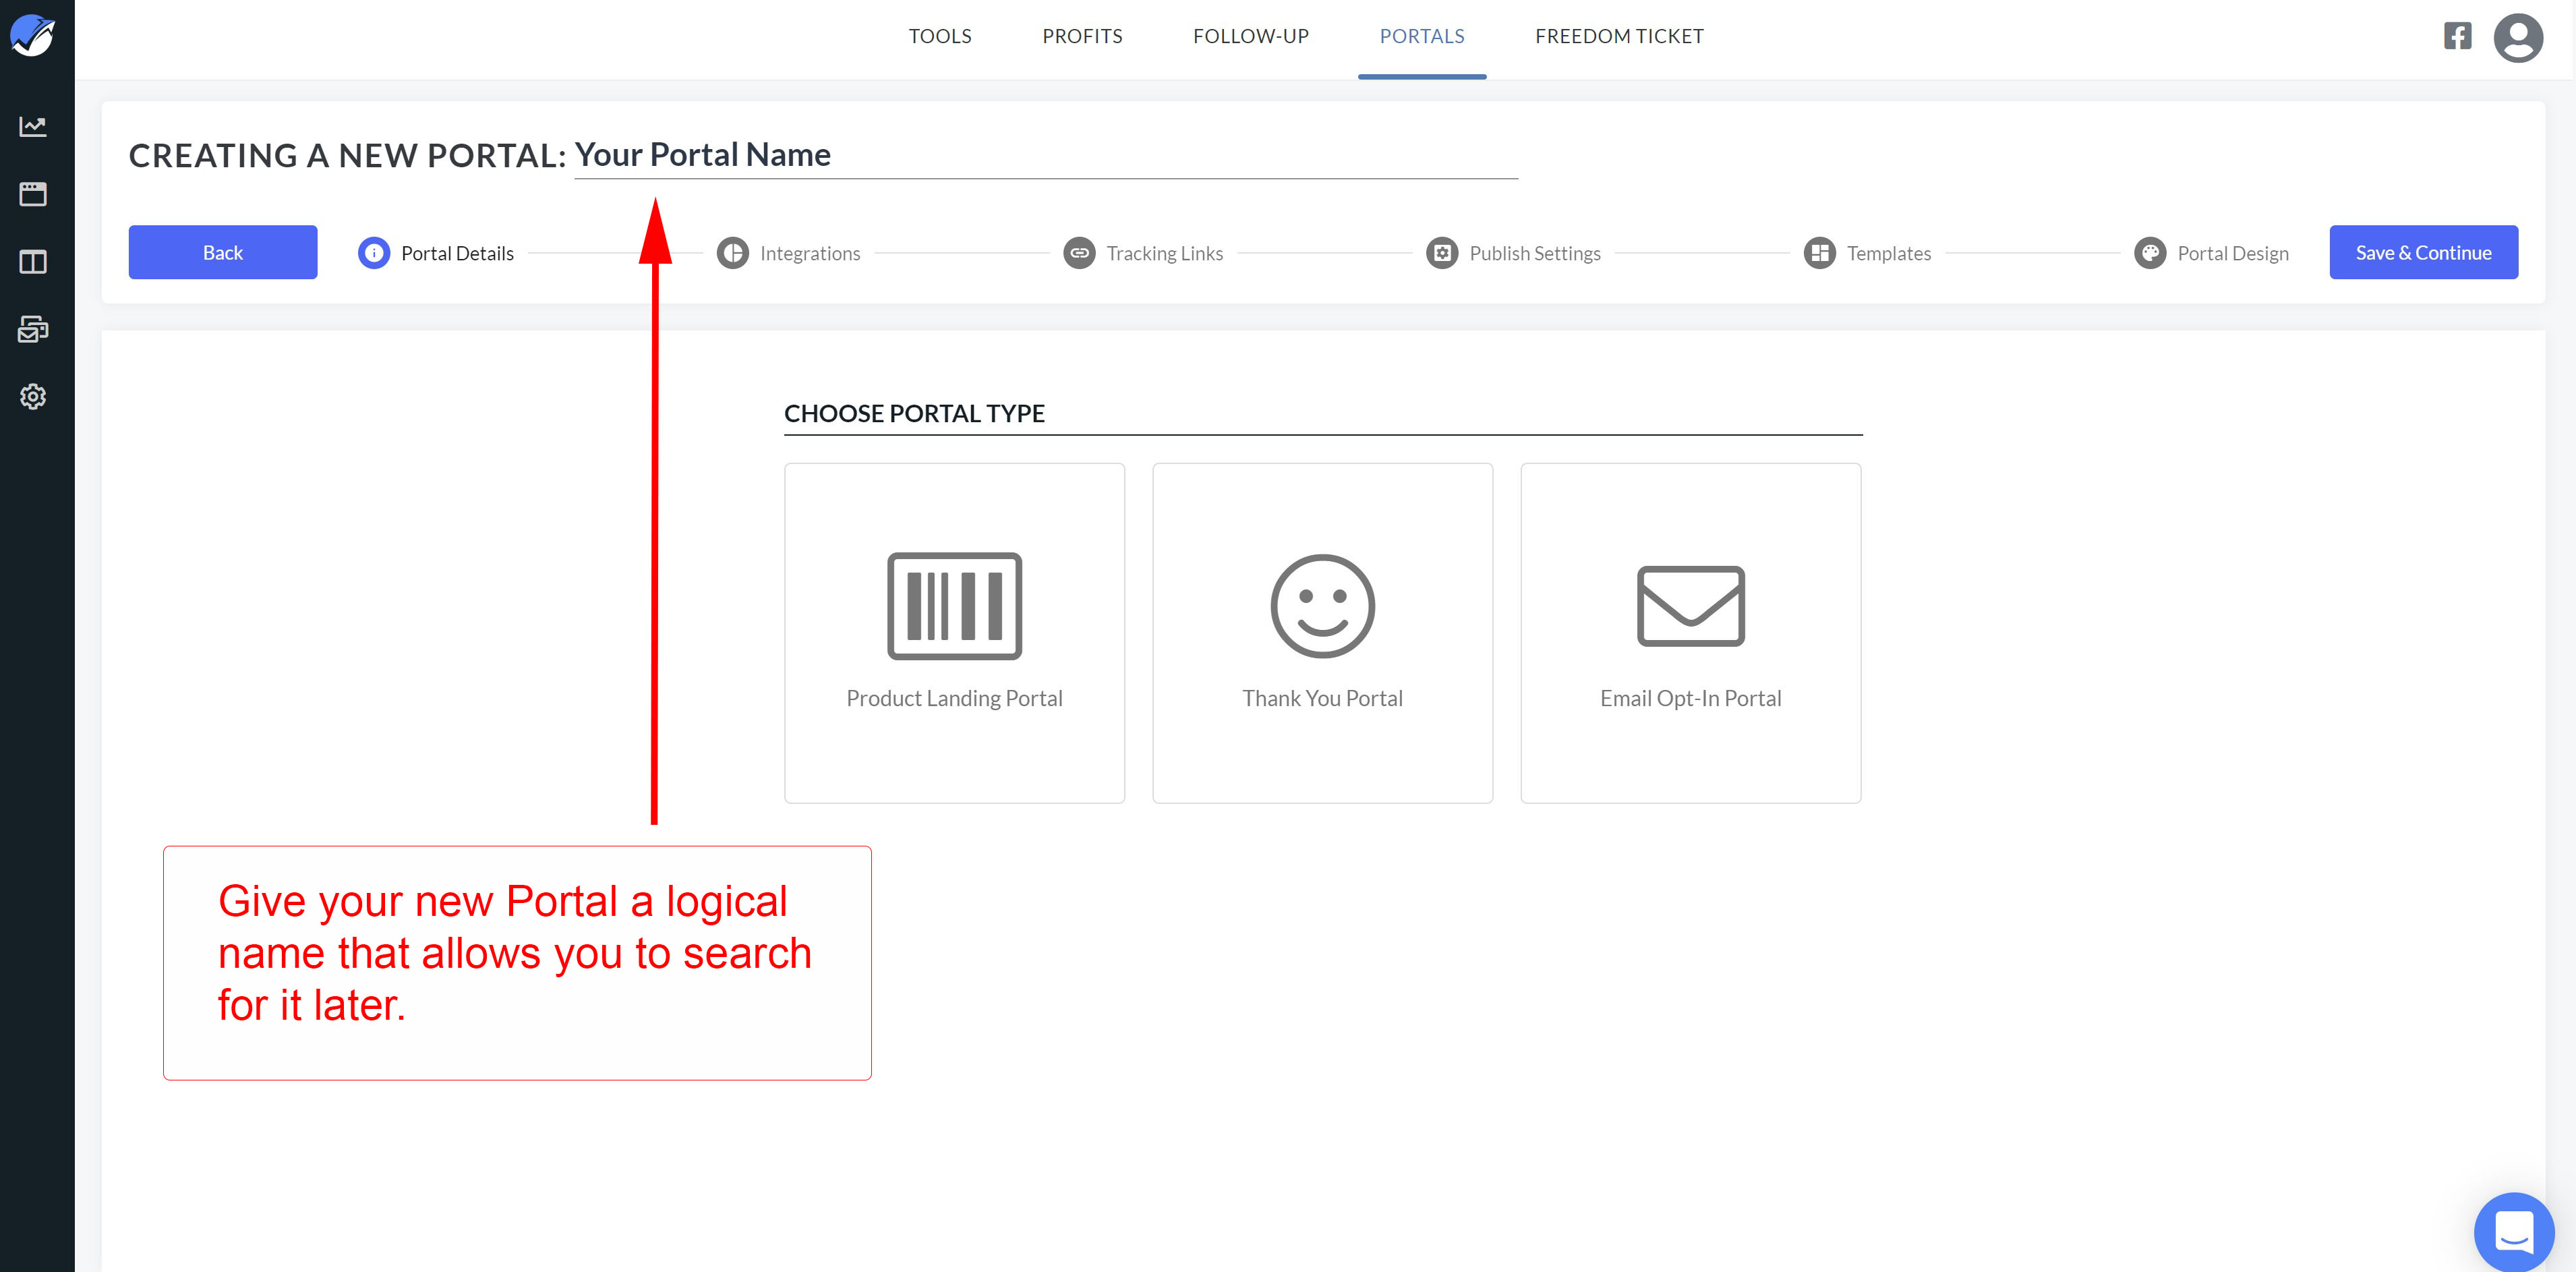
8. First and foremost, name your campaign. If you choose to import your product information directly from Amazon, it might change the name, but you can always revise the name again.
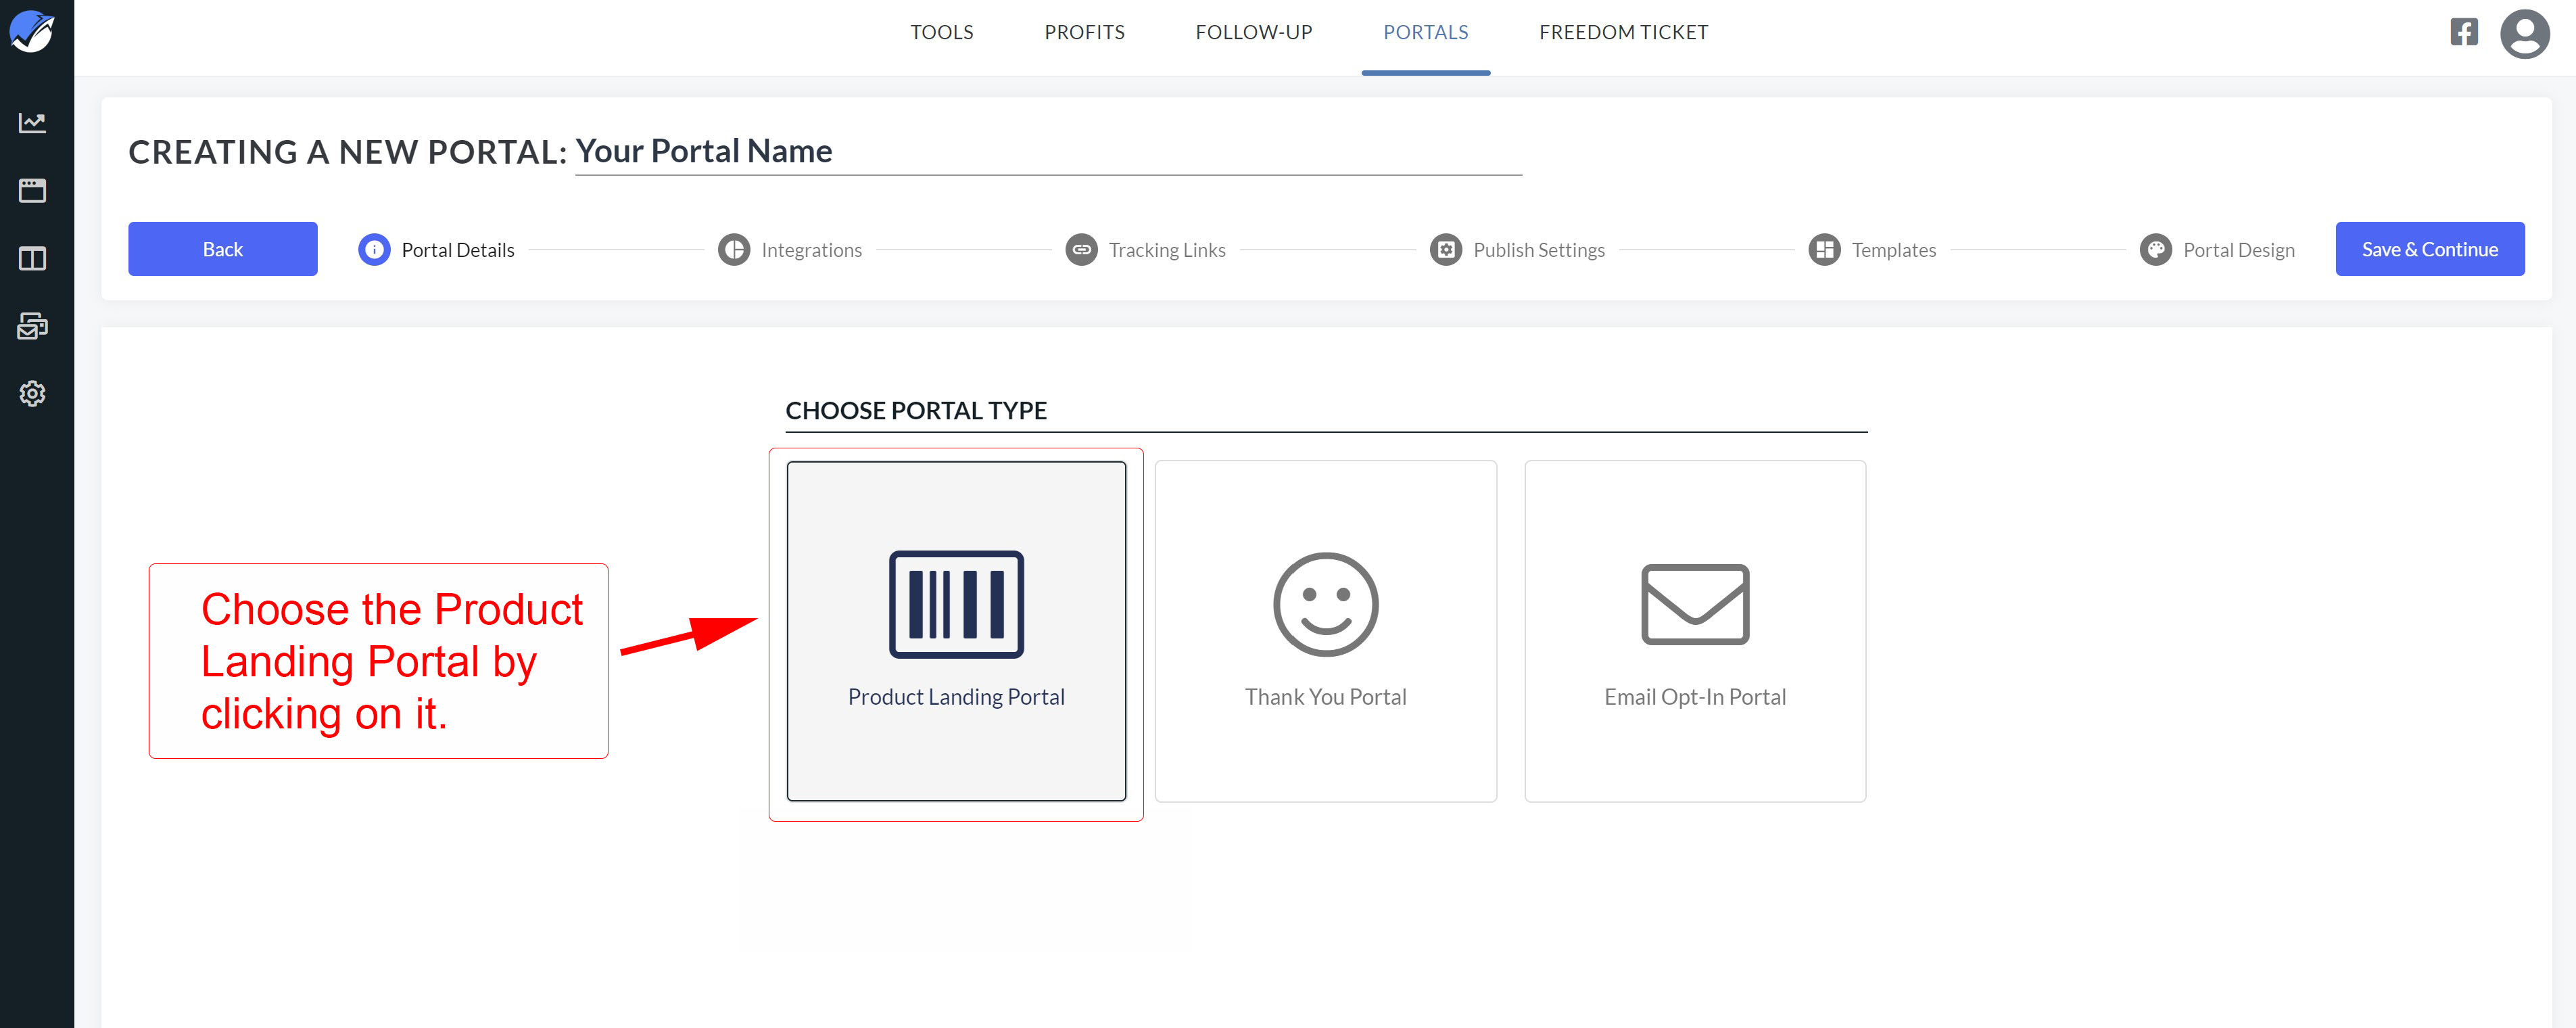
9. Next, select the type of Portal you want to create. Helium 10 offers its members three categories of Portal templates: one to showcase products; one to thank customers; and one to collect customer emails. For the first Portal, let's create a Product Landing Portal. This Portals landing page is designed for the promotion of a specific product.
10. On the Product Landing Page creation screen, you can choose to automatically import the existing bullet points and images from your Amazon product directly into your Portals landing page, saving you time.
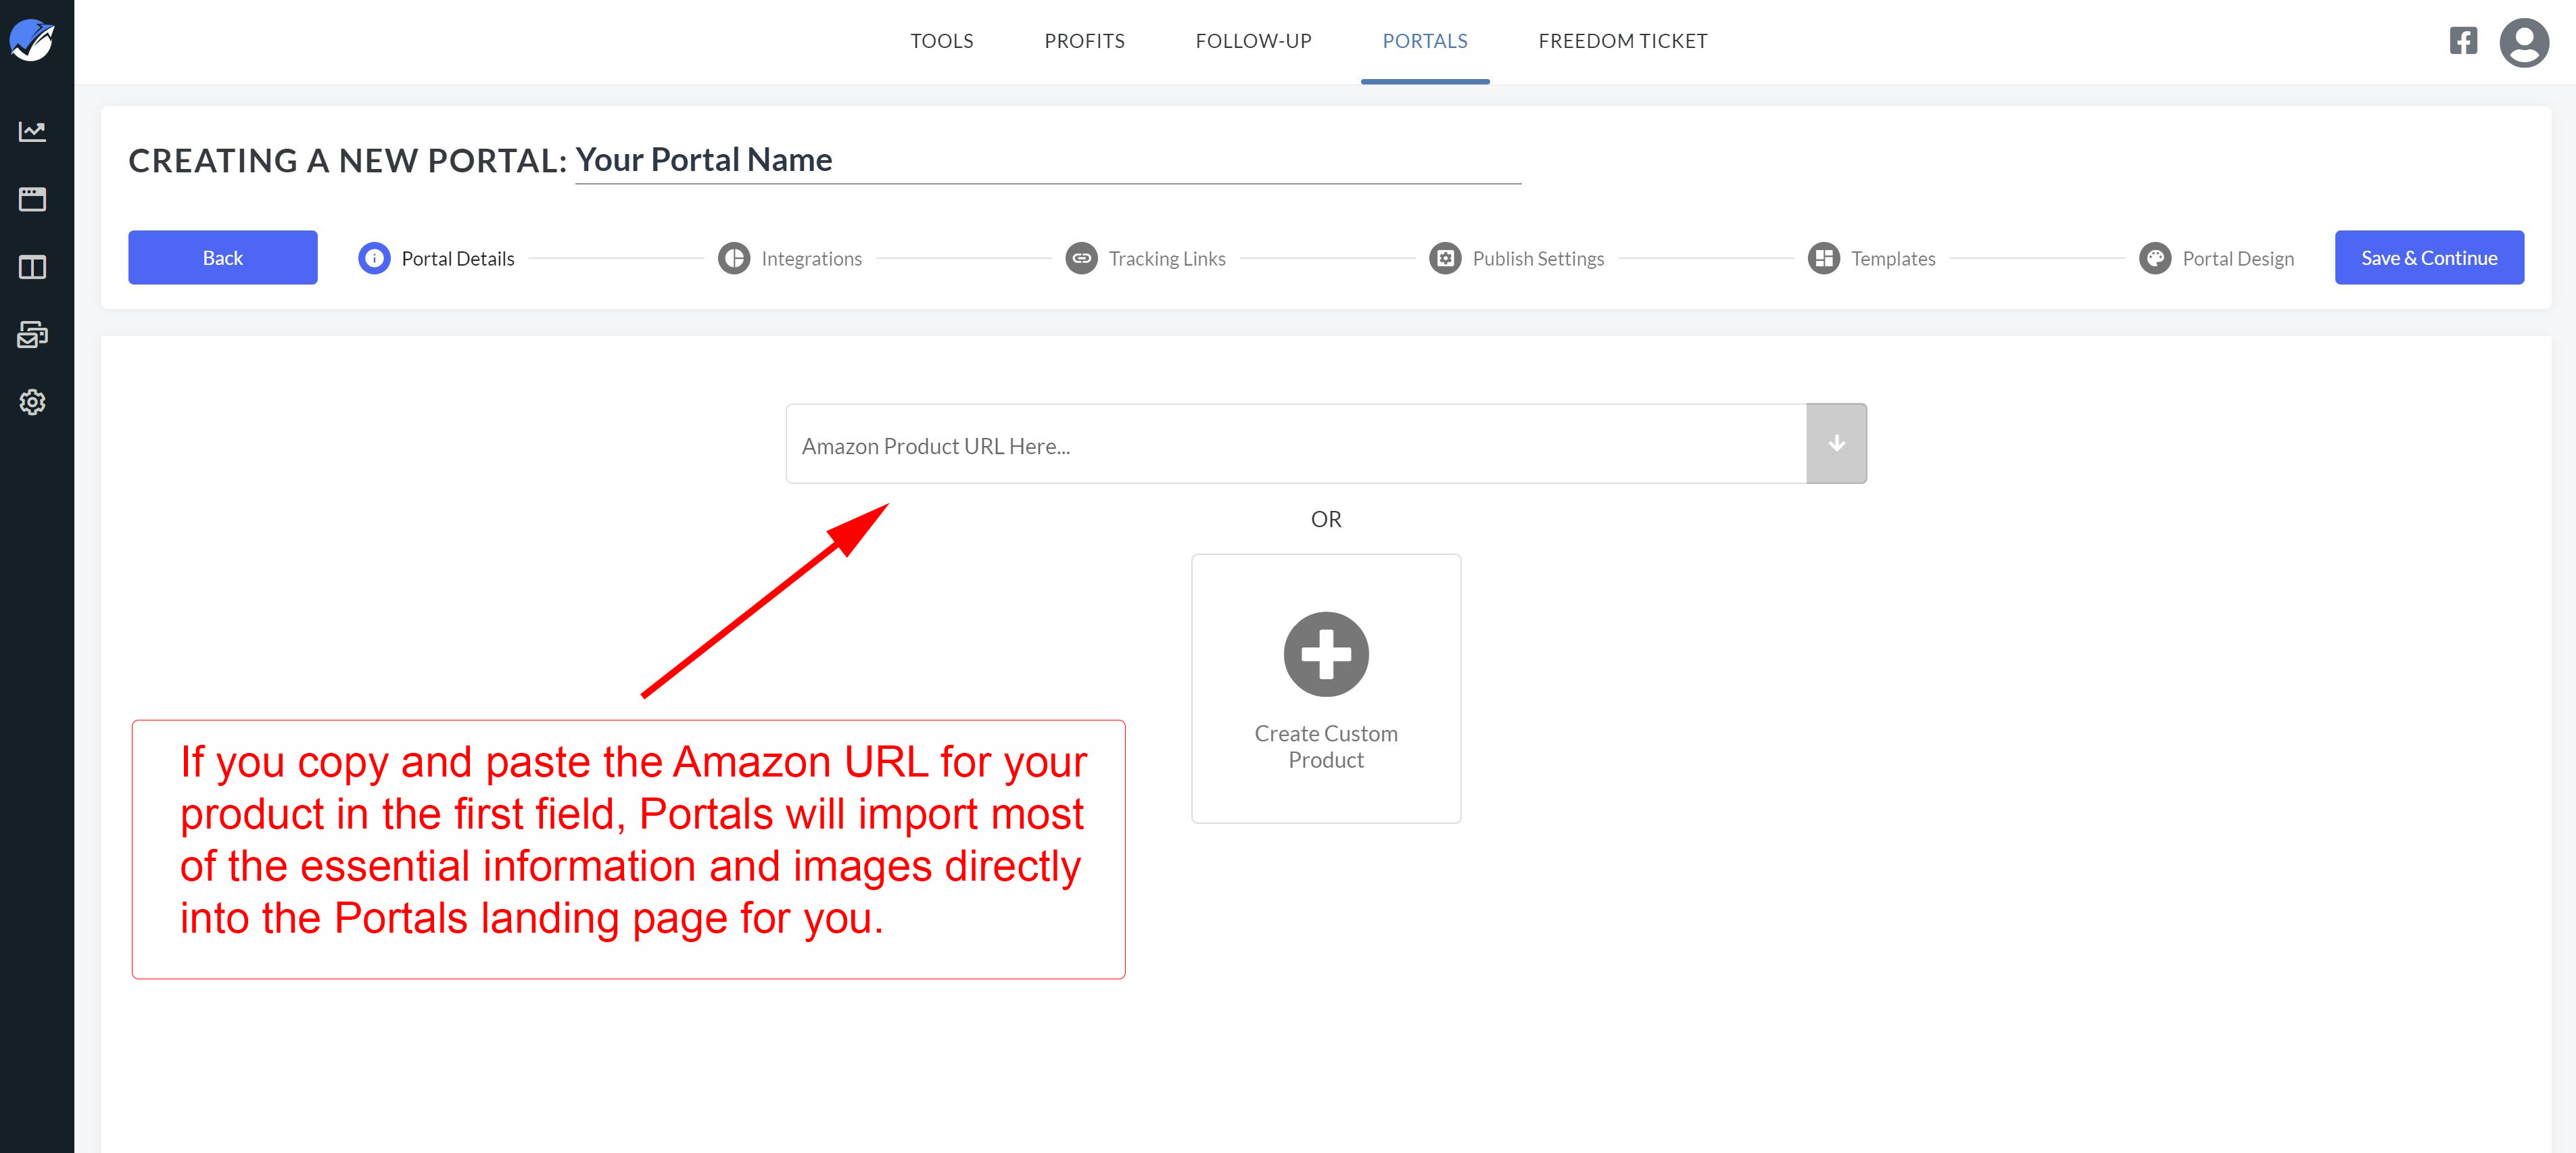
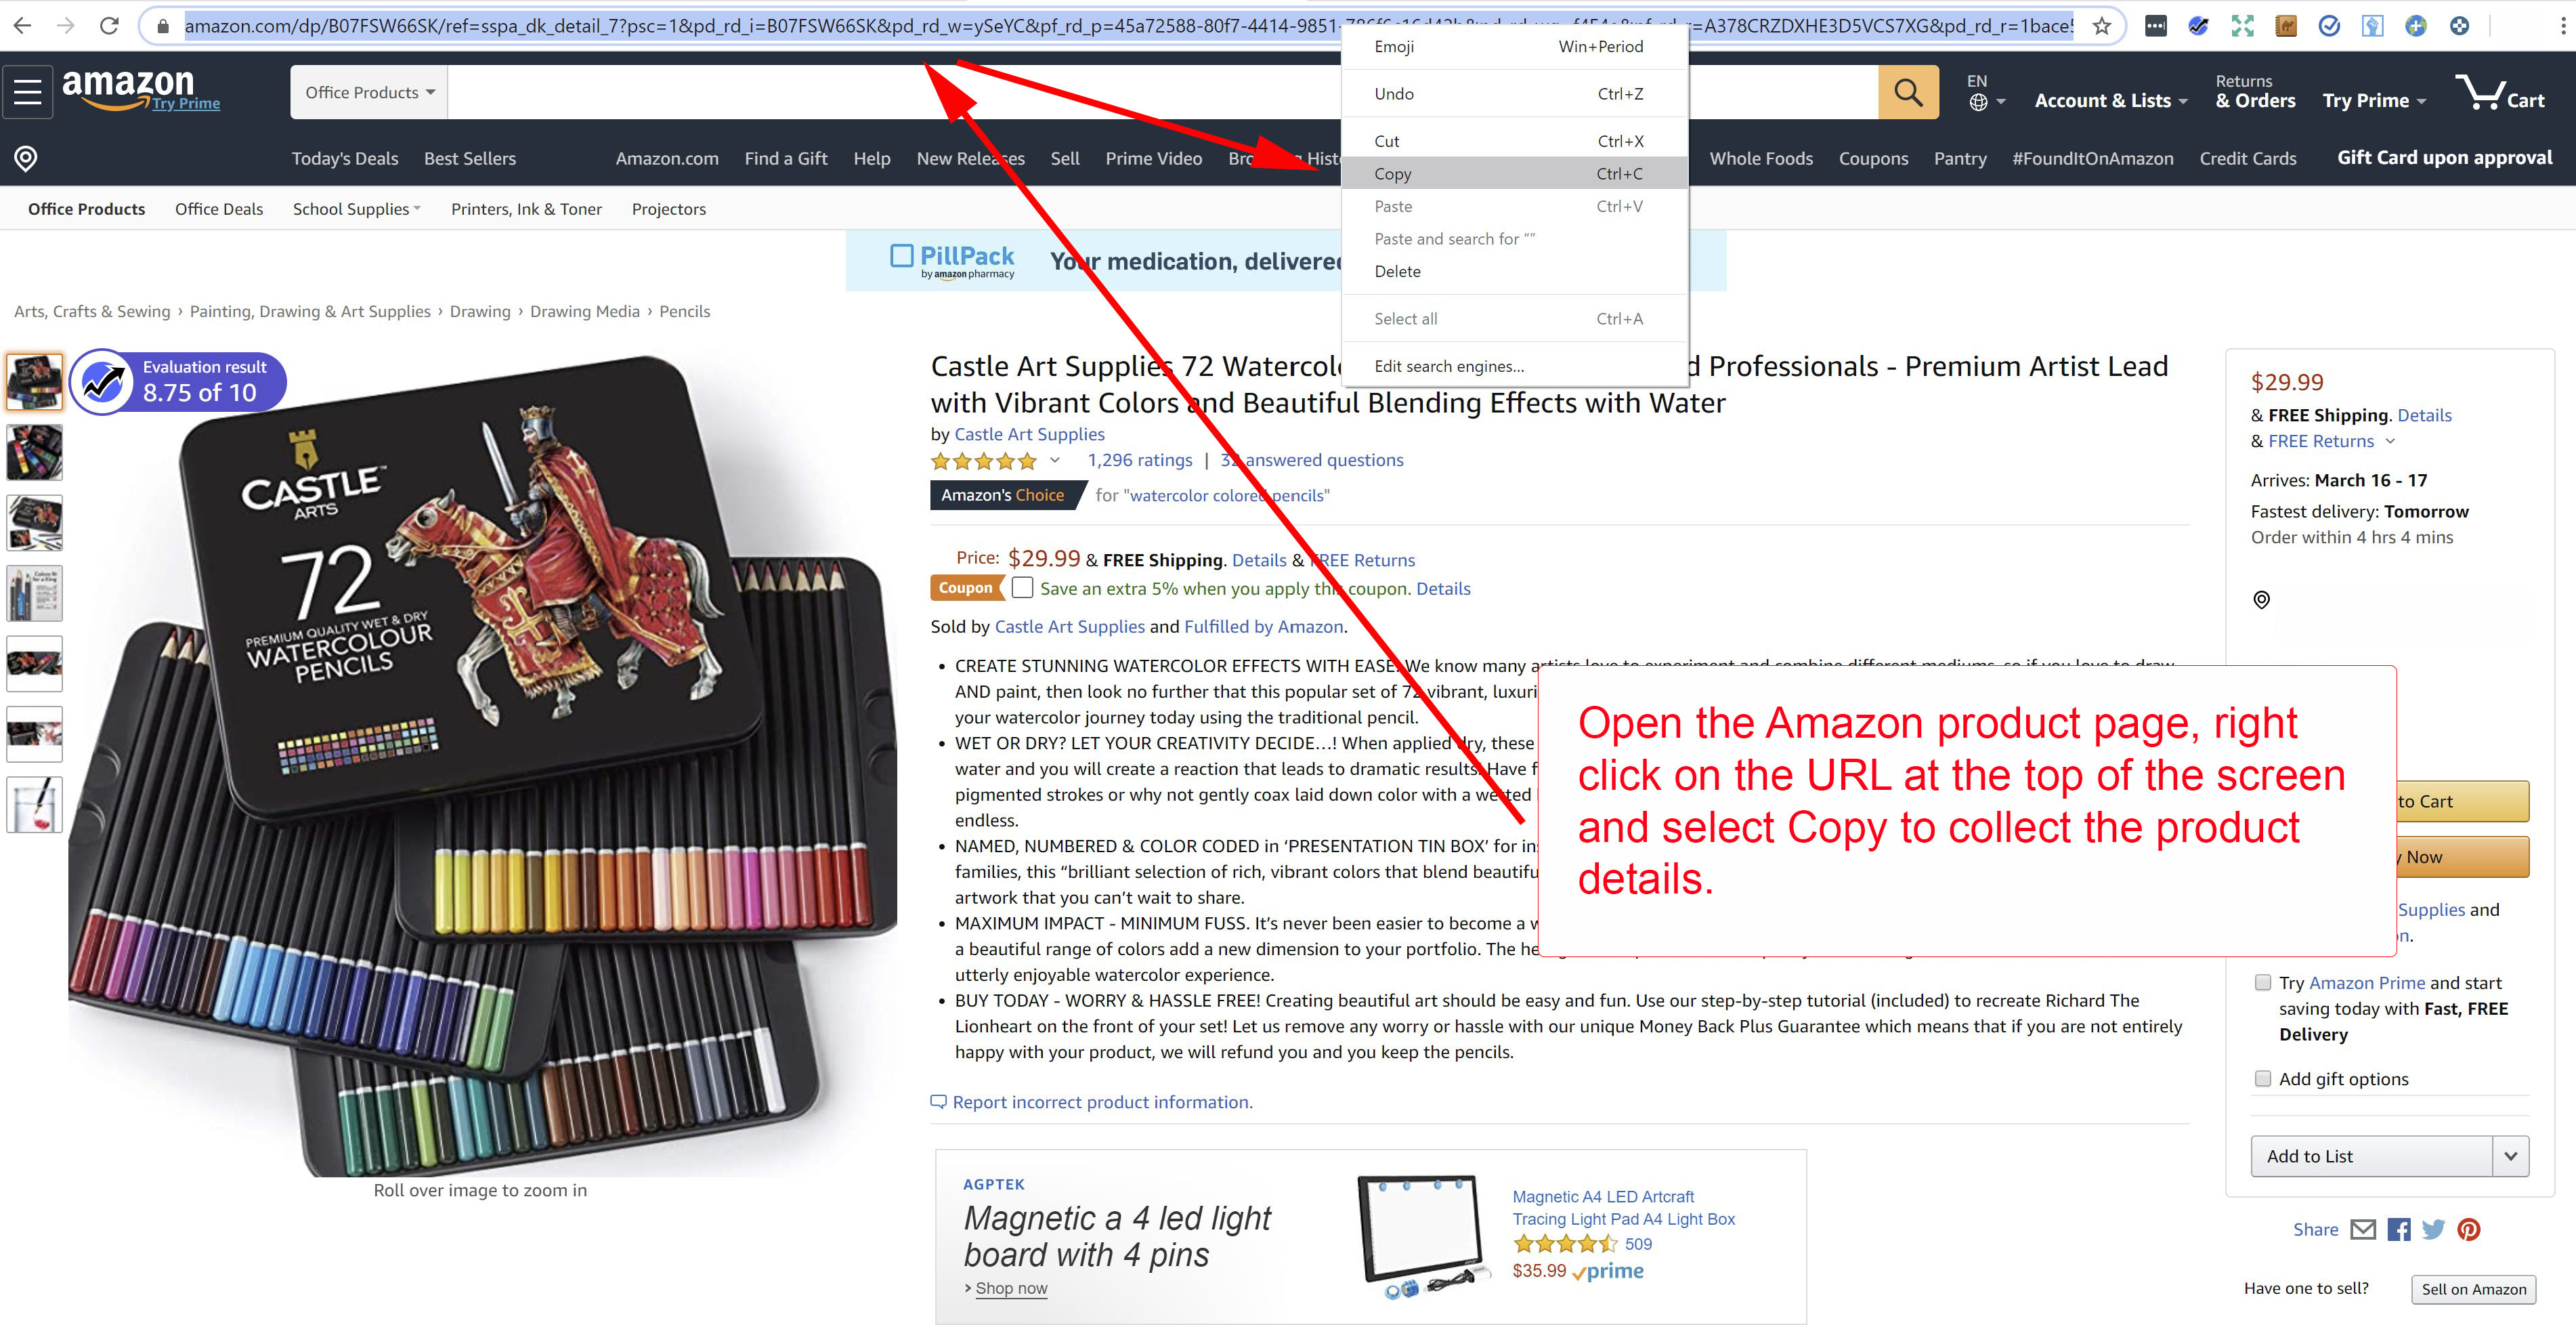
11. Go to Amazon and open the product listing page for your desired product. Copy the complete URL displayed for the page. (To copy, simply right click and hold. When the URL is highlighted in blue, drag the cursor down to Copy in the popup window and select it.)
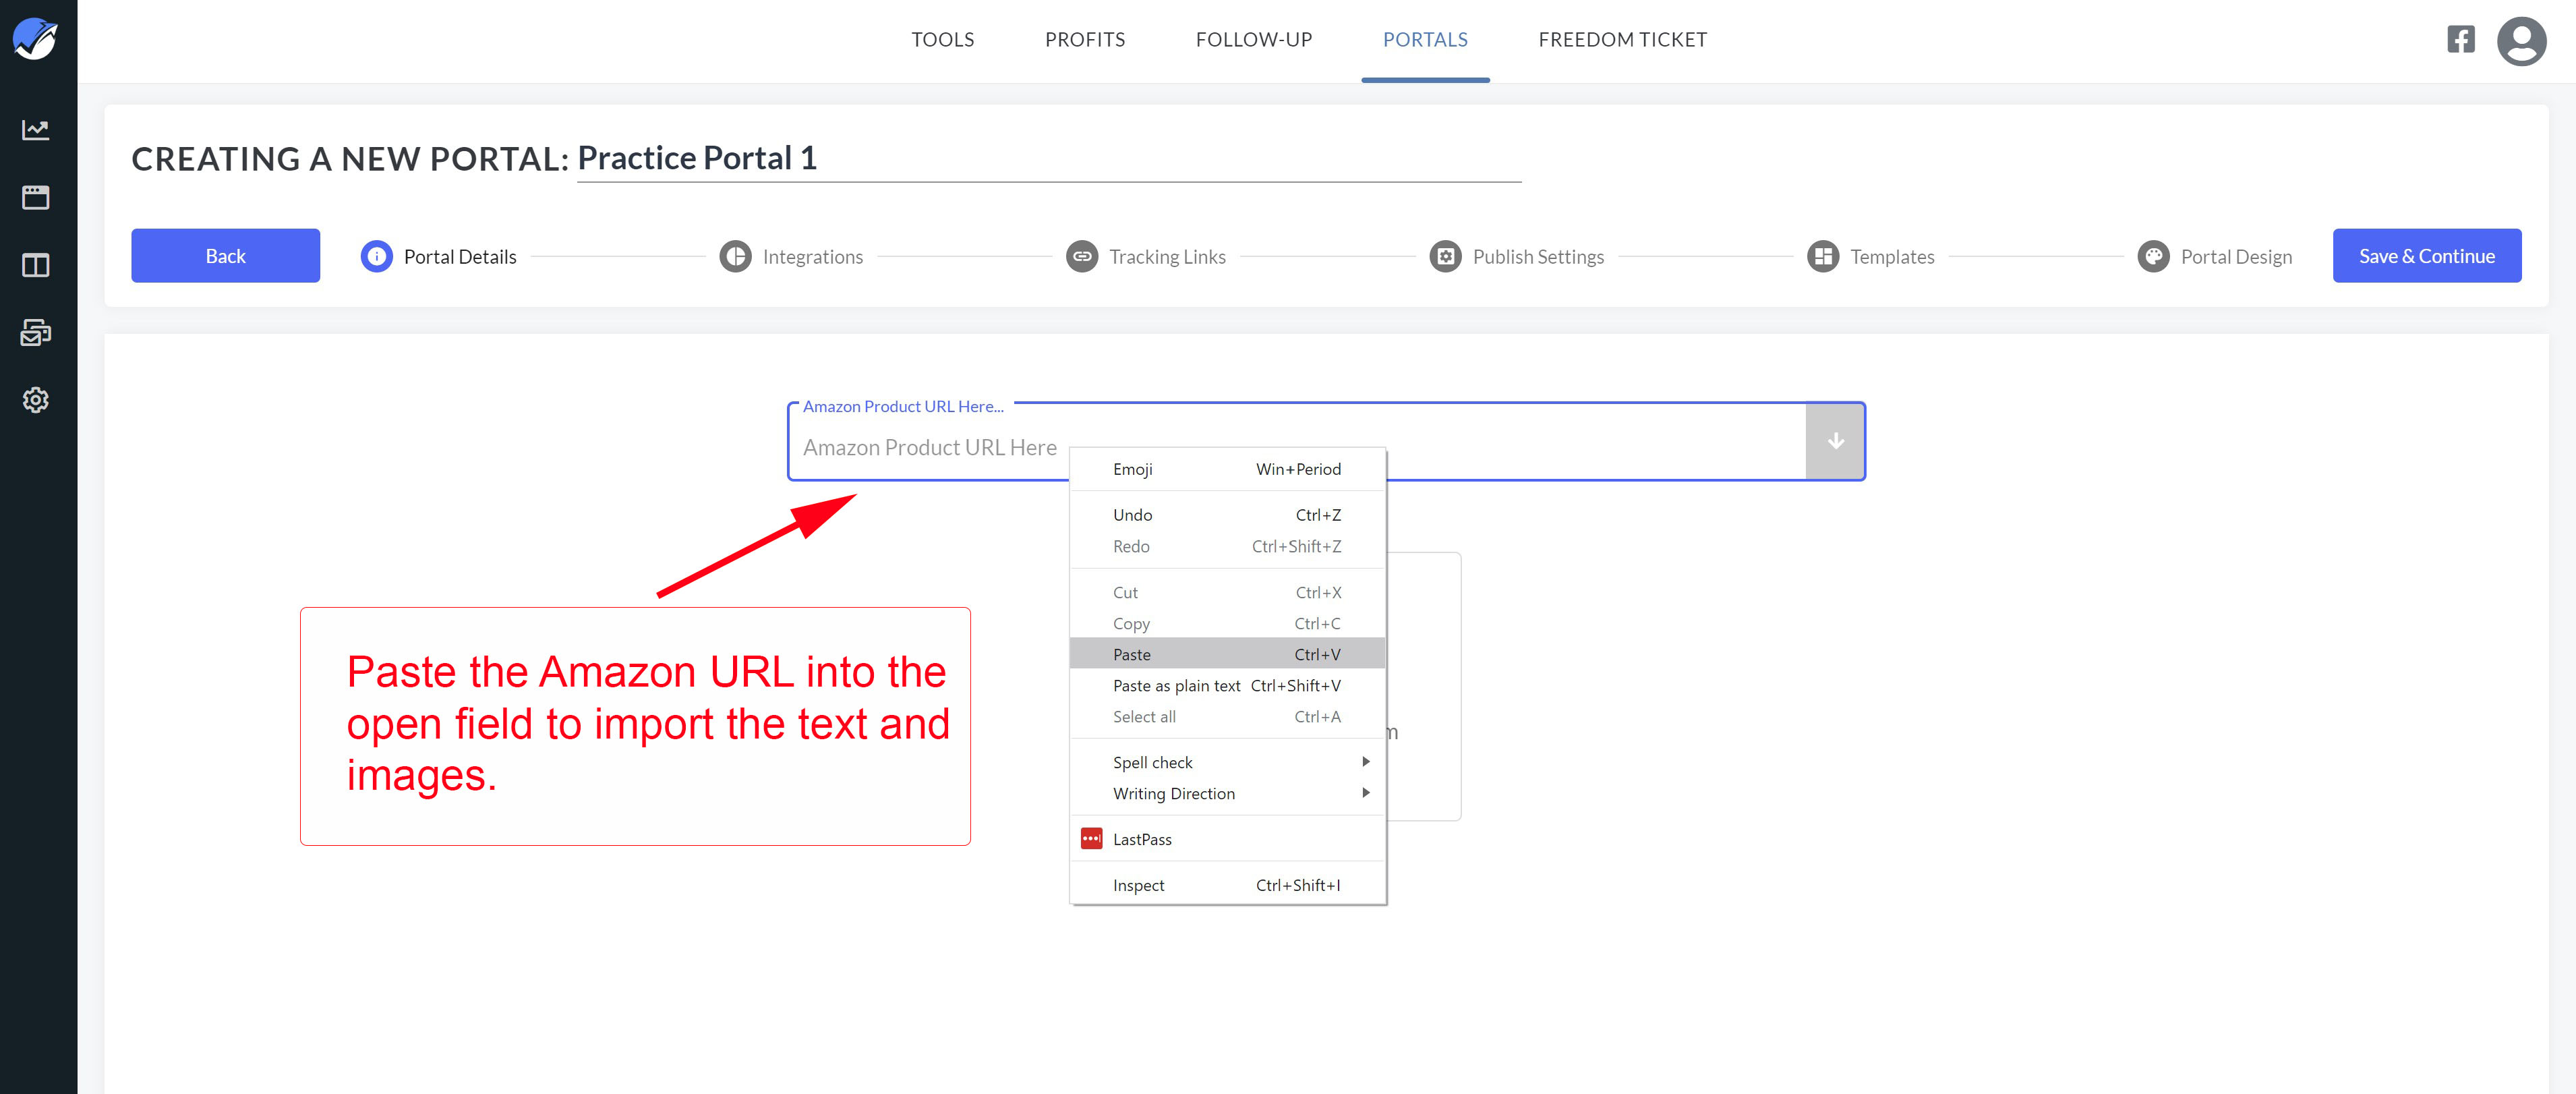
12. Return to your open Portals tool, and paste the URL into the central field that says, "Amazon Product URL here..."
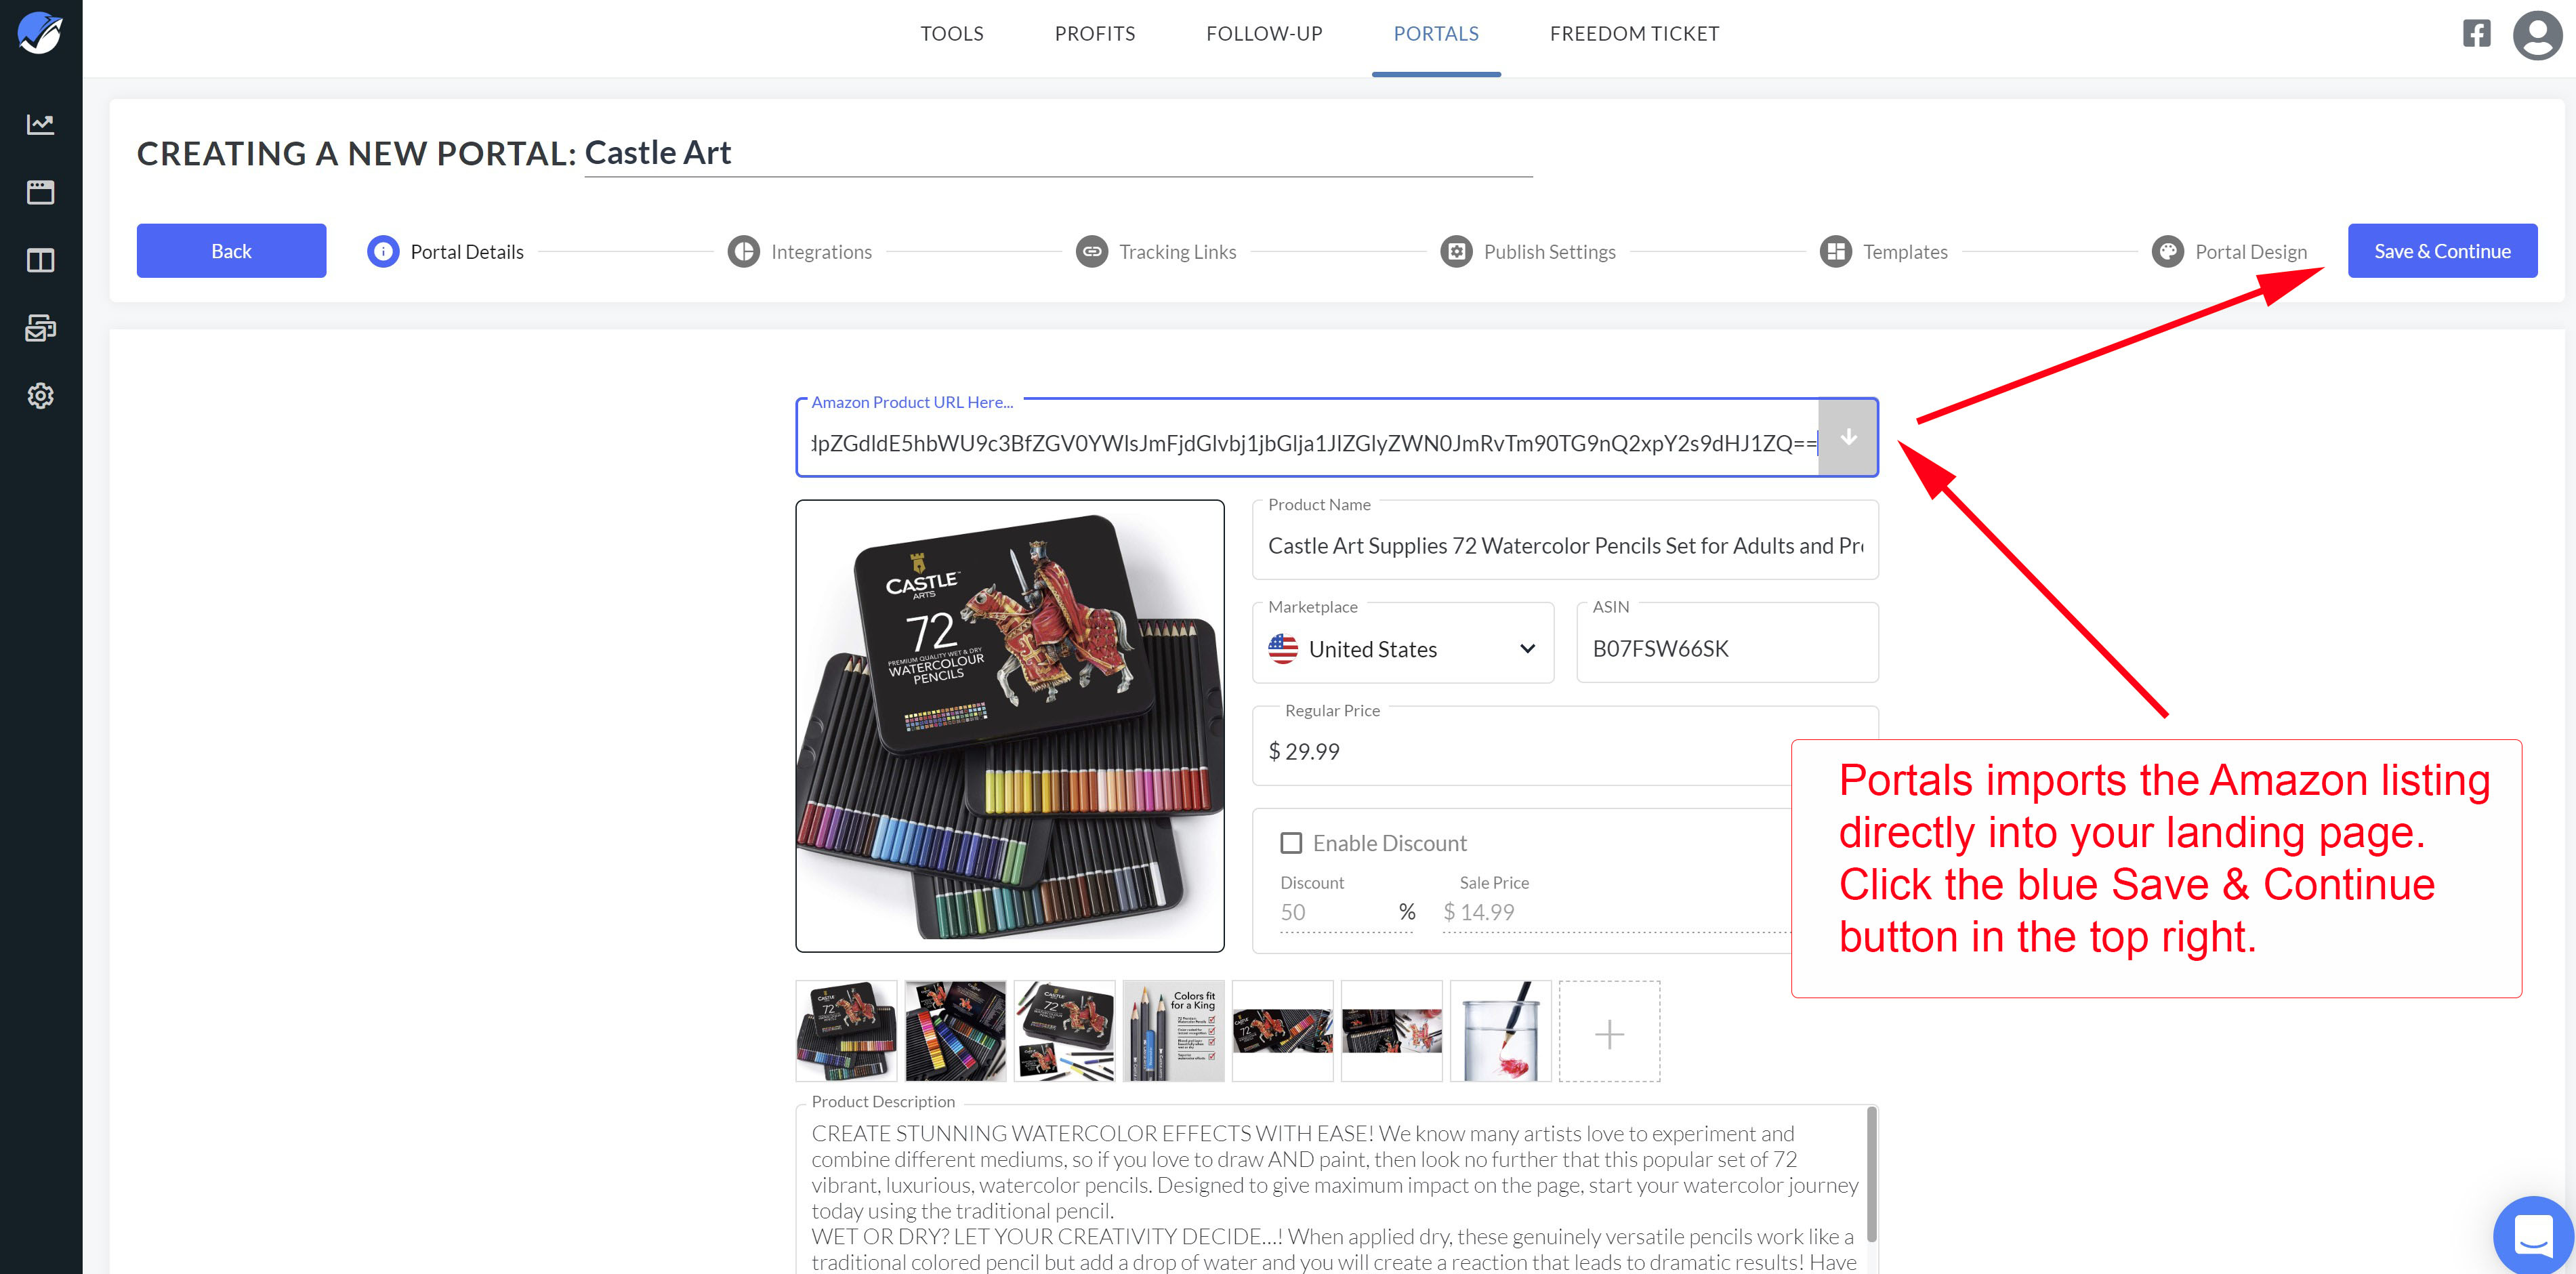
13. Portals will populate your landing page with the images and text from your listing. Click the blue Save & Continue button in the top right corner to move forward on the Portal Creation chronology line.
14. On the next screen, you can set up the integration of your Portal to Google and Facebook, create your own Portal tracking code, and enable Deep Linking. These are essential steps to ensure that you collect the best data concerning customer traffic. If you don't have these codes or pixels at the moment, you can come back anytime and add them.
The Deep Link allows customers viewing your Portal from a mobile device to tap directly to your product page (if they have the shopping site app installed) instead of to the general site.
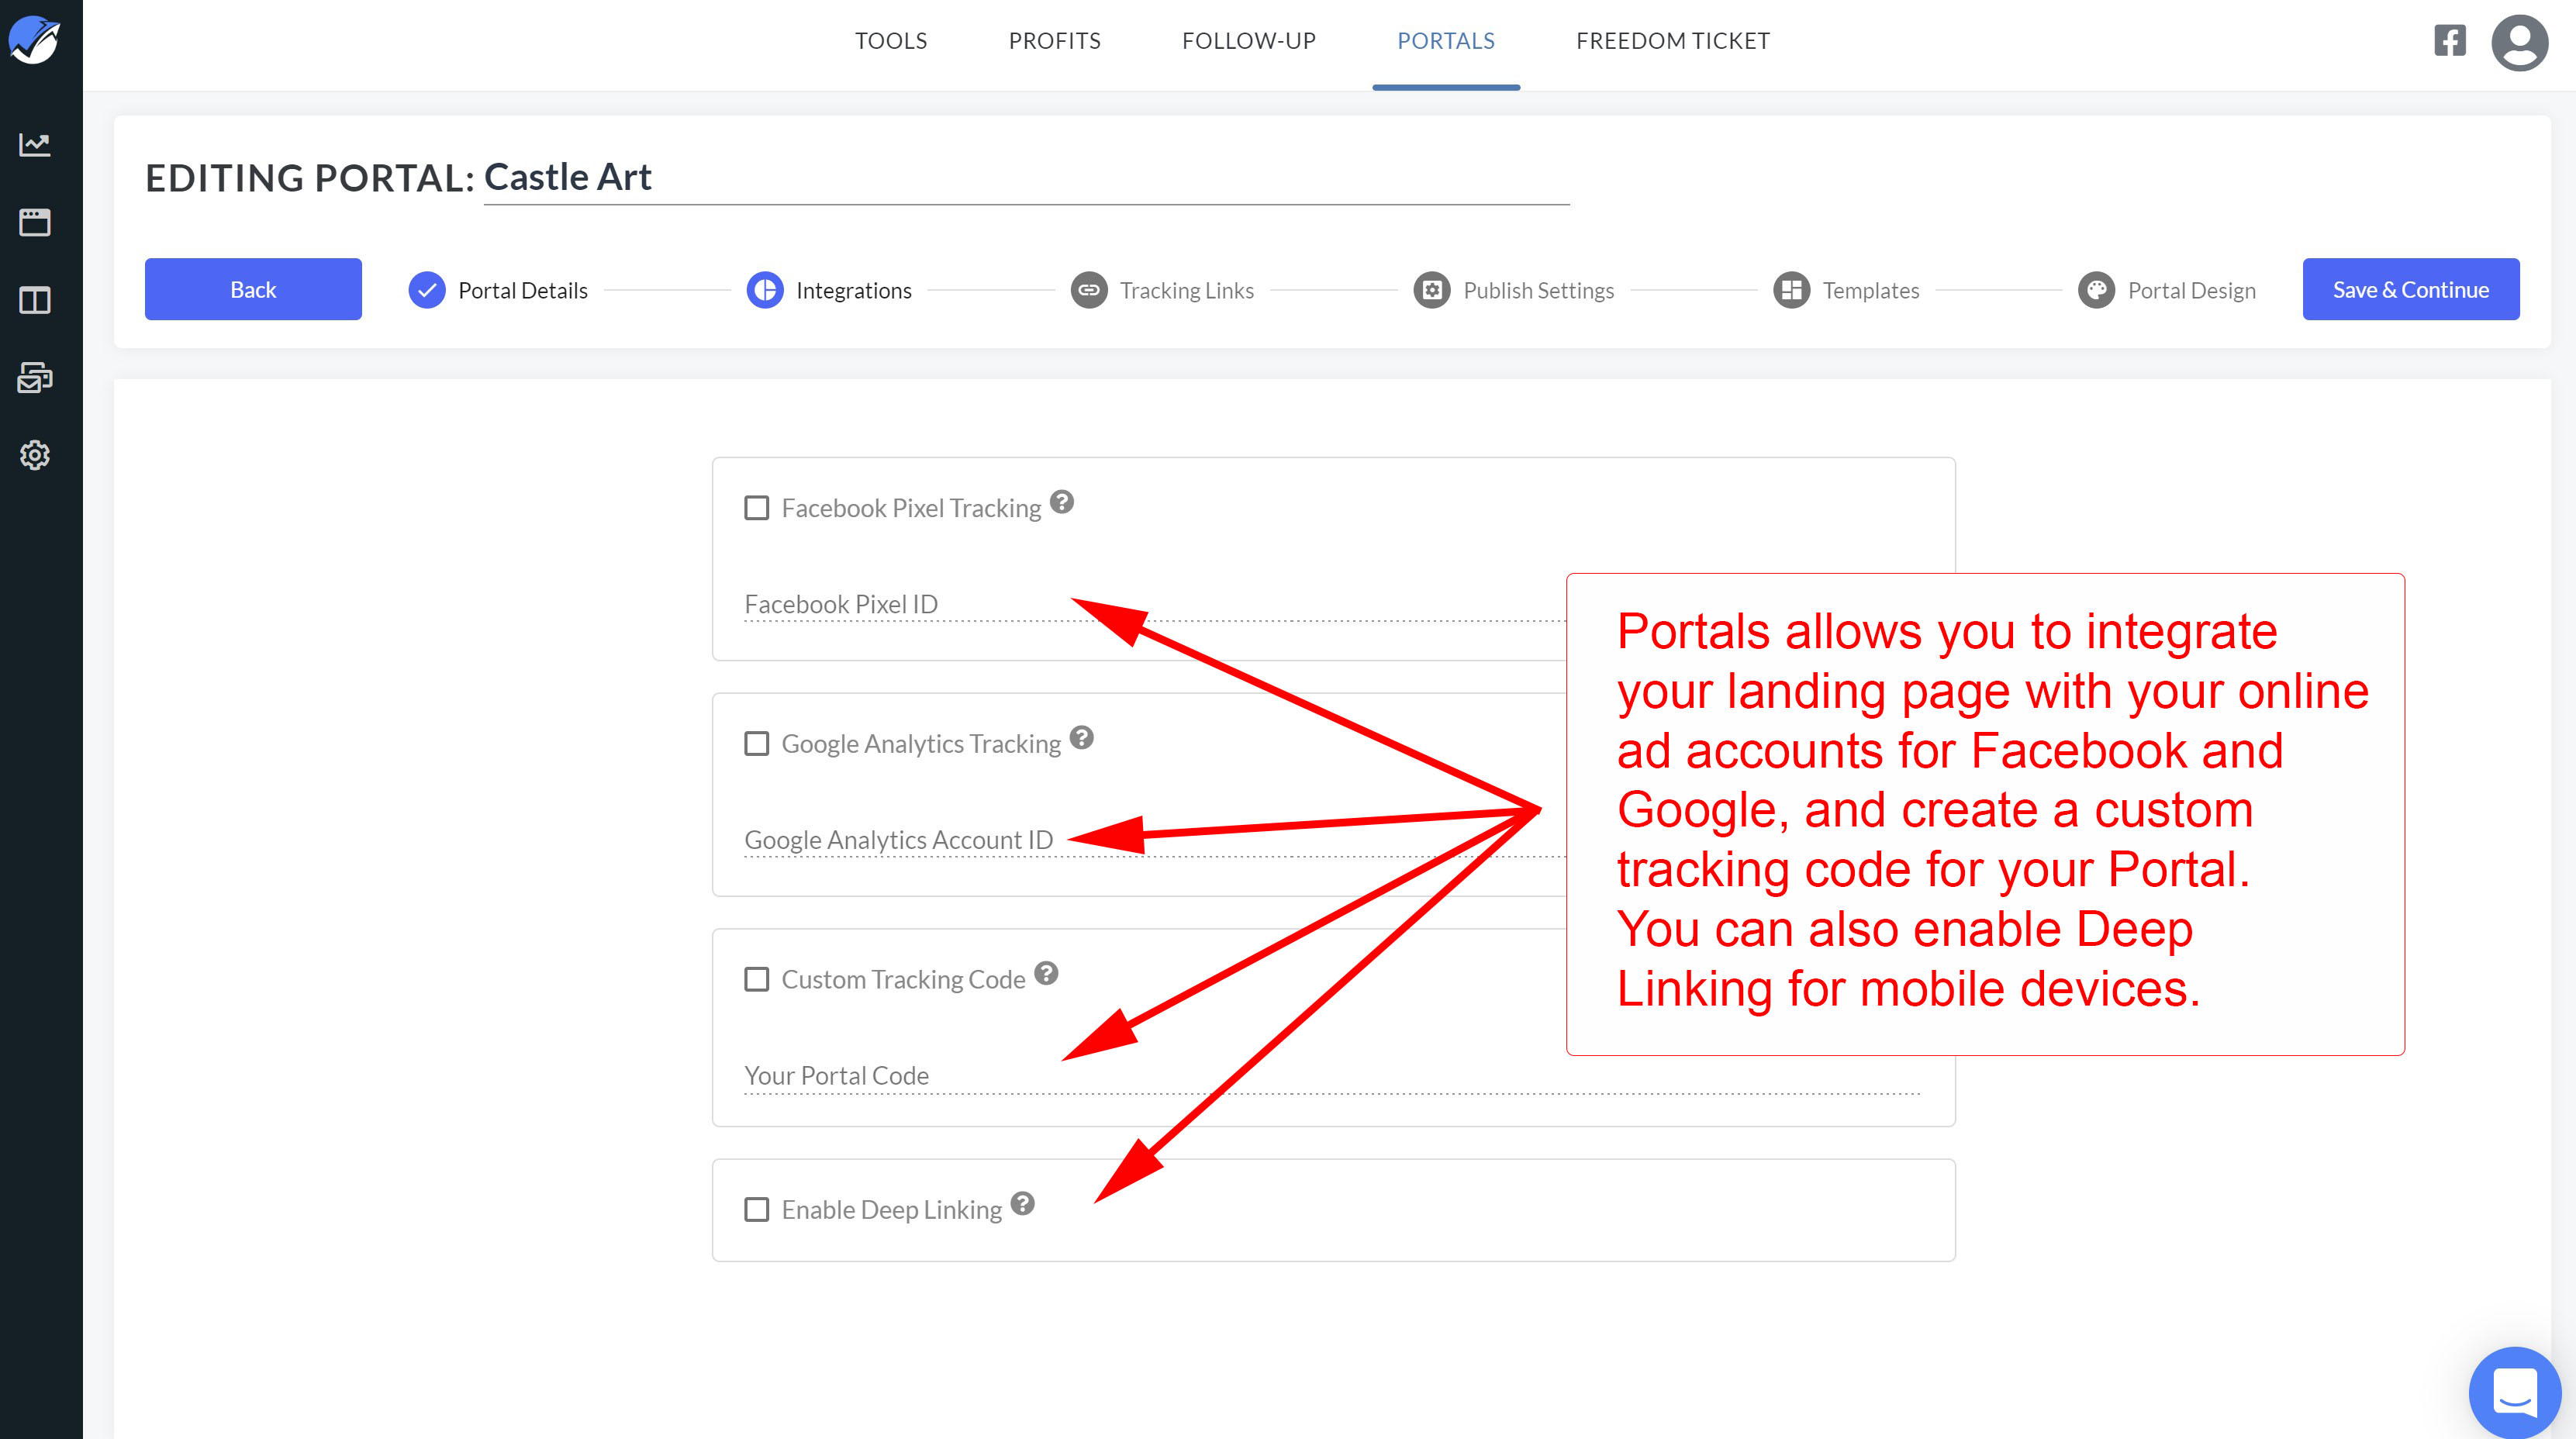
You'll notice along the top of the screen that Portals is monitoring the stages in the process of creating a Portal. Once you've reached the second step, you can revisit any stage, and revise your information at any time.

15. Portals easily lets you incorporate Helium 10's two-step process (originally Gems) into your promotion. Using two-step URLs in your ad campaigns can help increase the likelihood of your product sales being associated with specific keywords. If, along with your ad campaign, you're hoping to improve your product's rank in an Amazon organic search, you'll want to use one or more of these two-step URLs.
![]()
![]()
16. Review the types of two-step URL generators are possible, and then click on the gold Add button for the type you'd like to create.
![]()
17. A new window will open. Type in the keywords that you want to appear in the URL linking to your product on Amazon. Click the blue Save & Continue button in the upper right corner. This action will return you to the Two-Step menu page, where you can chose to create another unique URL.
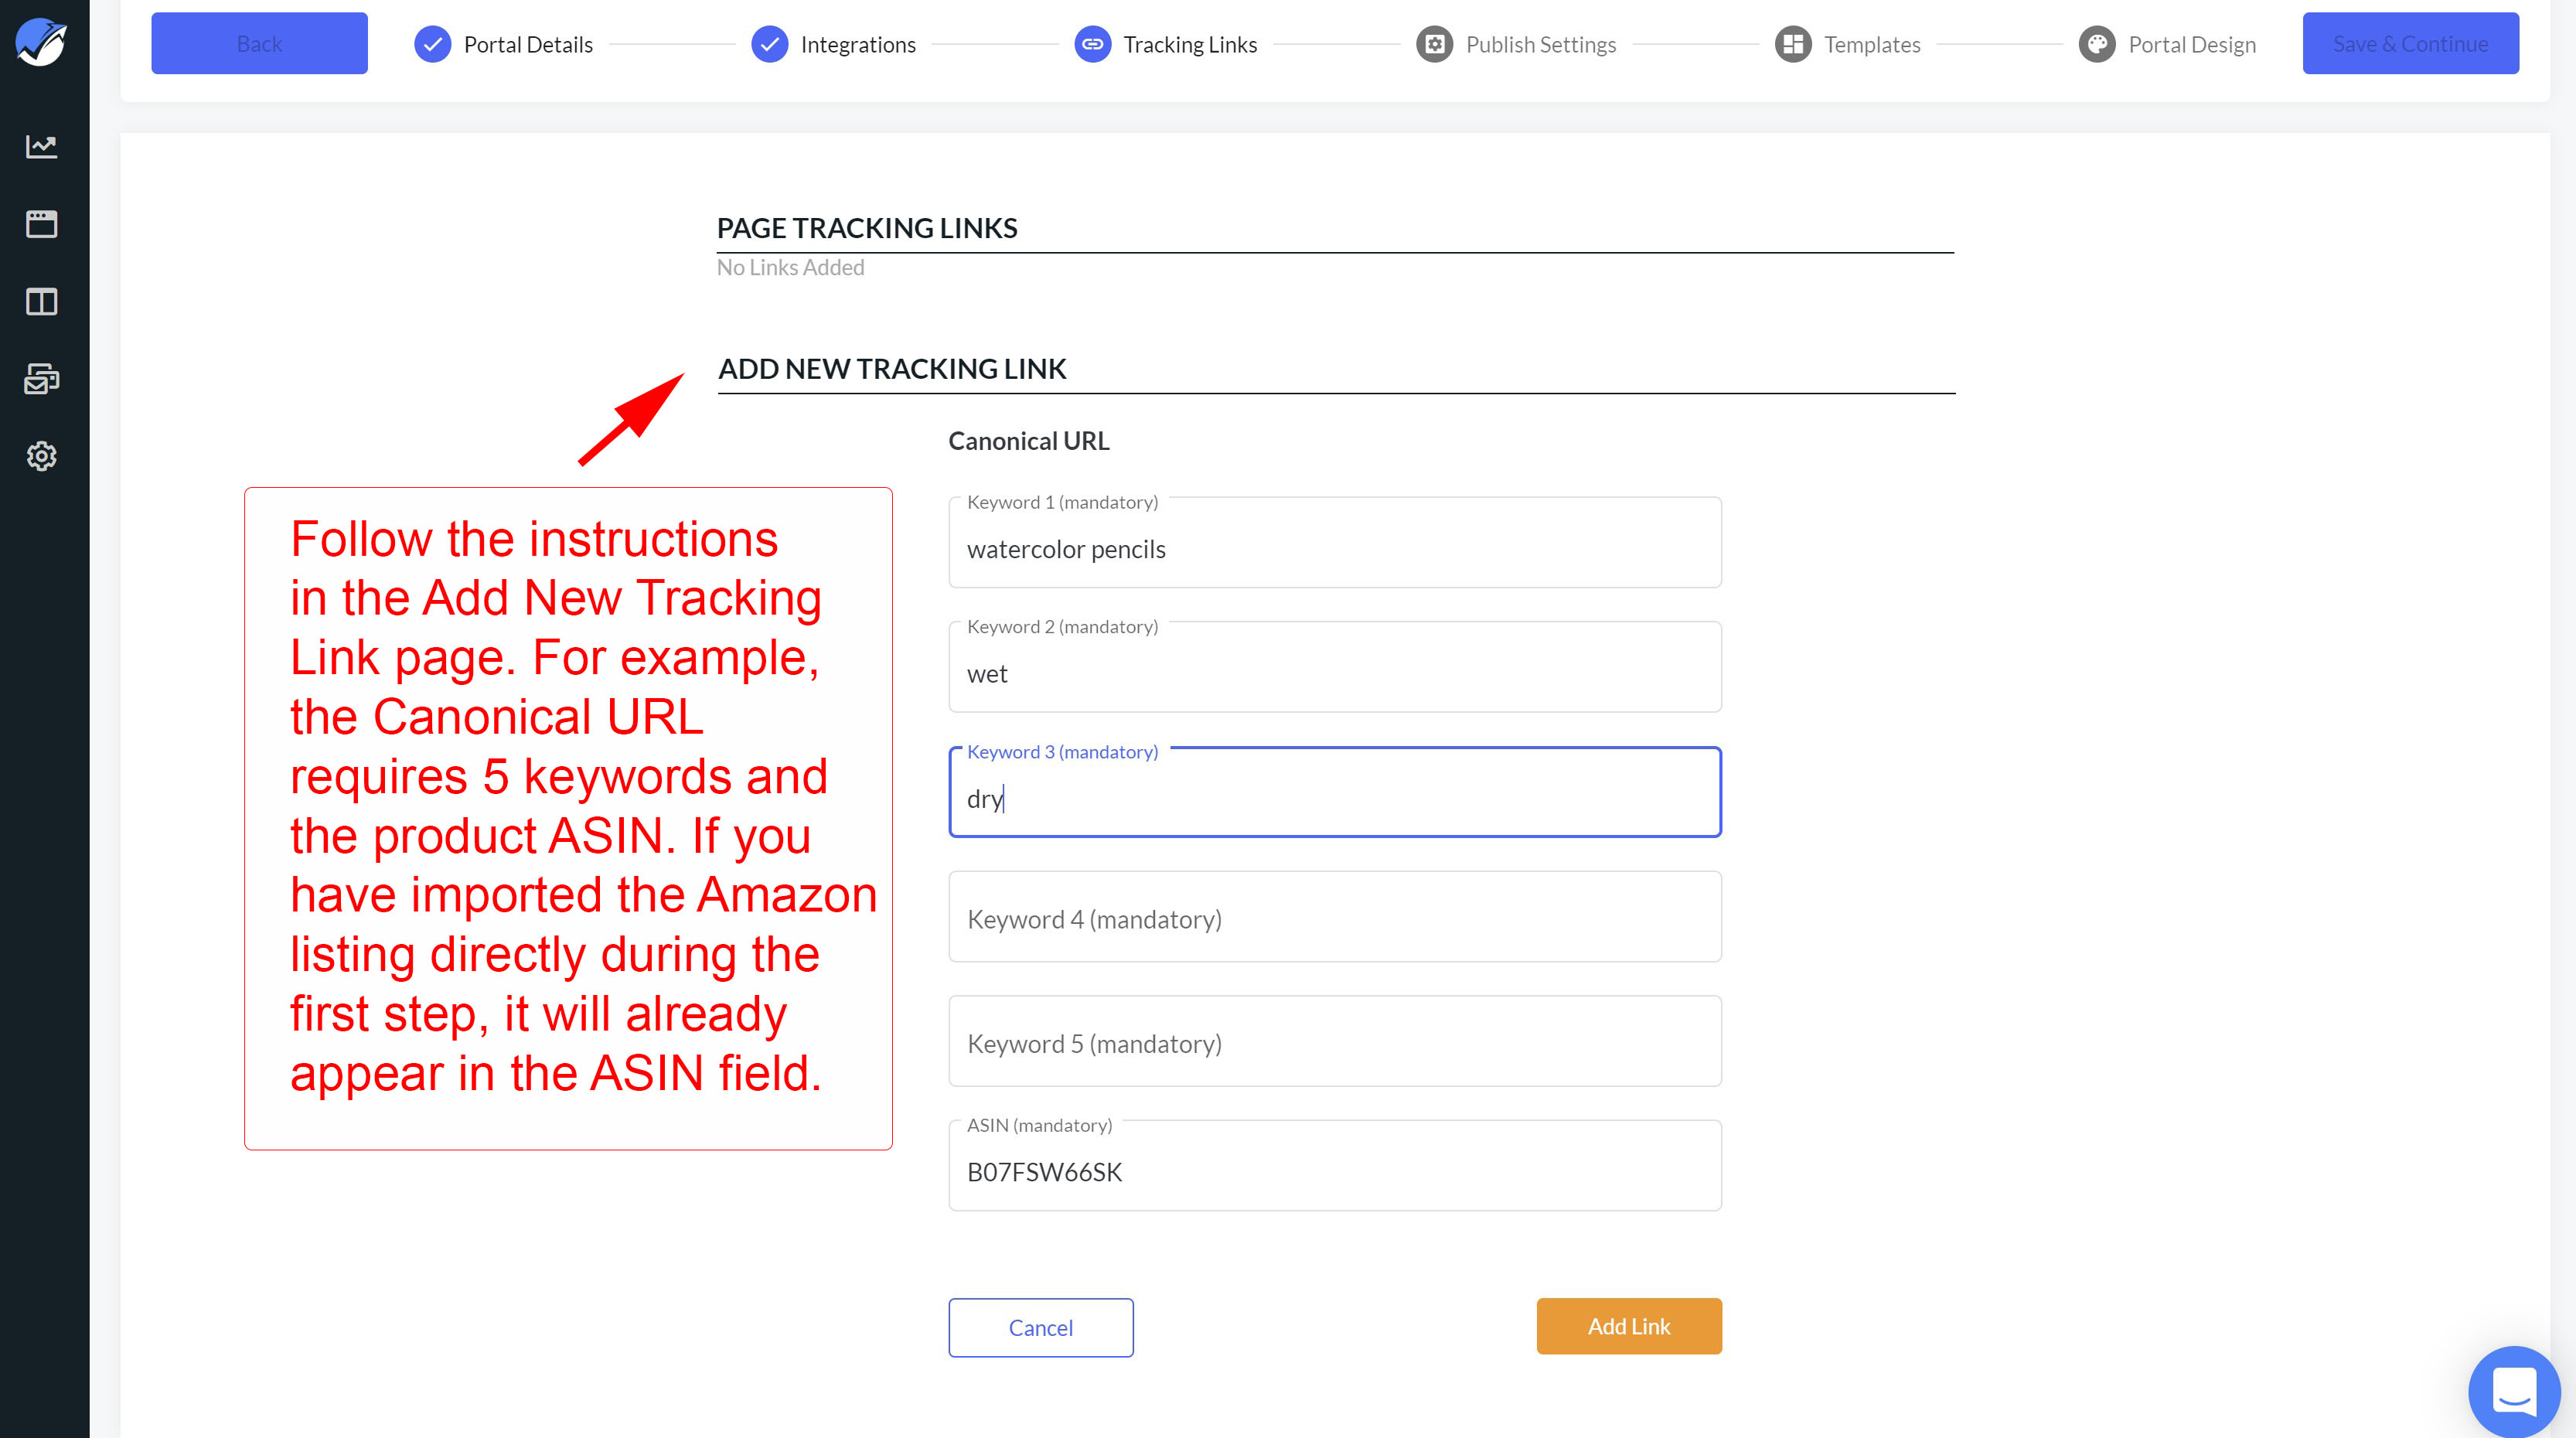
18. You can create as many tracking links as you like. Portals saves them for you and keeps them located, ready for use, under the Page Tracking Links section of your Tracking Links window. During a campaign, Portals will rotate customers through these 2-step URLs.
To move to the next stage, click on the blue Save & Continue button.
![]()
19. When you are done creating unique two-step URLs, click the Save & Continue button to move forward to the Publishing Settings section. Here, you can enable Portals to collect emails and share coupon links. At the moment, Portals only supports general use coupon codes. We recommend setting limits on the number of purchases per product at one time in Seller Central to prevent a run on your stock.
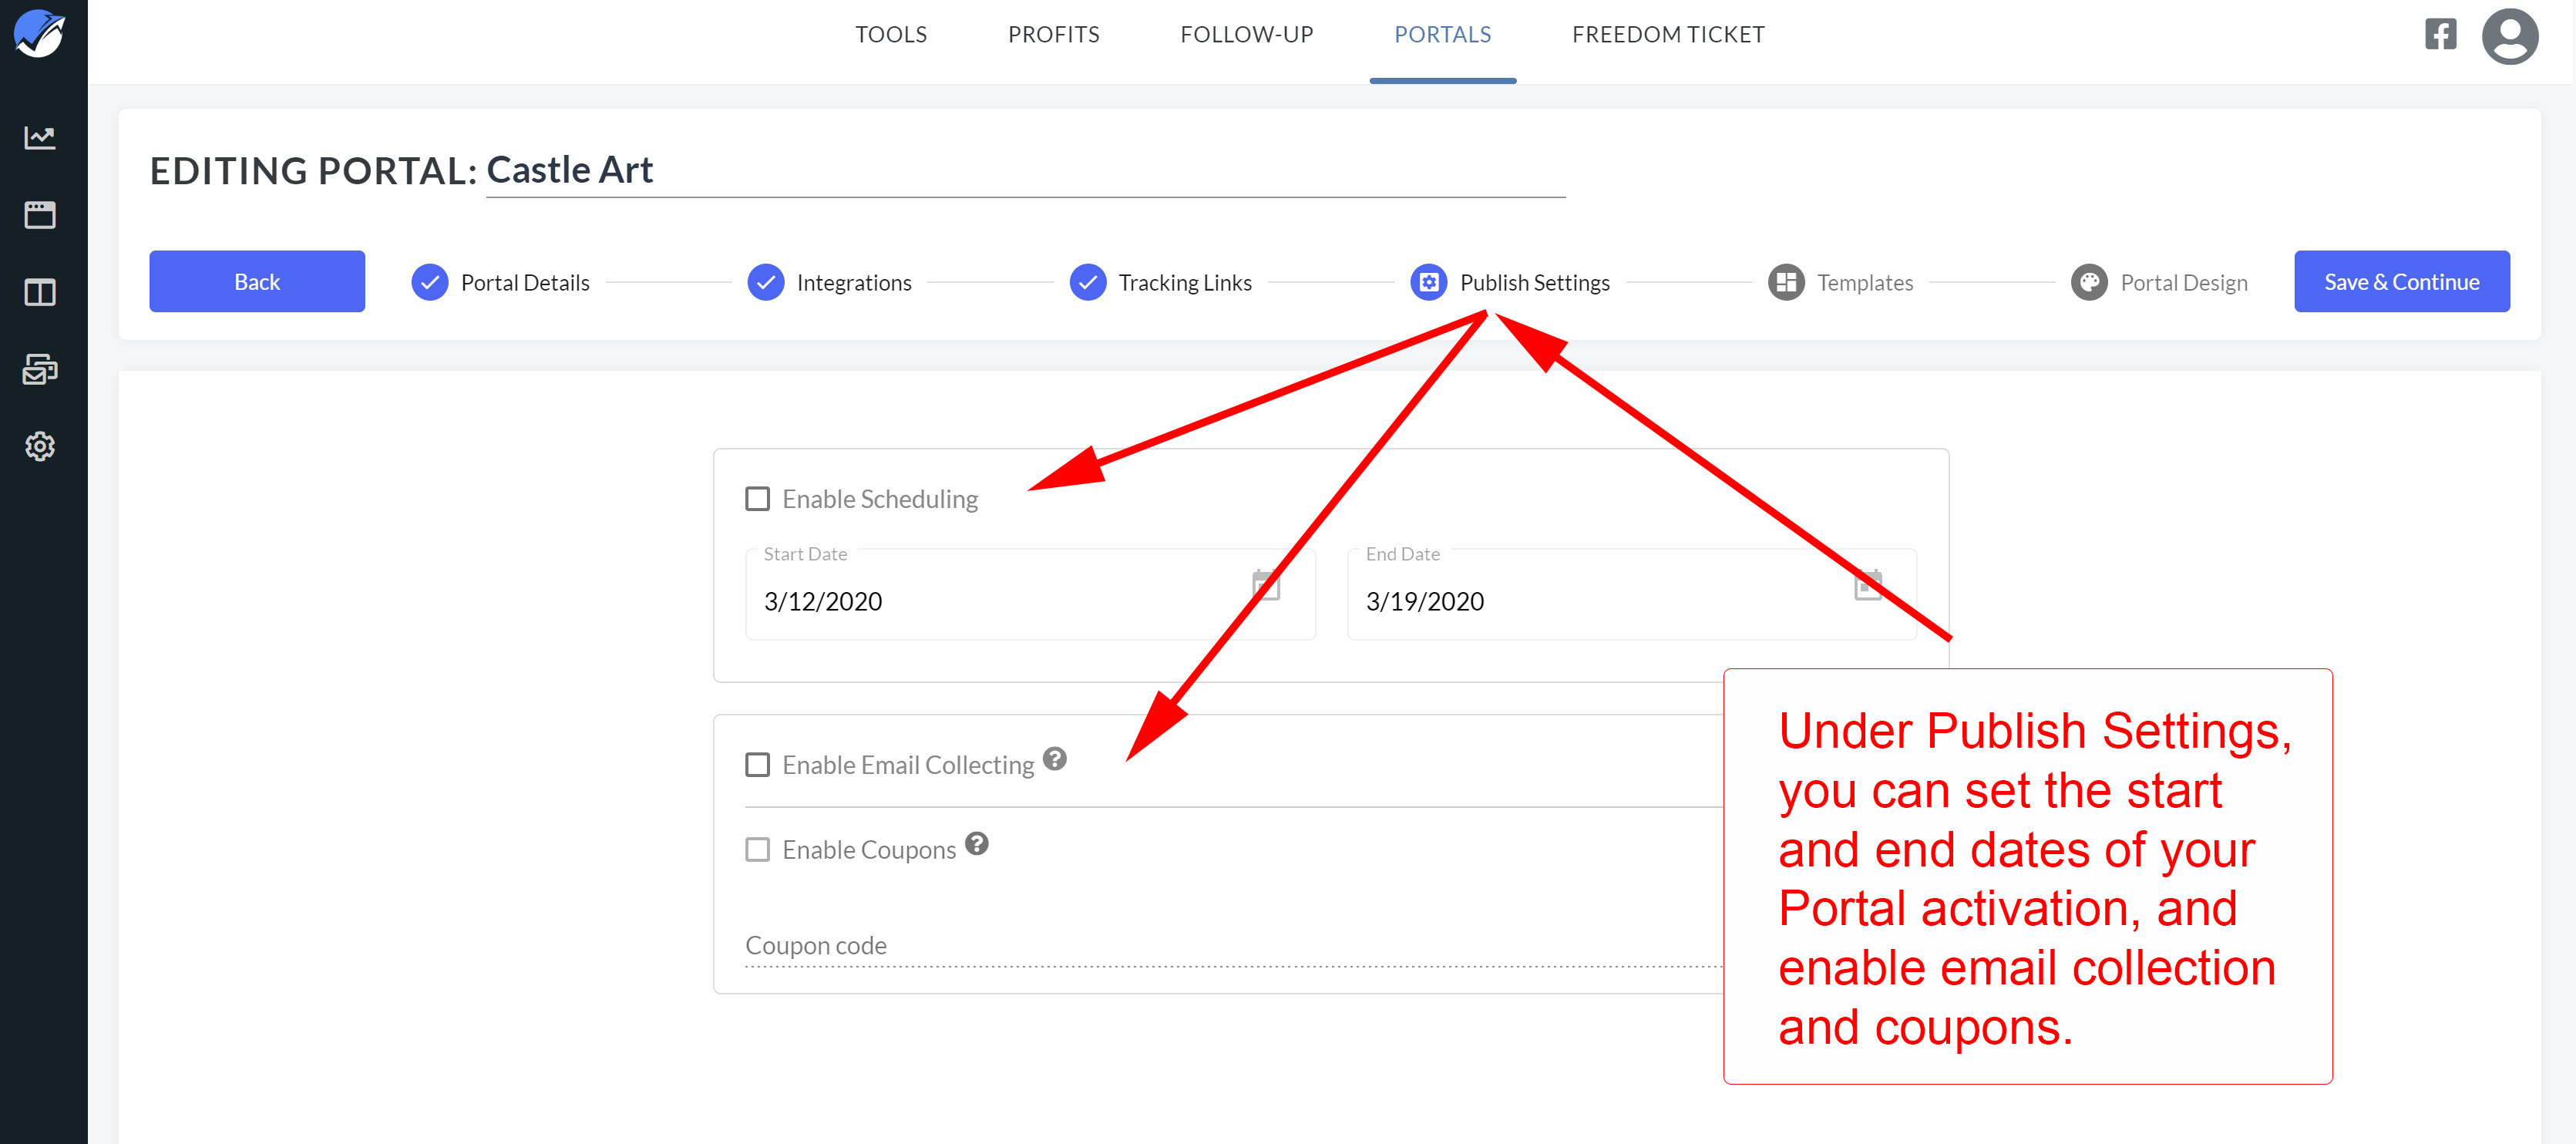
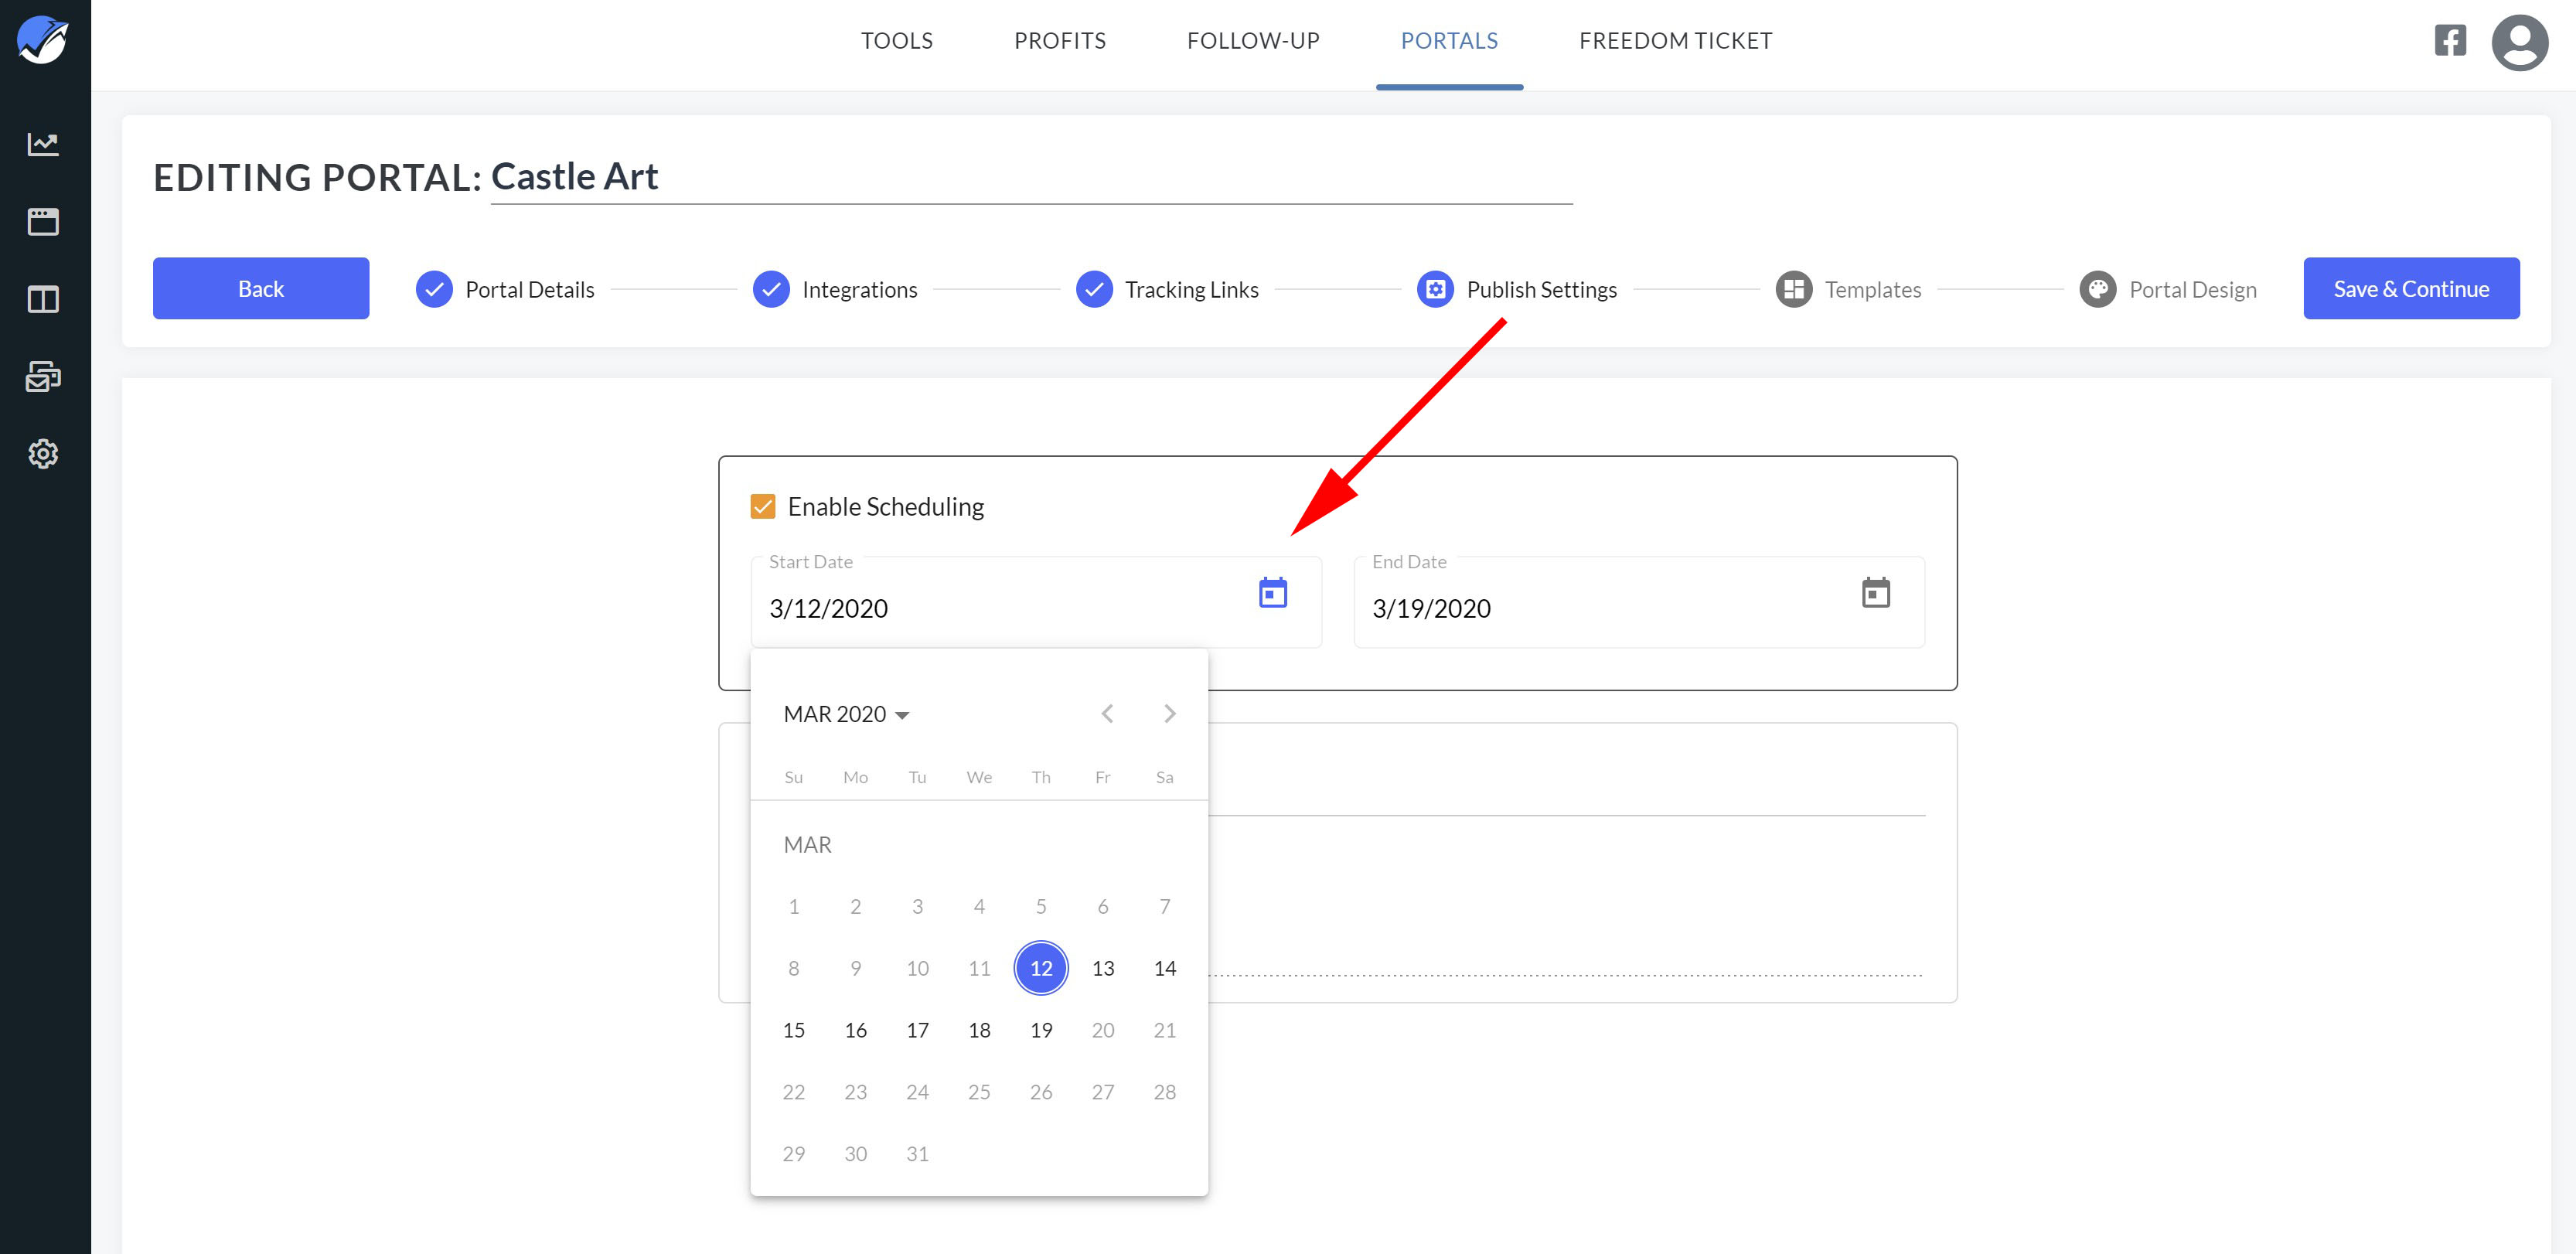
To set the date range of the promotional run, click on the small calendar icons in the Enable Scheduling section of the window.
20. On the second to last step, you'll be offered premade templates. For this tutorial, we chose to create a product landing page, so we're offered templates specific to this purpose. Click on the desired Premade Template and click the blue Save & Continue button in the top right corner.
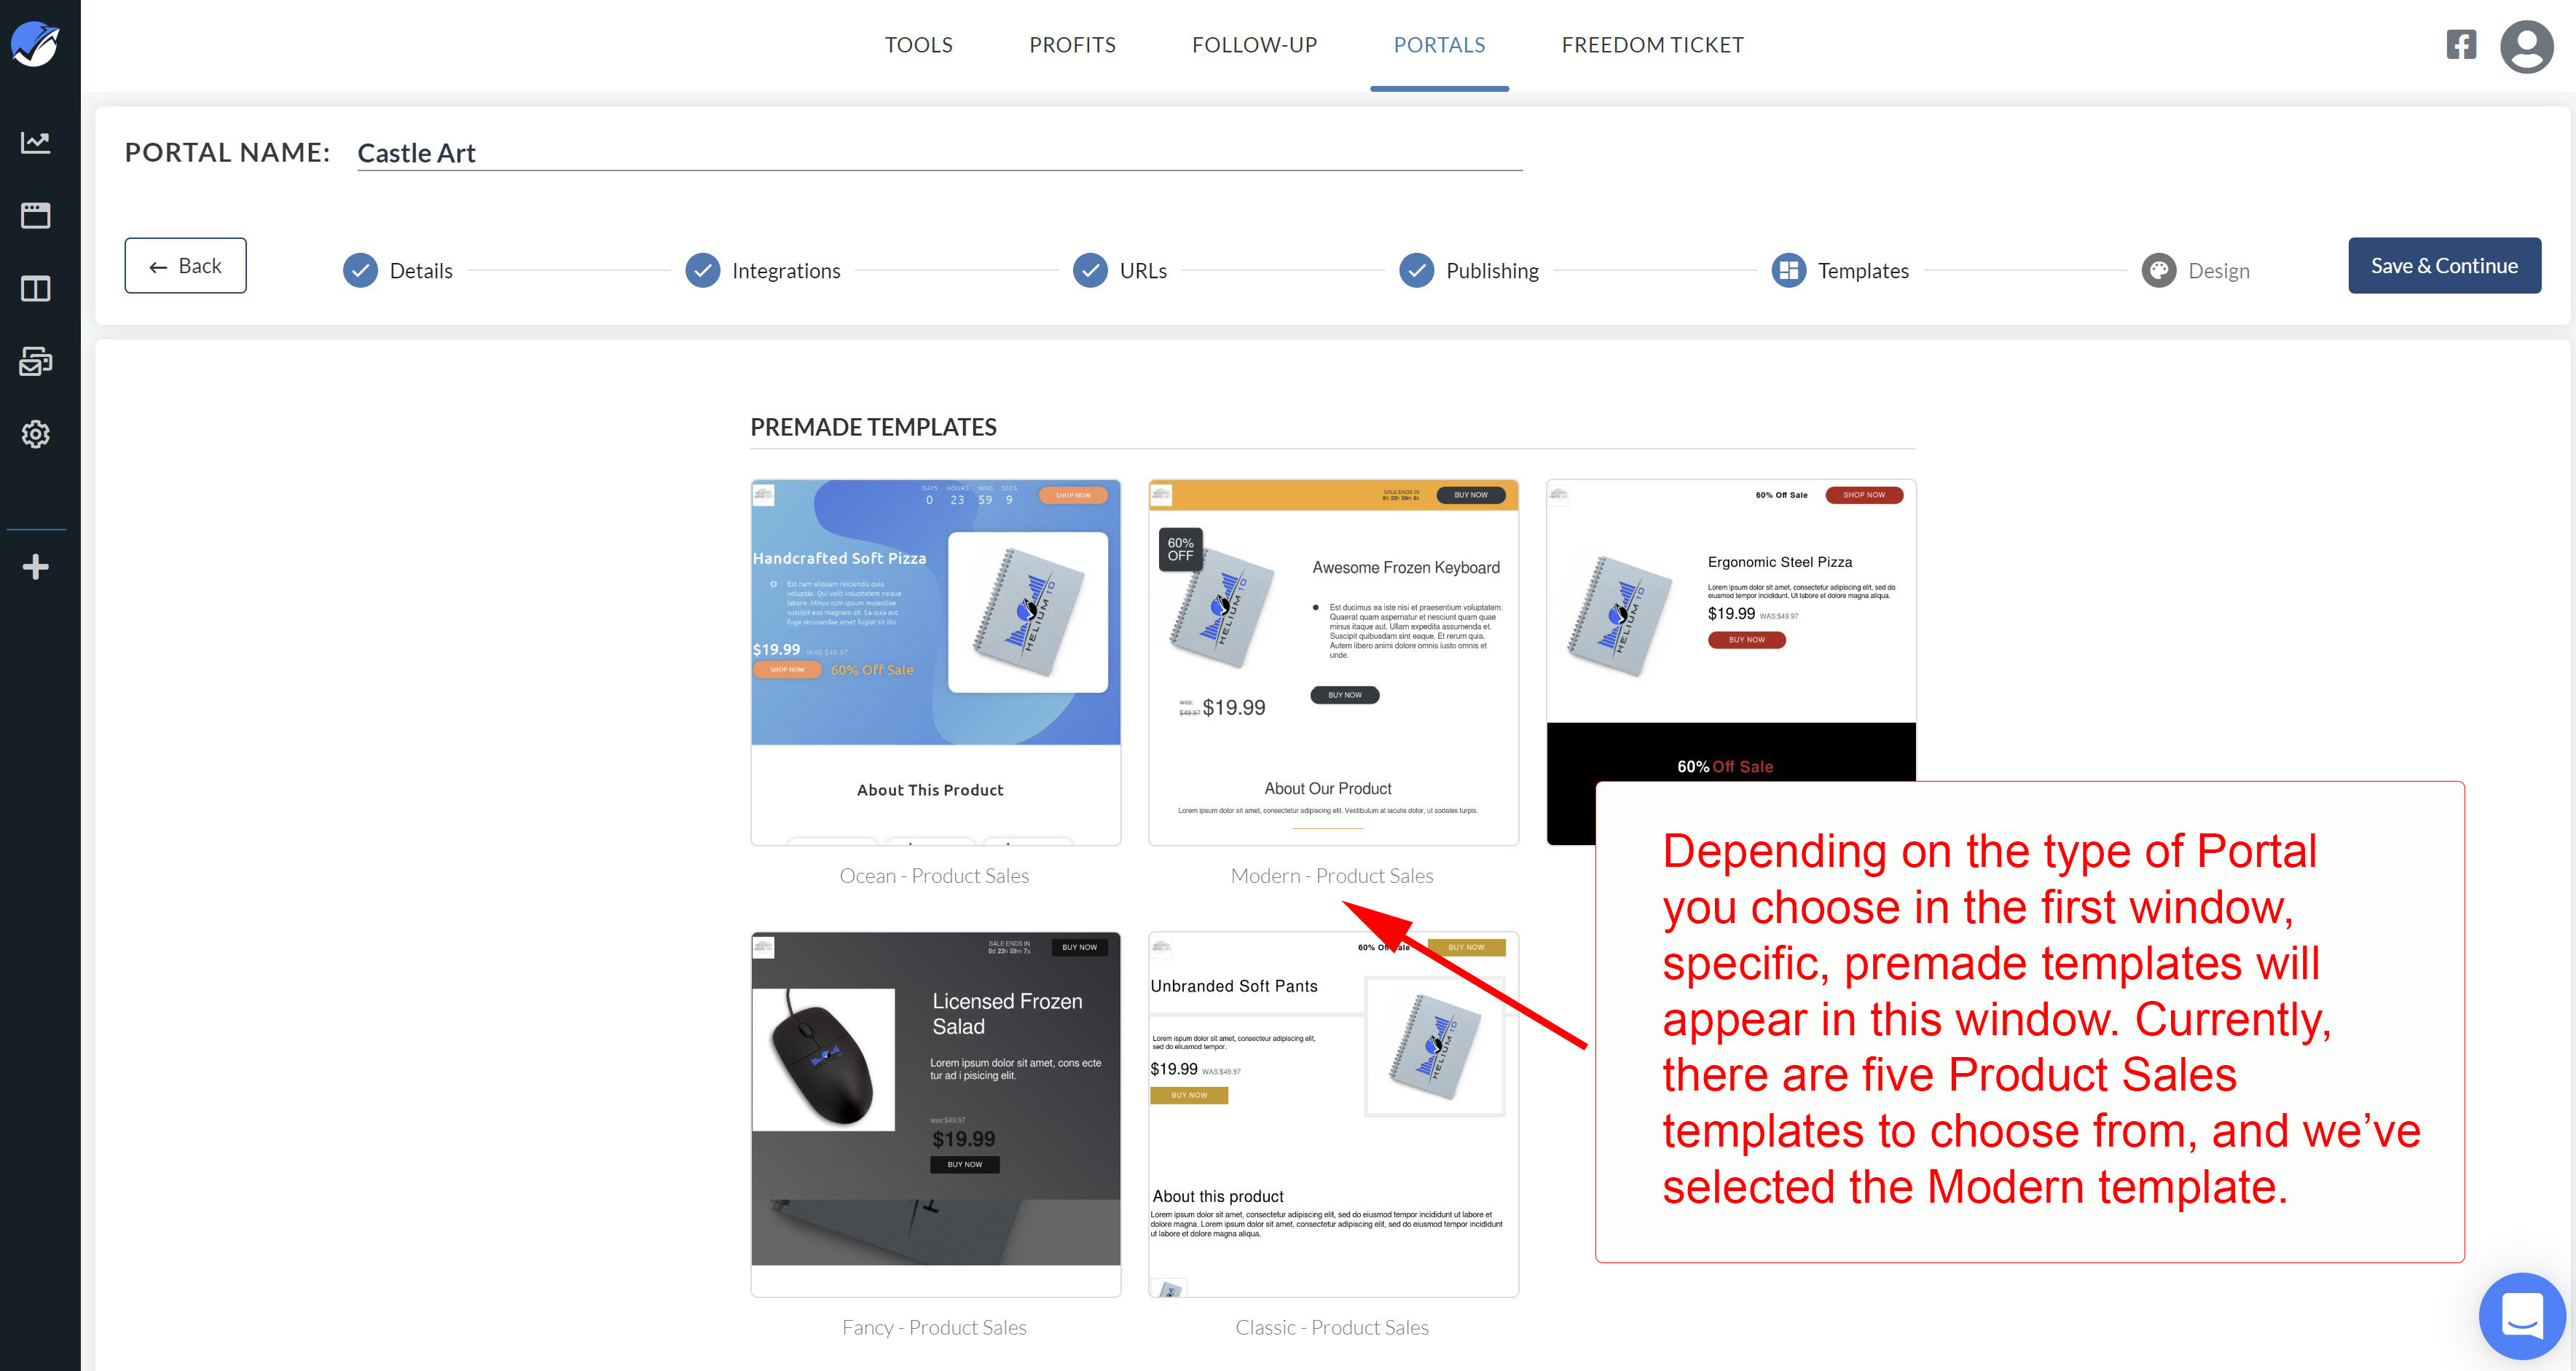
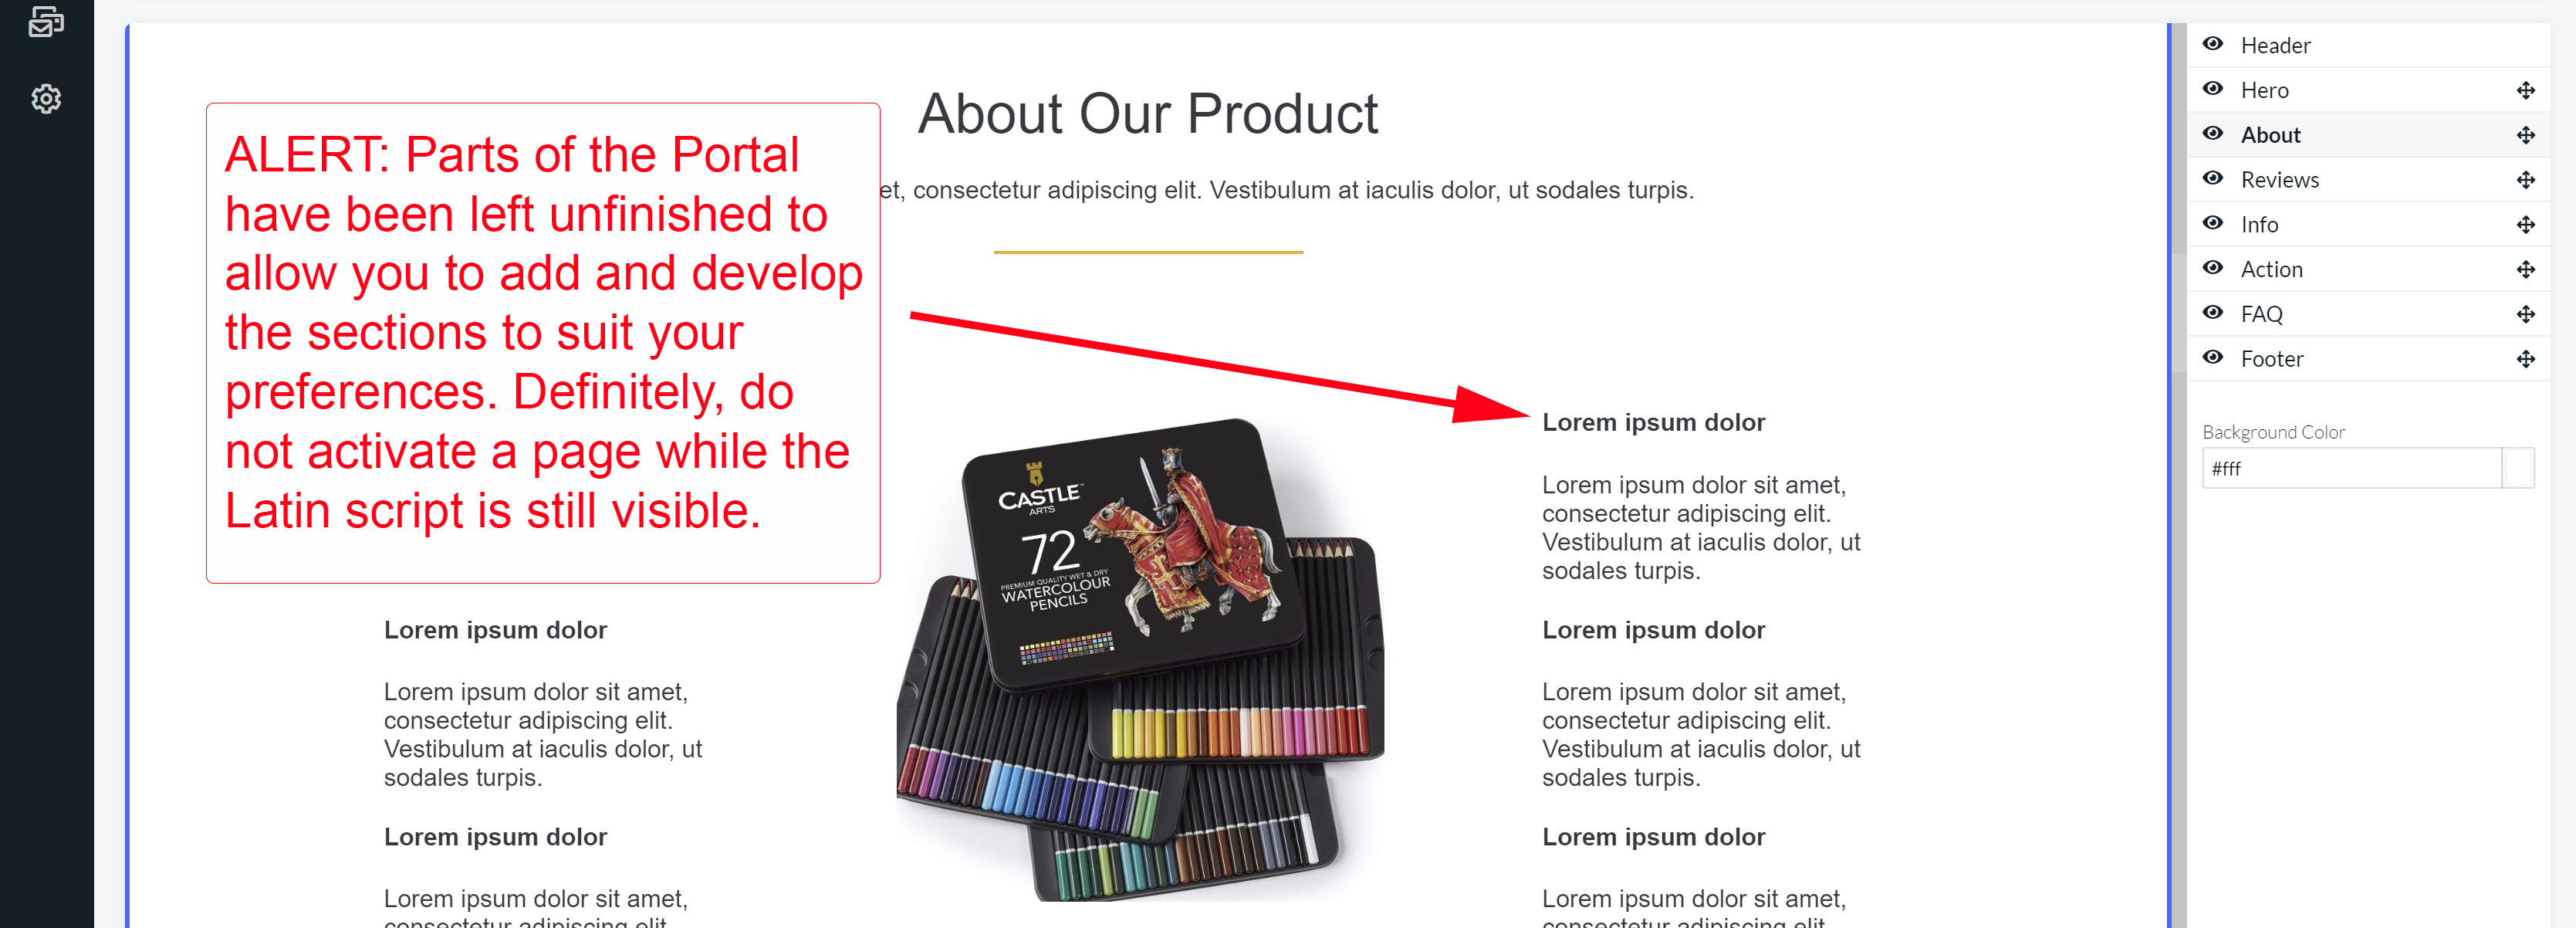
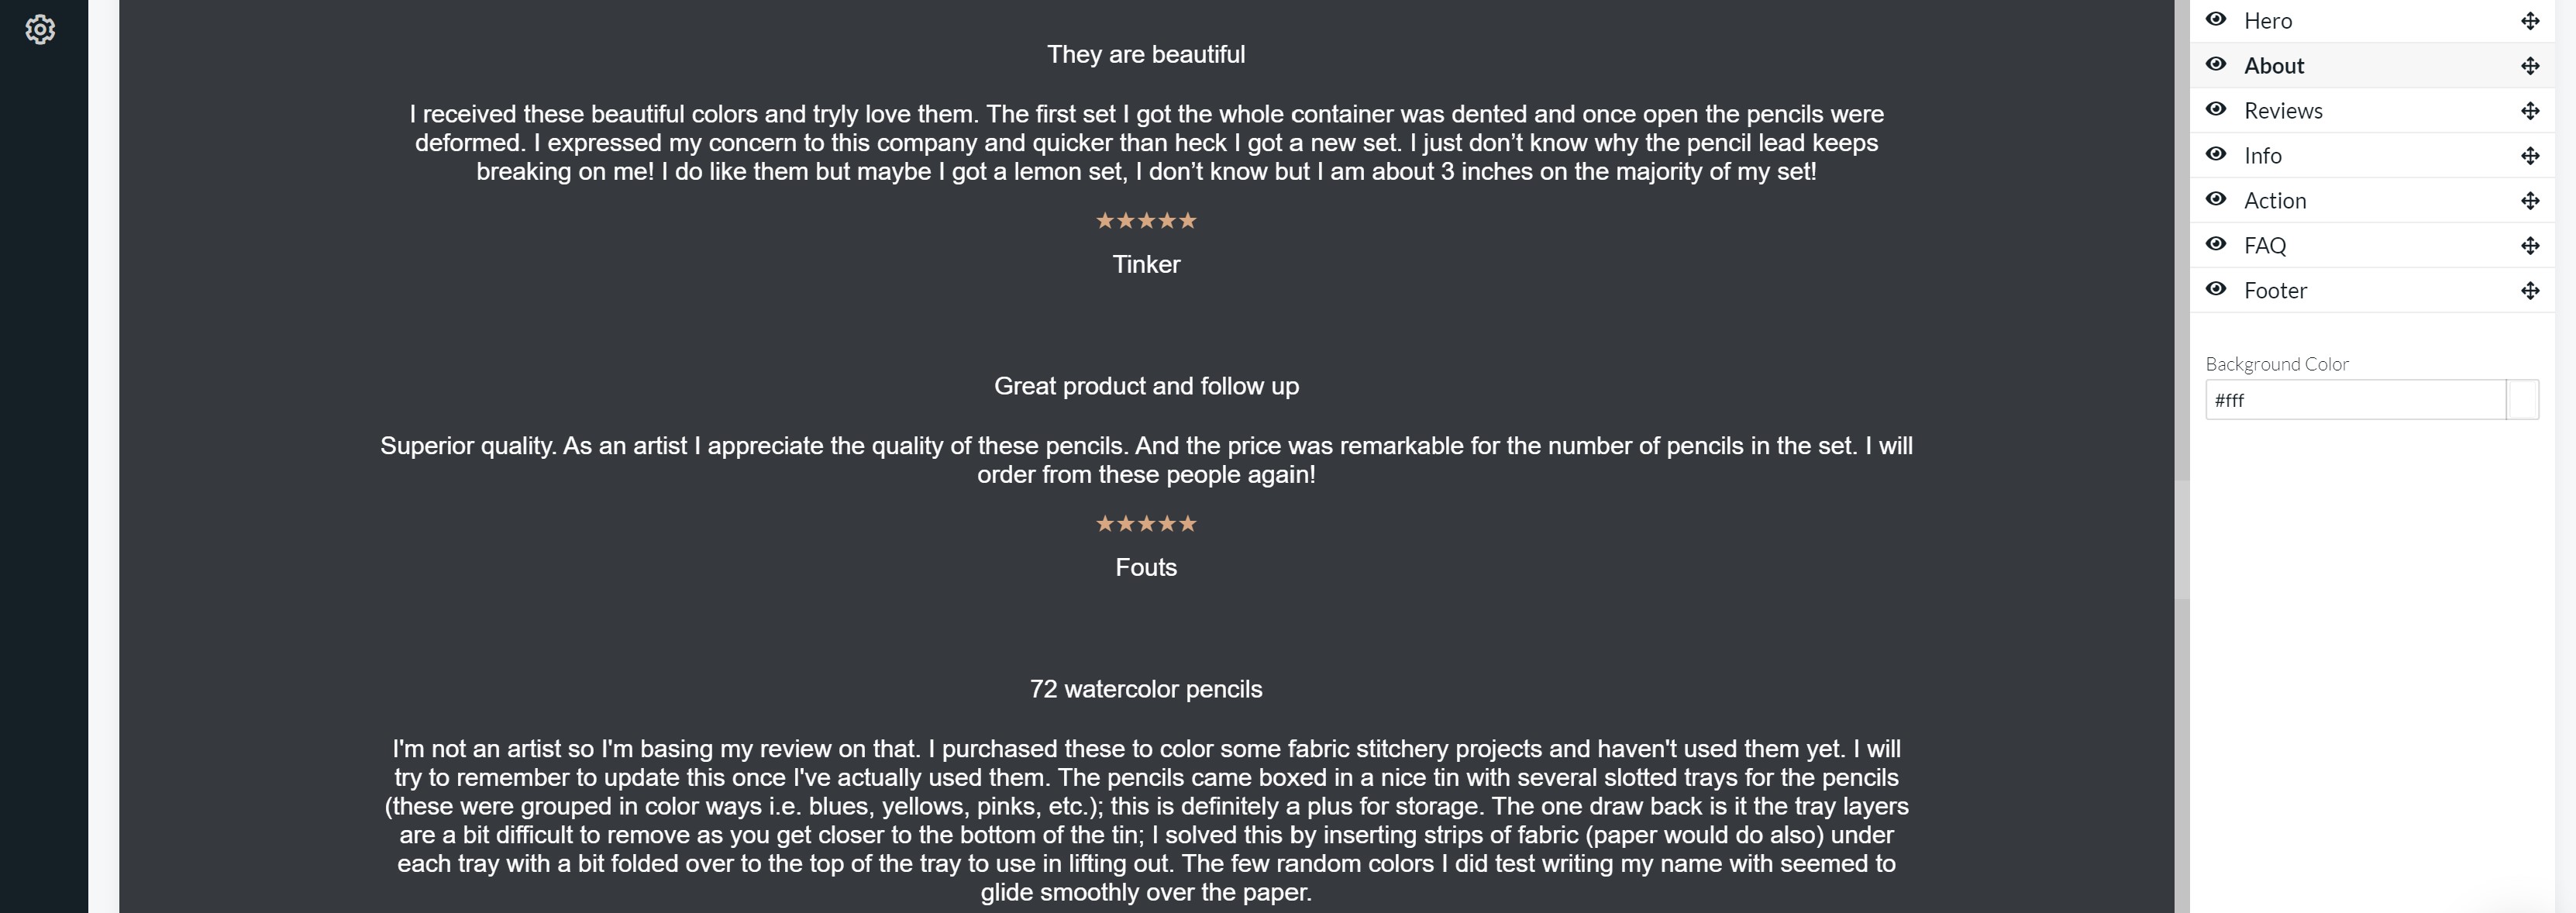
21. The final stage in creating your Portal is reviewing, editing, and adding to your landing page. The template has a number of sections where you can expand the information that you imported from your listing. To edit and change things, you can simply click on the item and make the changes. Options expand in the right-hand menu. Sections include:
- The imported listing images and bullet points
- An About Our Product area to teach your customers about your brand
- Imported top 5 star reviews about your product
- Buy Now buttons
- FAQ section for questions and answers relevant to your product
You can also change background colors throughout the page to help emphasize your brand identity.
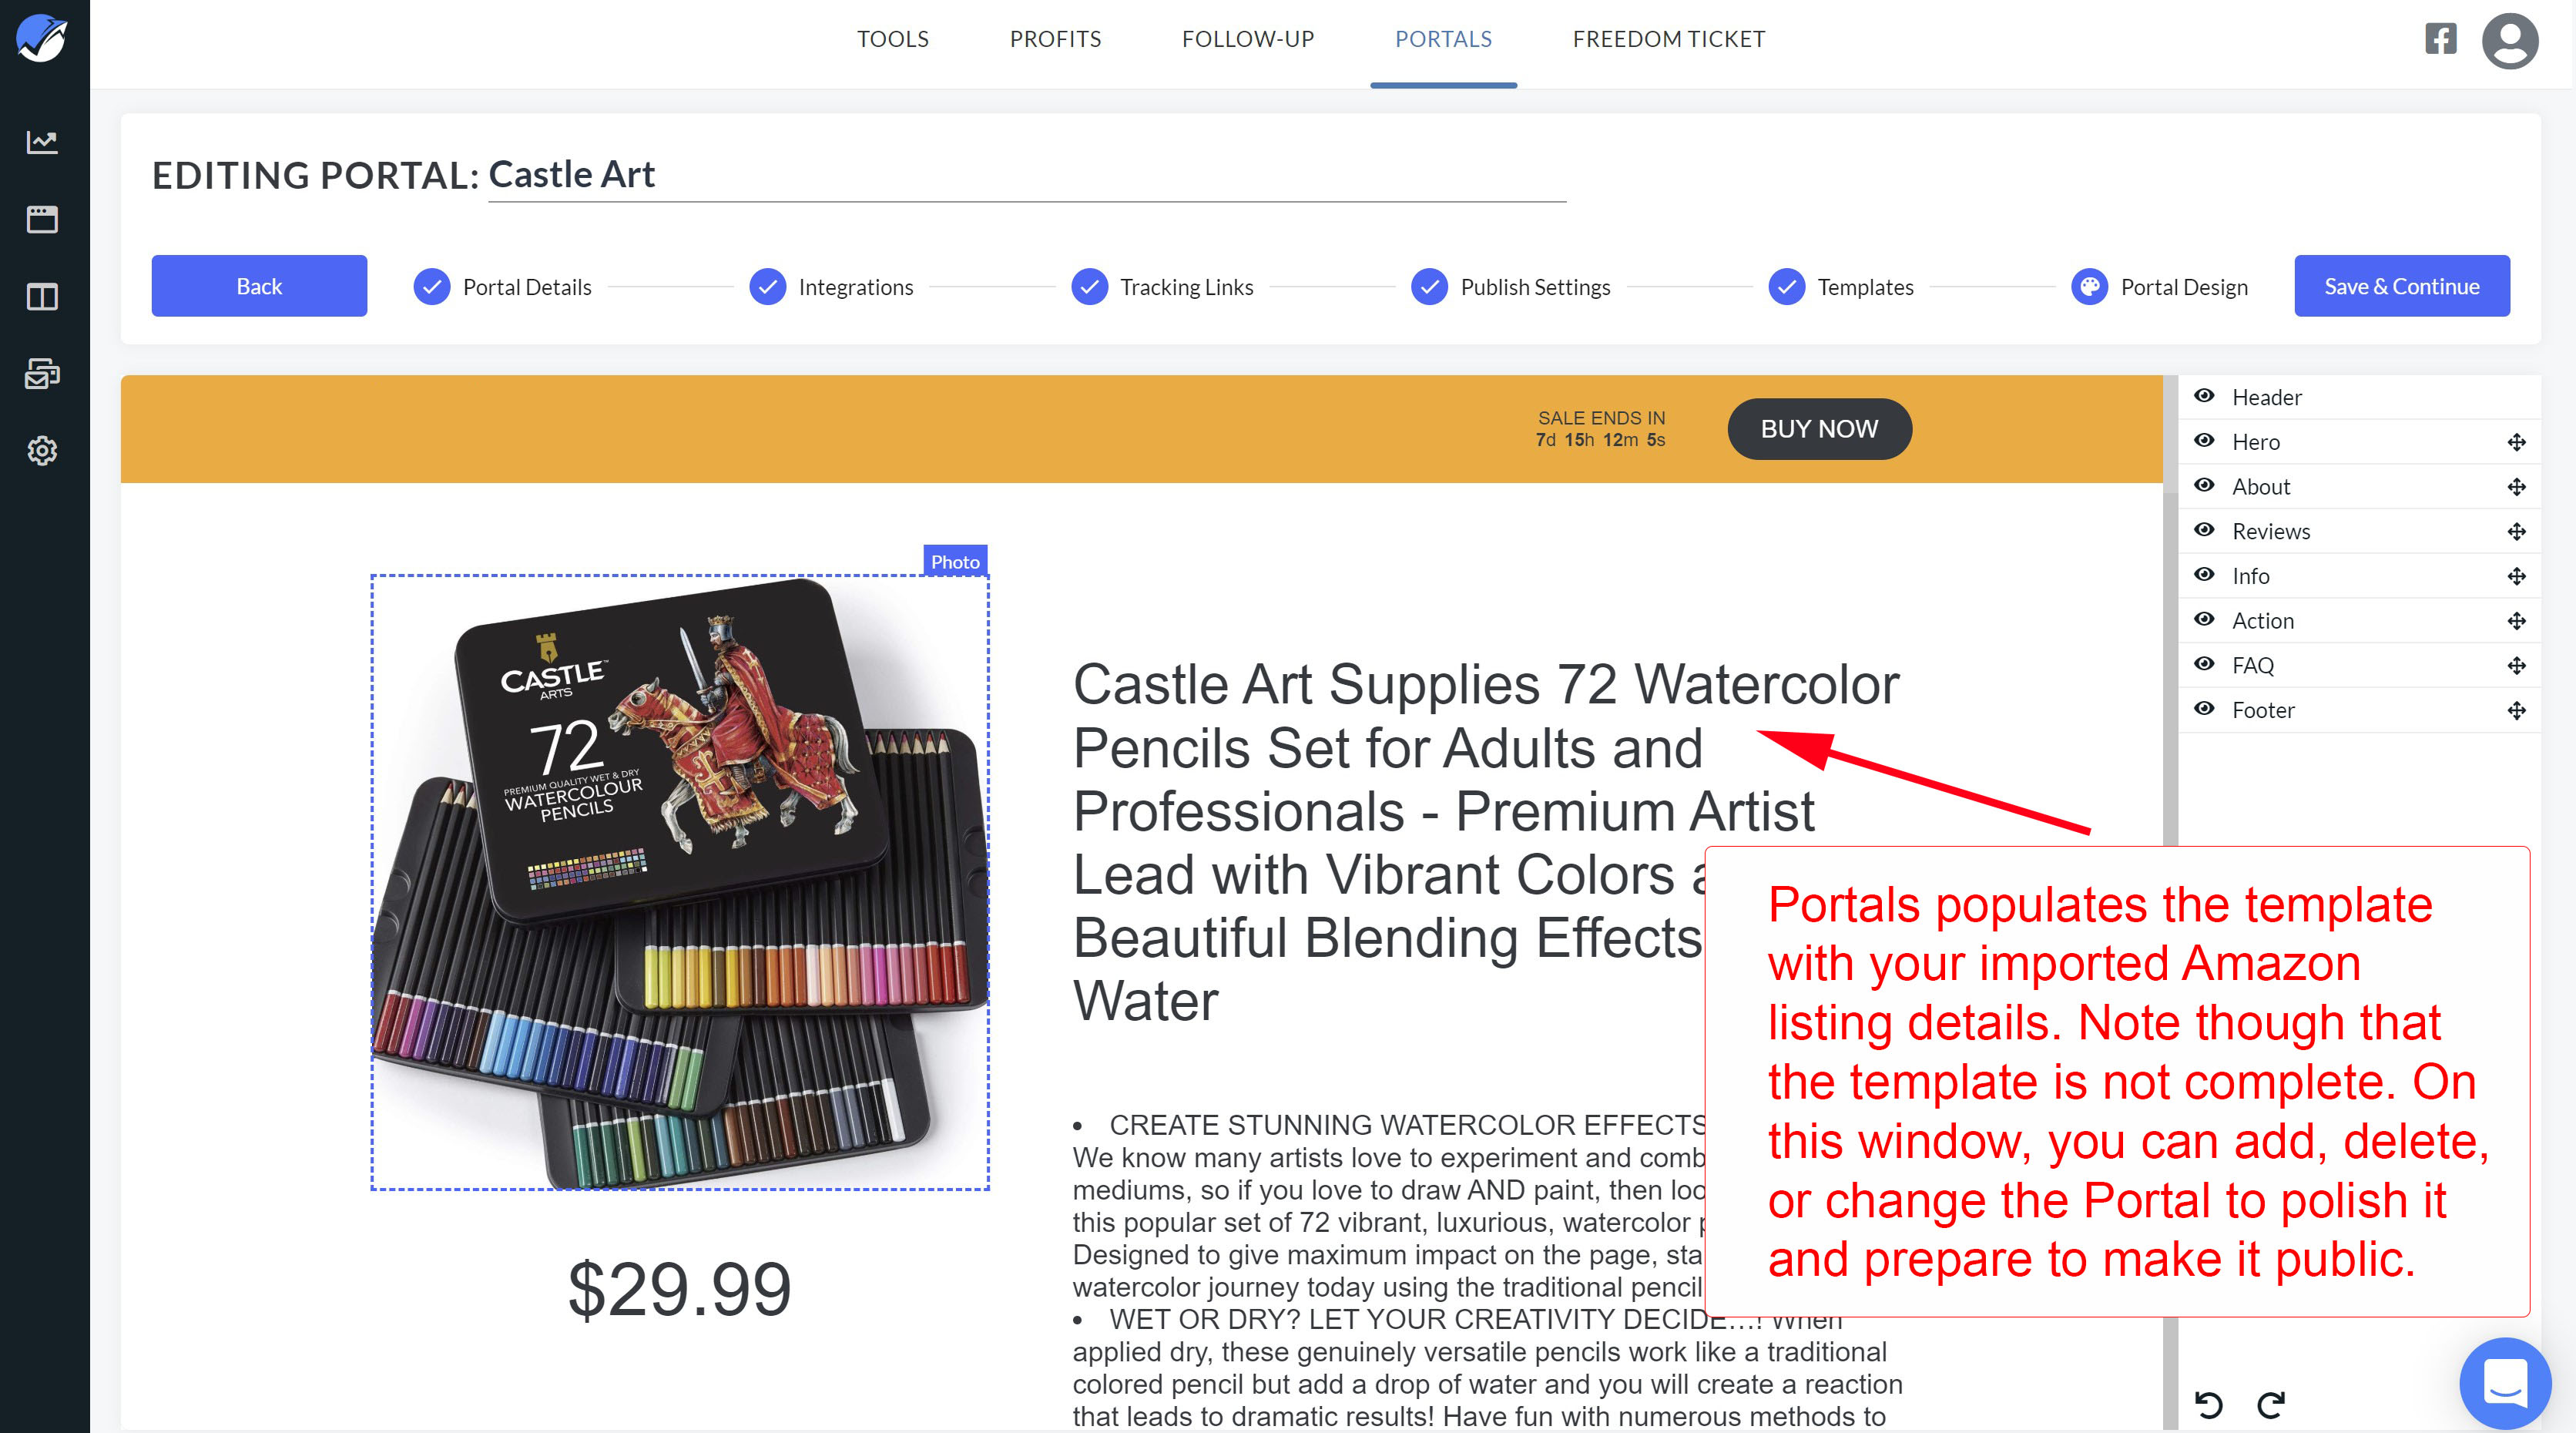



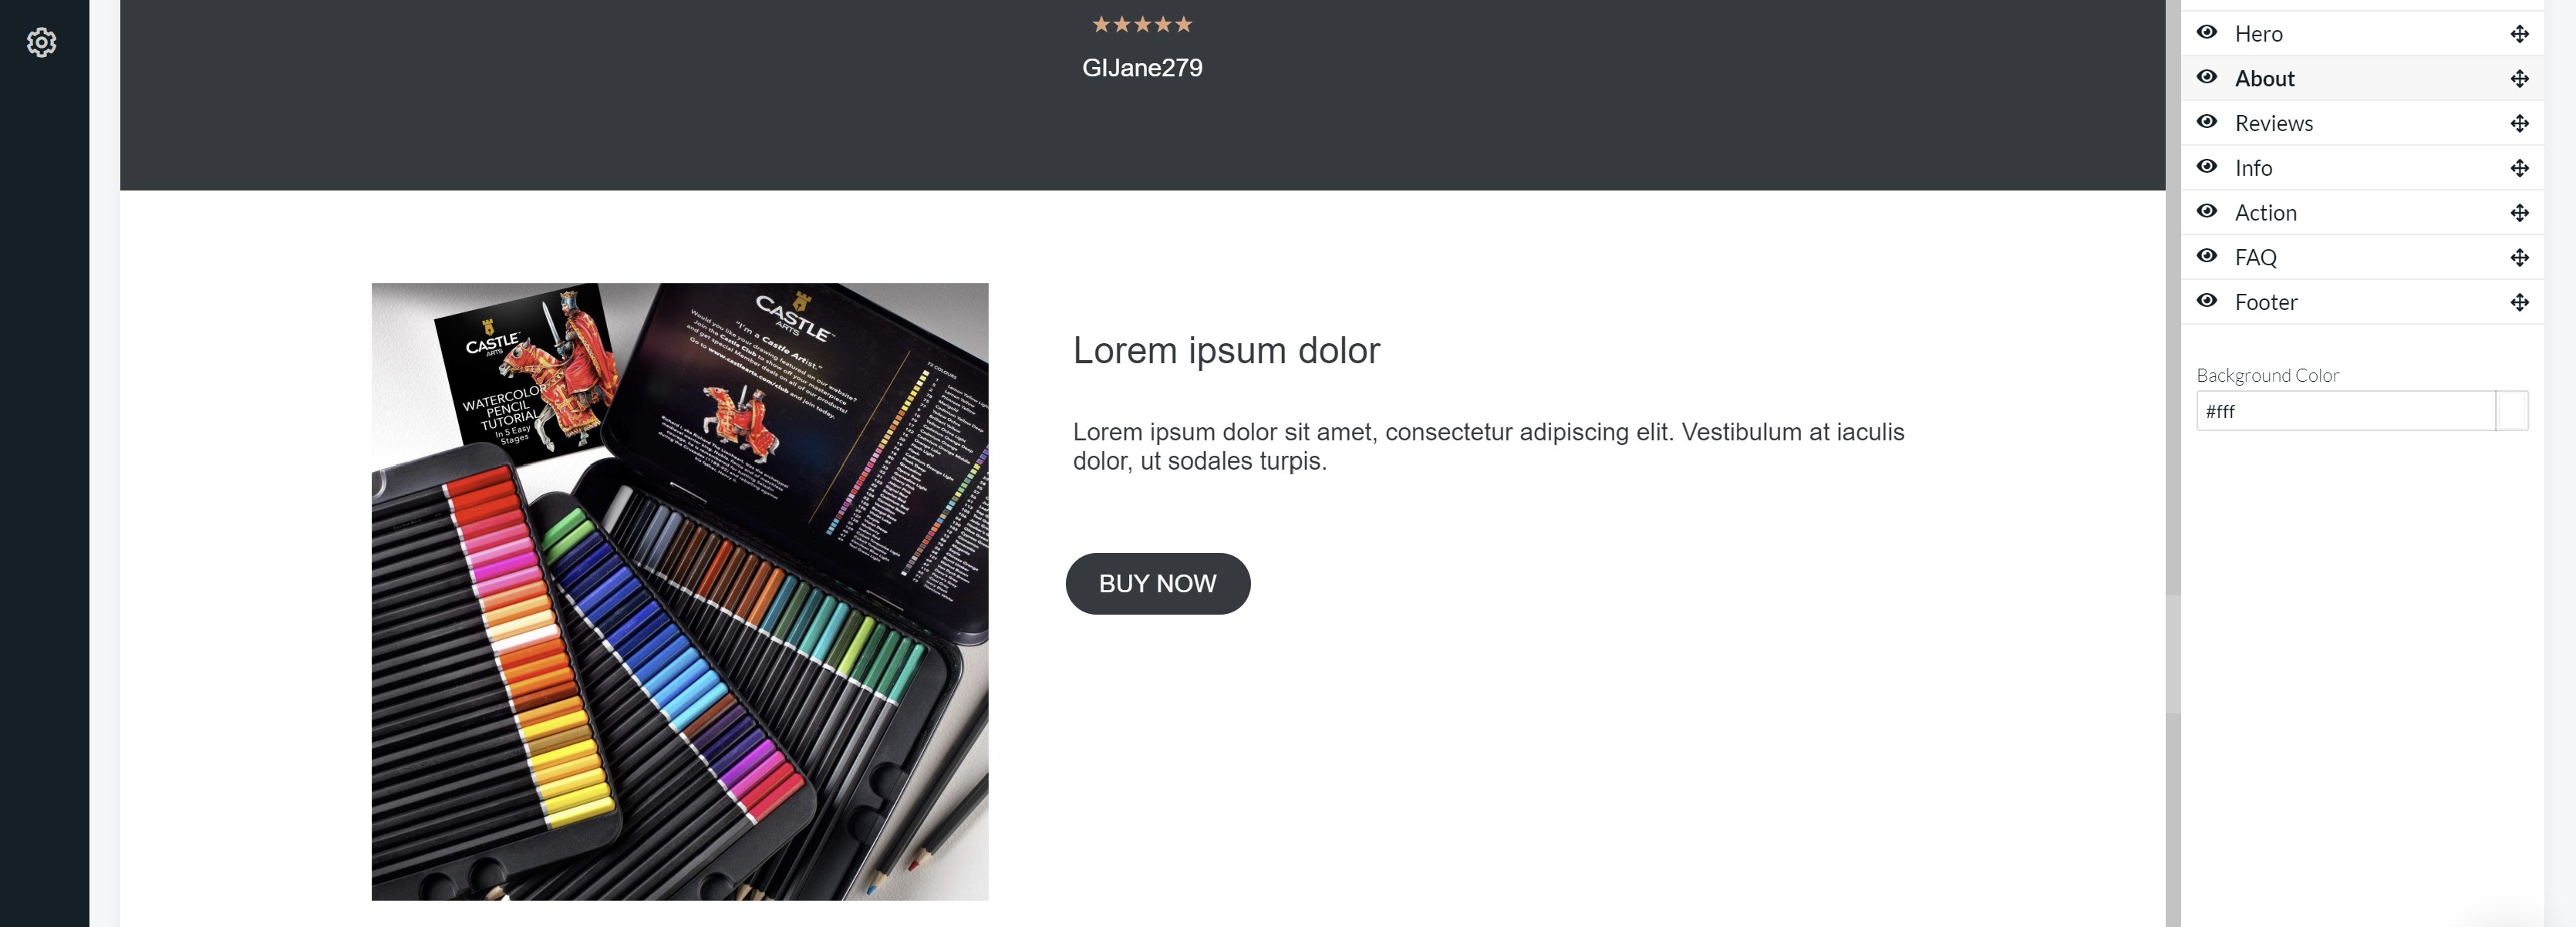
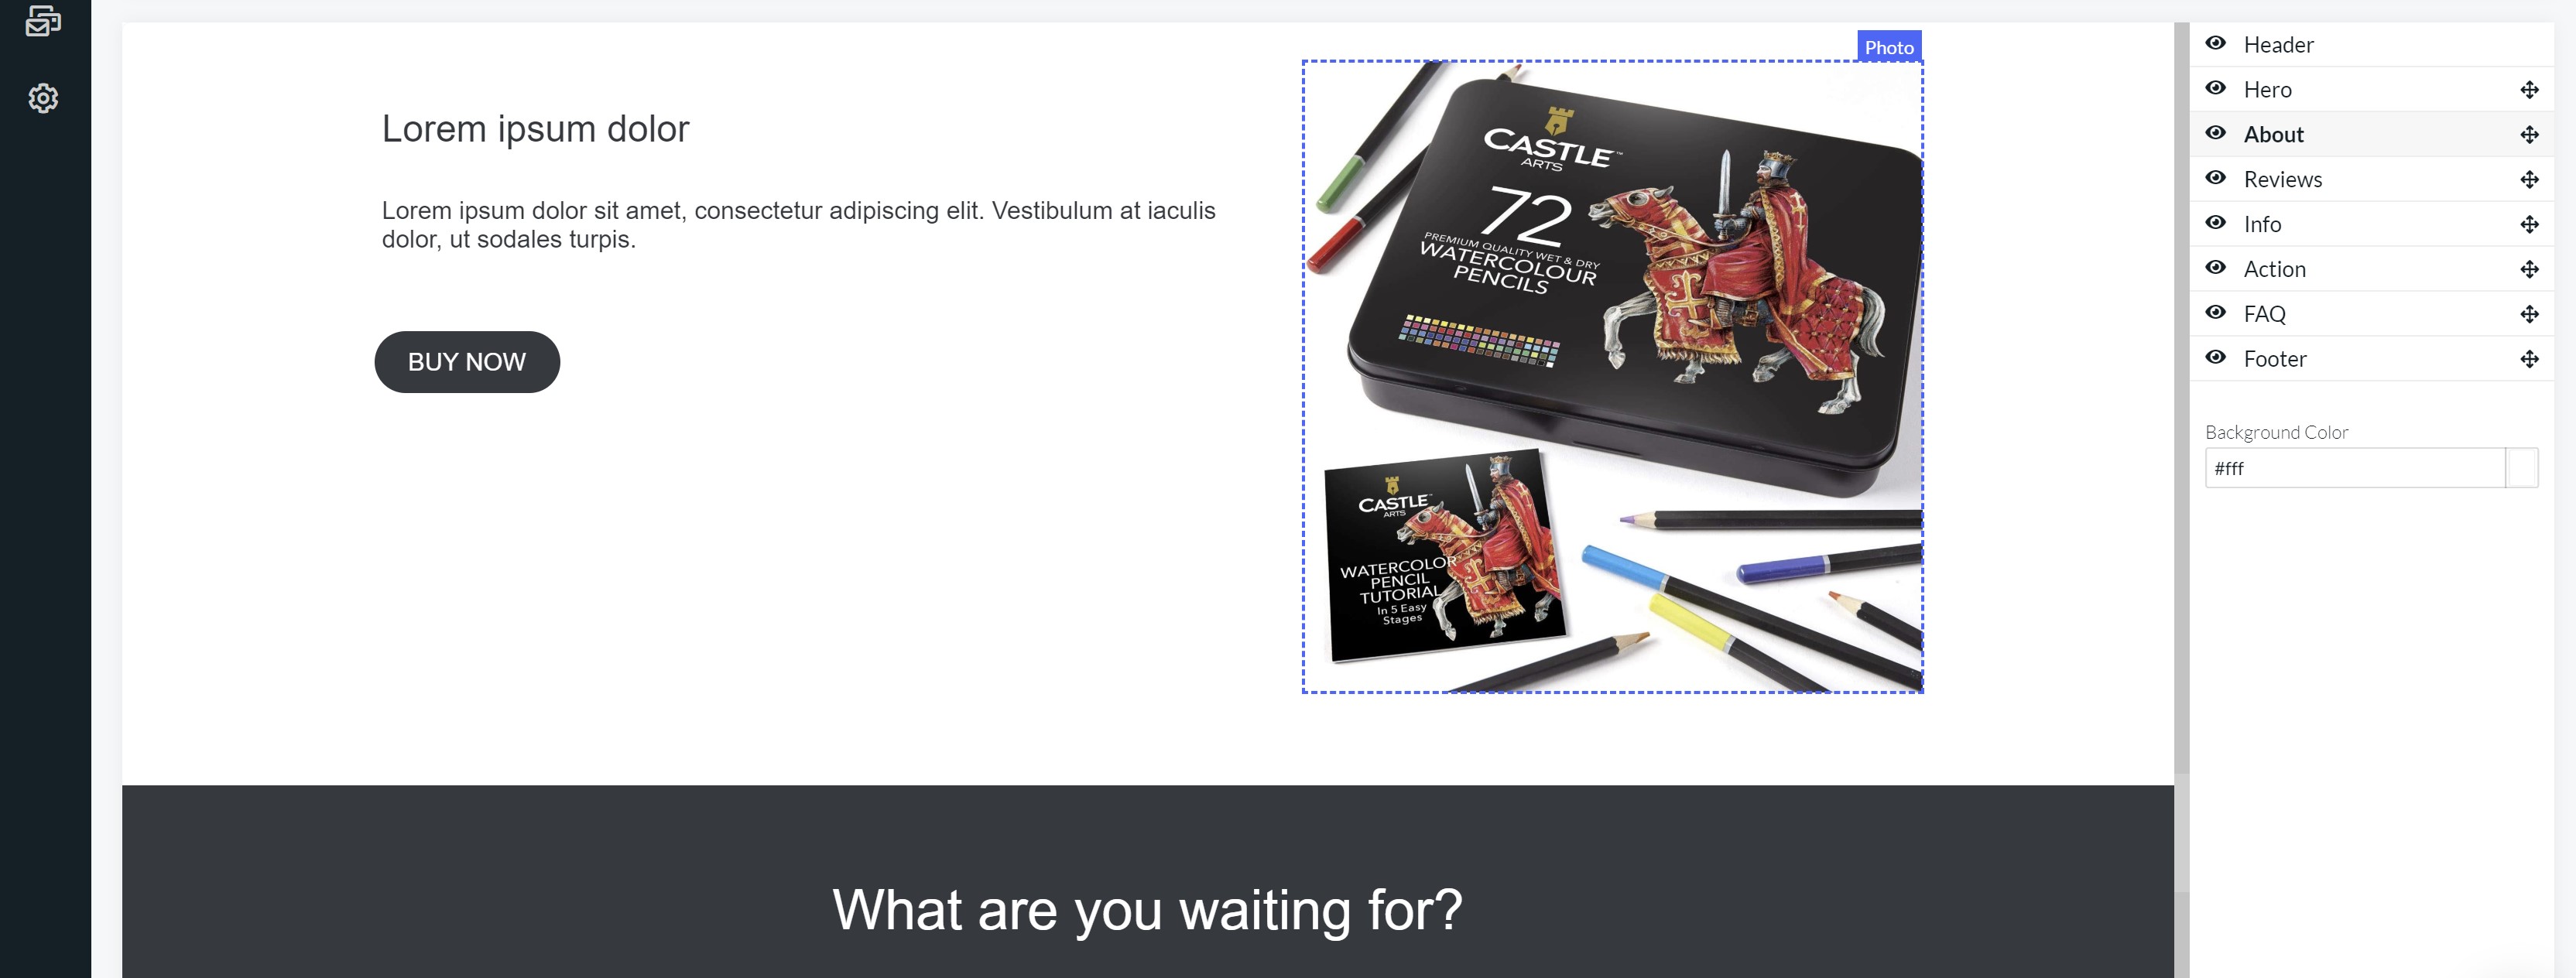
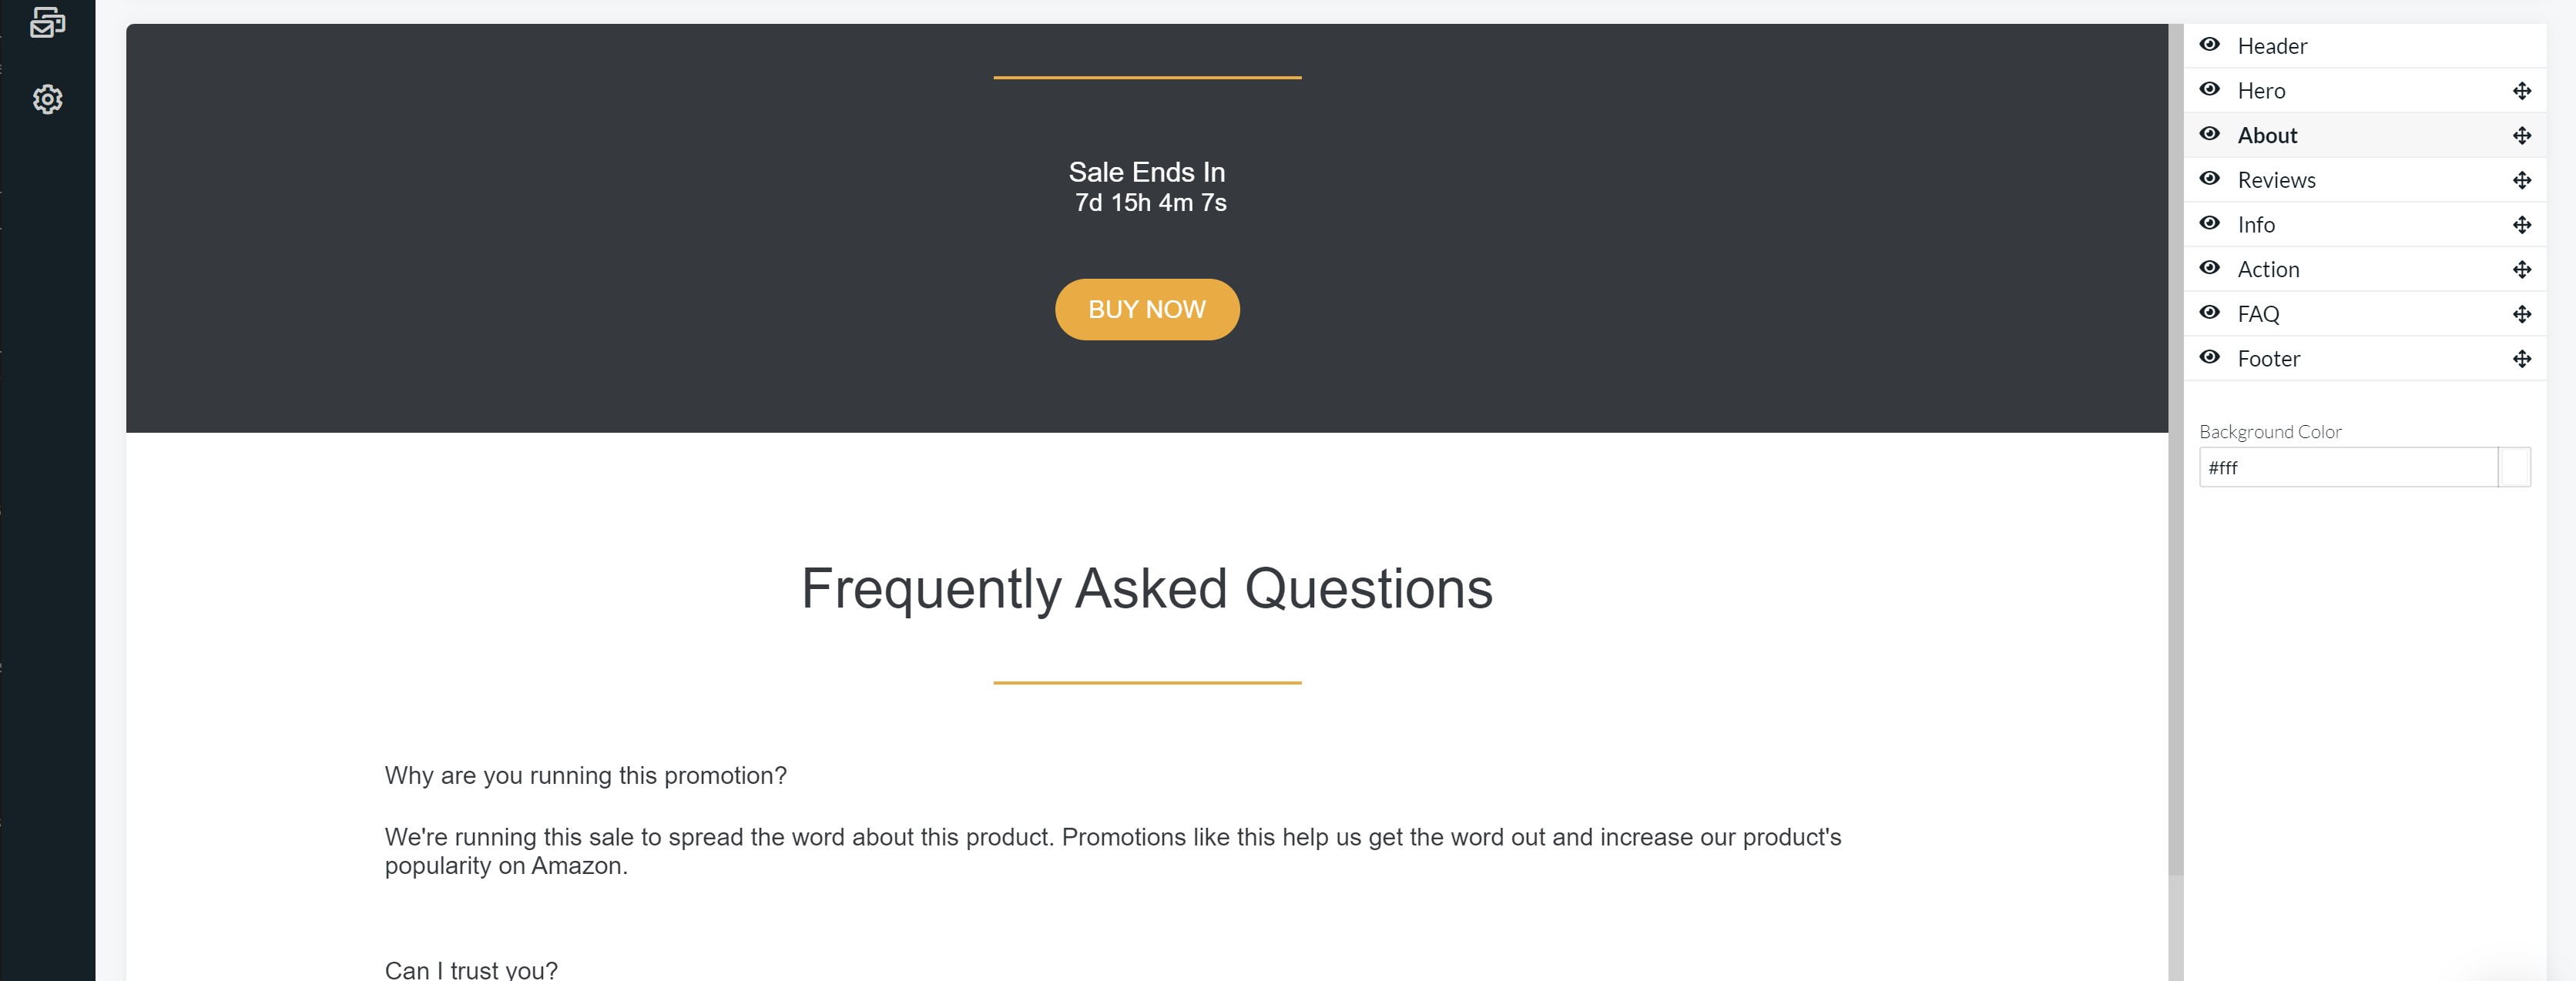

22. When you are satisfied with the way the landing page looks and what it says, click on the blue Save & Continue button in the top right corner. This action will return you to the main Portals window. This section is where your finished Portals are saved and available to activate or access to edit.
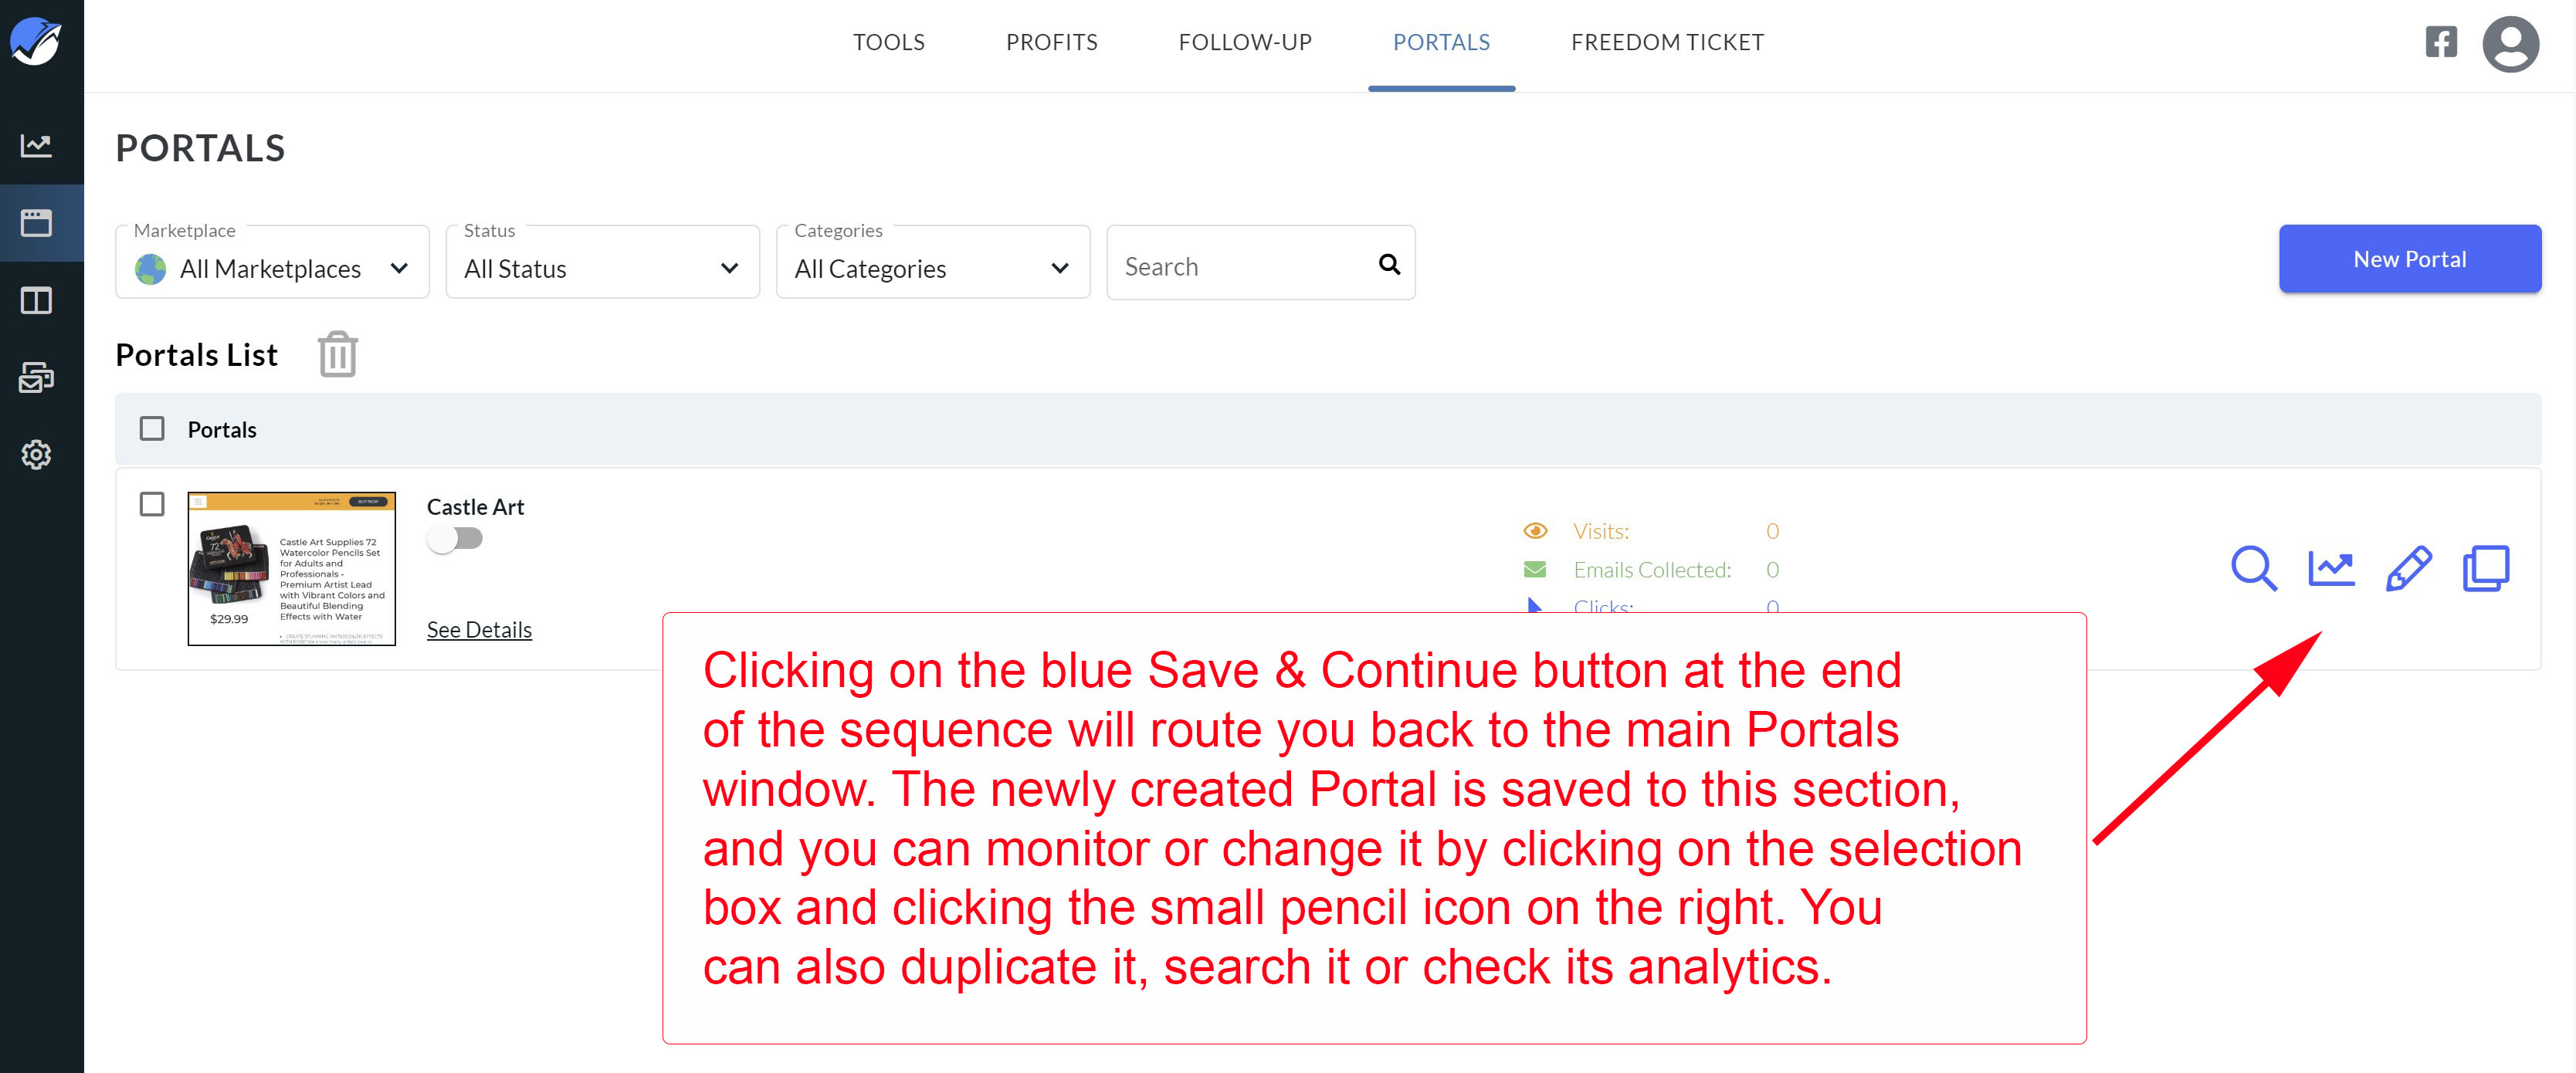
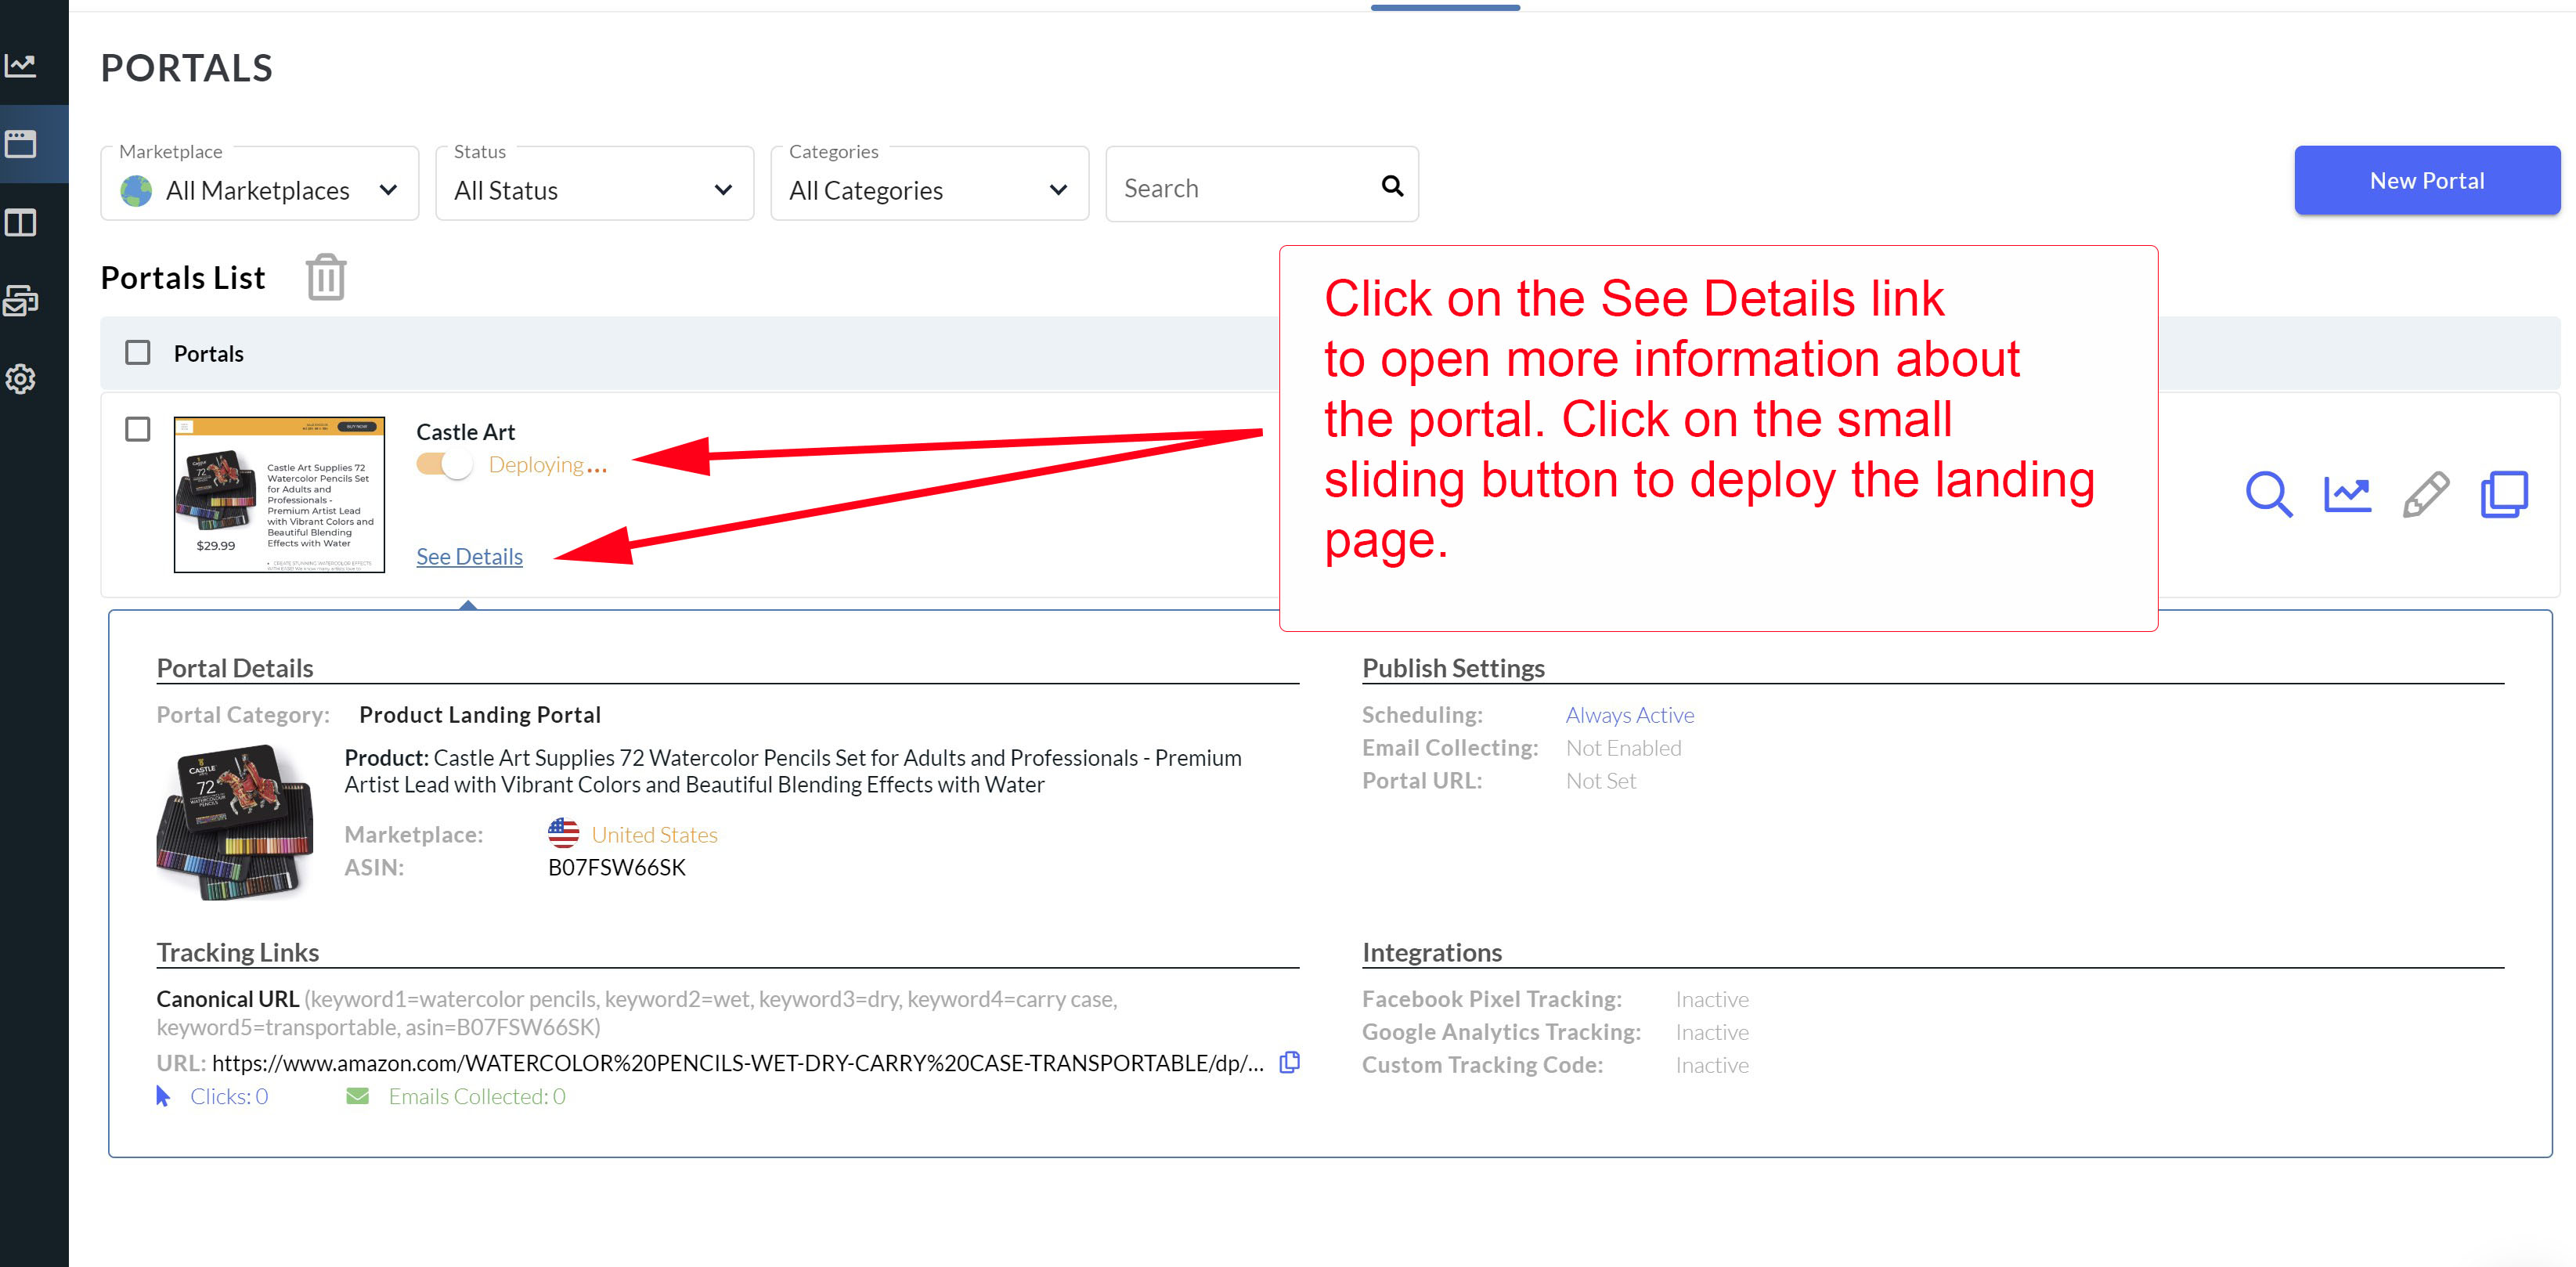
From this window, you can select the check box next to the Portal and put it the trash using the little bin icon located under the Marketplace drop-down window, or deploy the Portal by clicking the sliding button under the specific Portal name, or click on the See Details link to open up analytical data about the Portal.
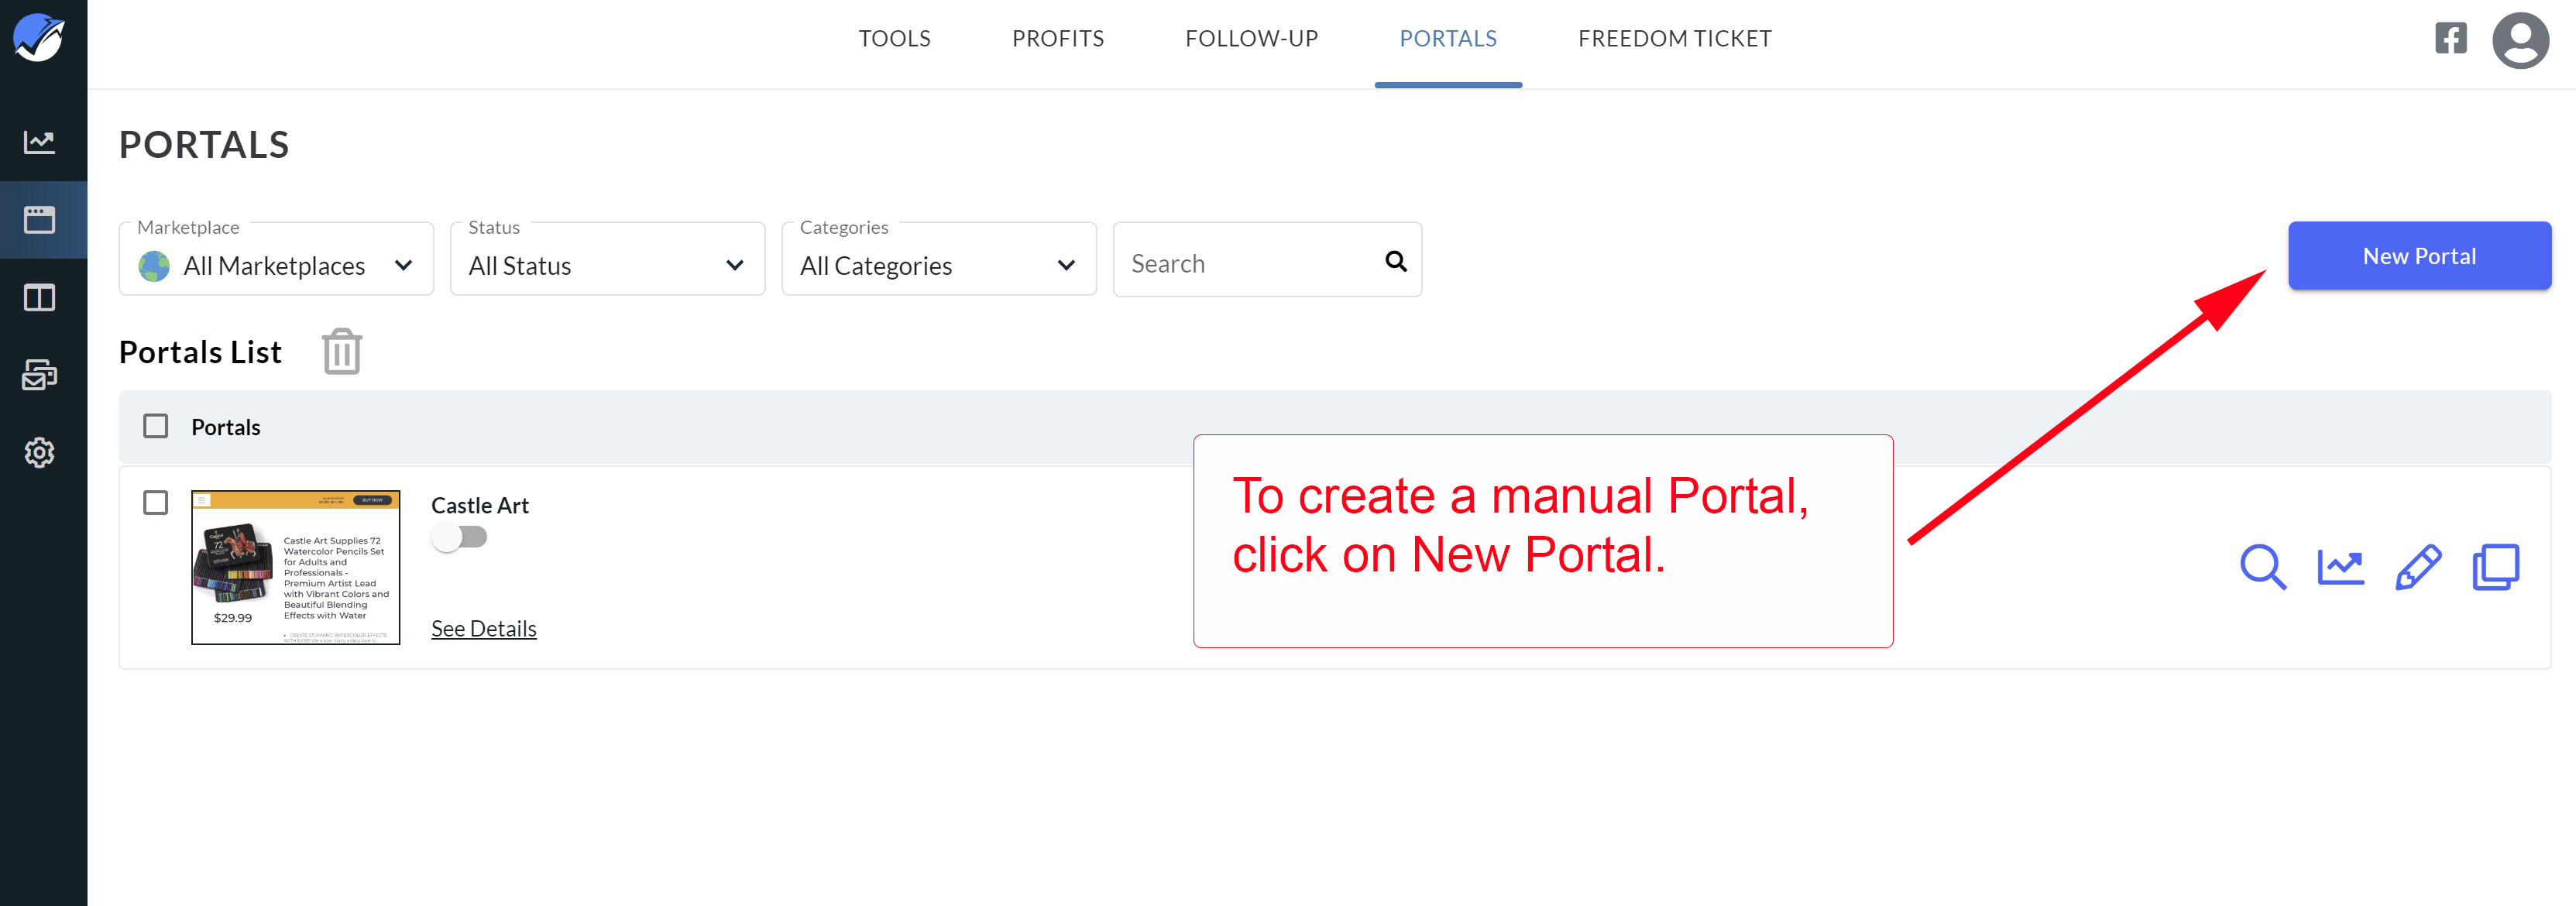
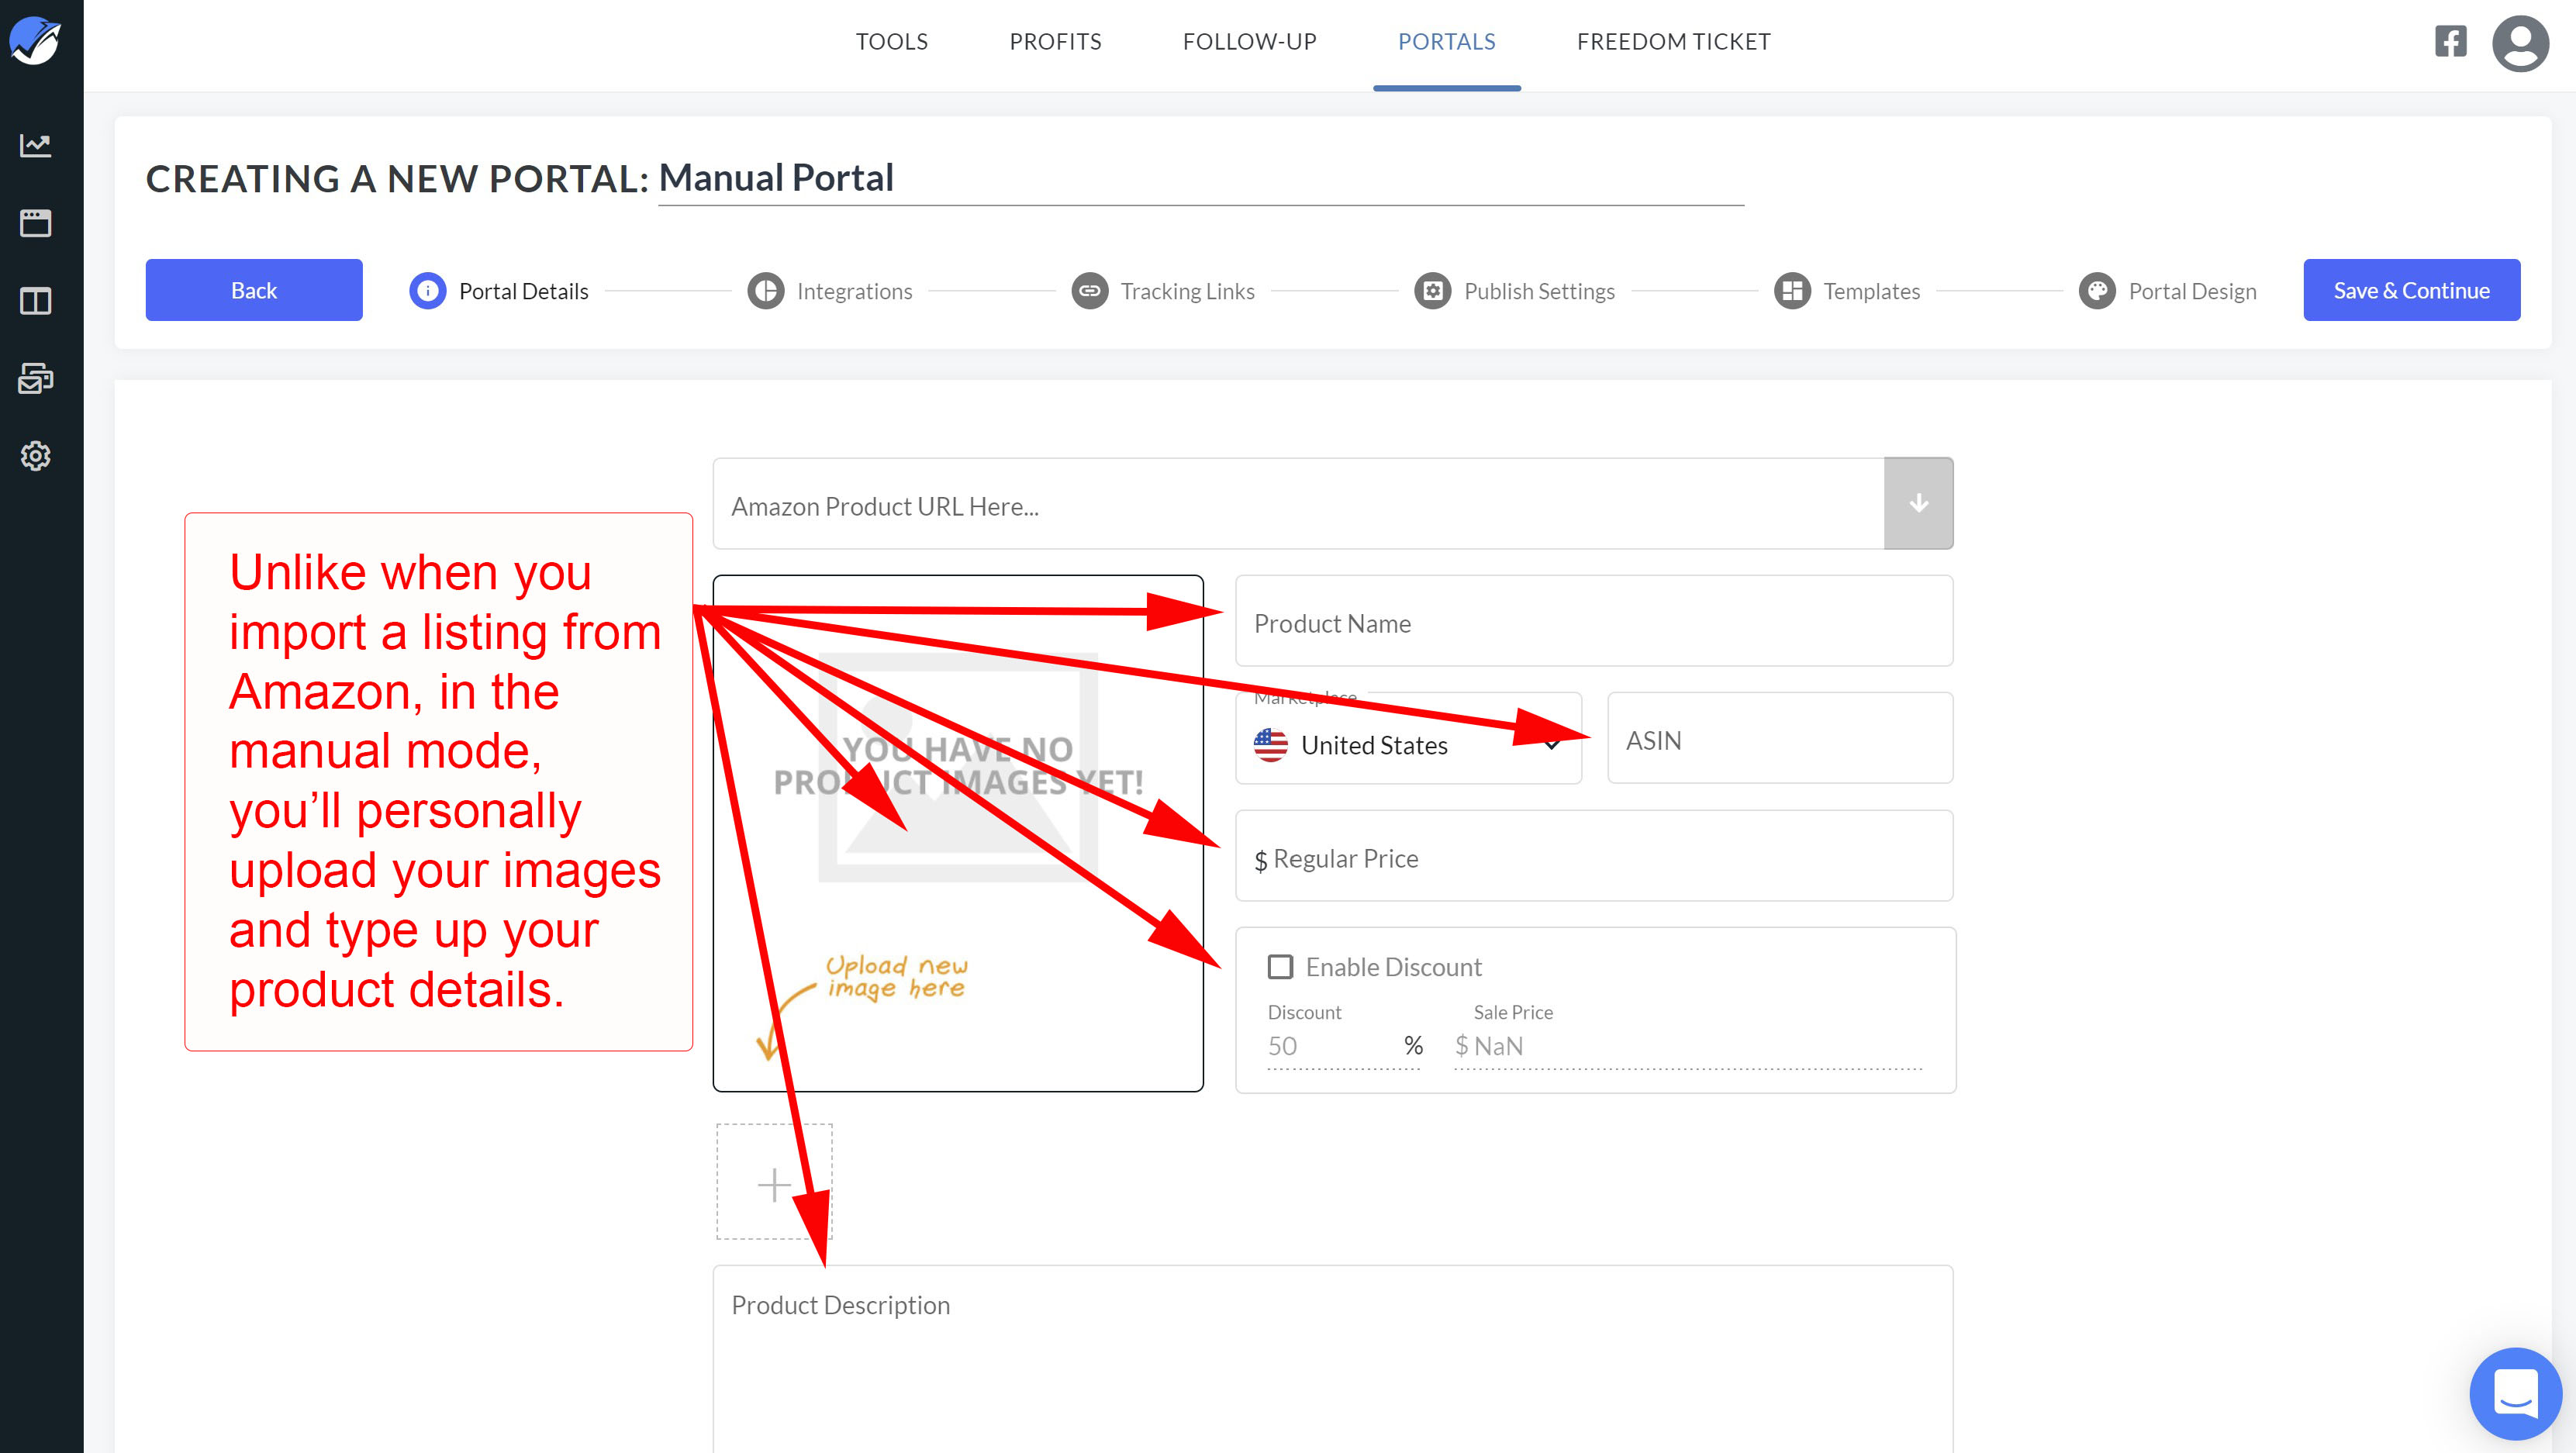
23. You can also create Portal landing pages without importing data from Amazon. To create a manual landing page, begin again at the Portals window and click the blue New Portal button in the top right corner.
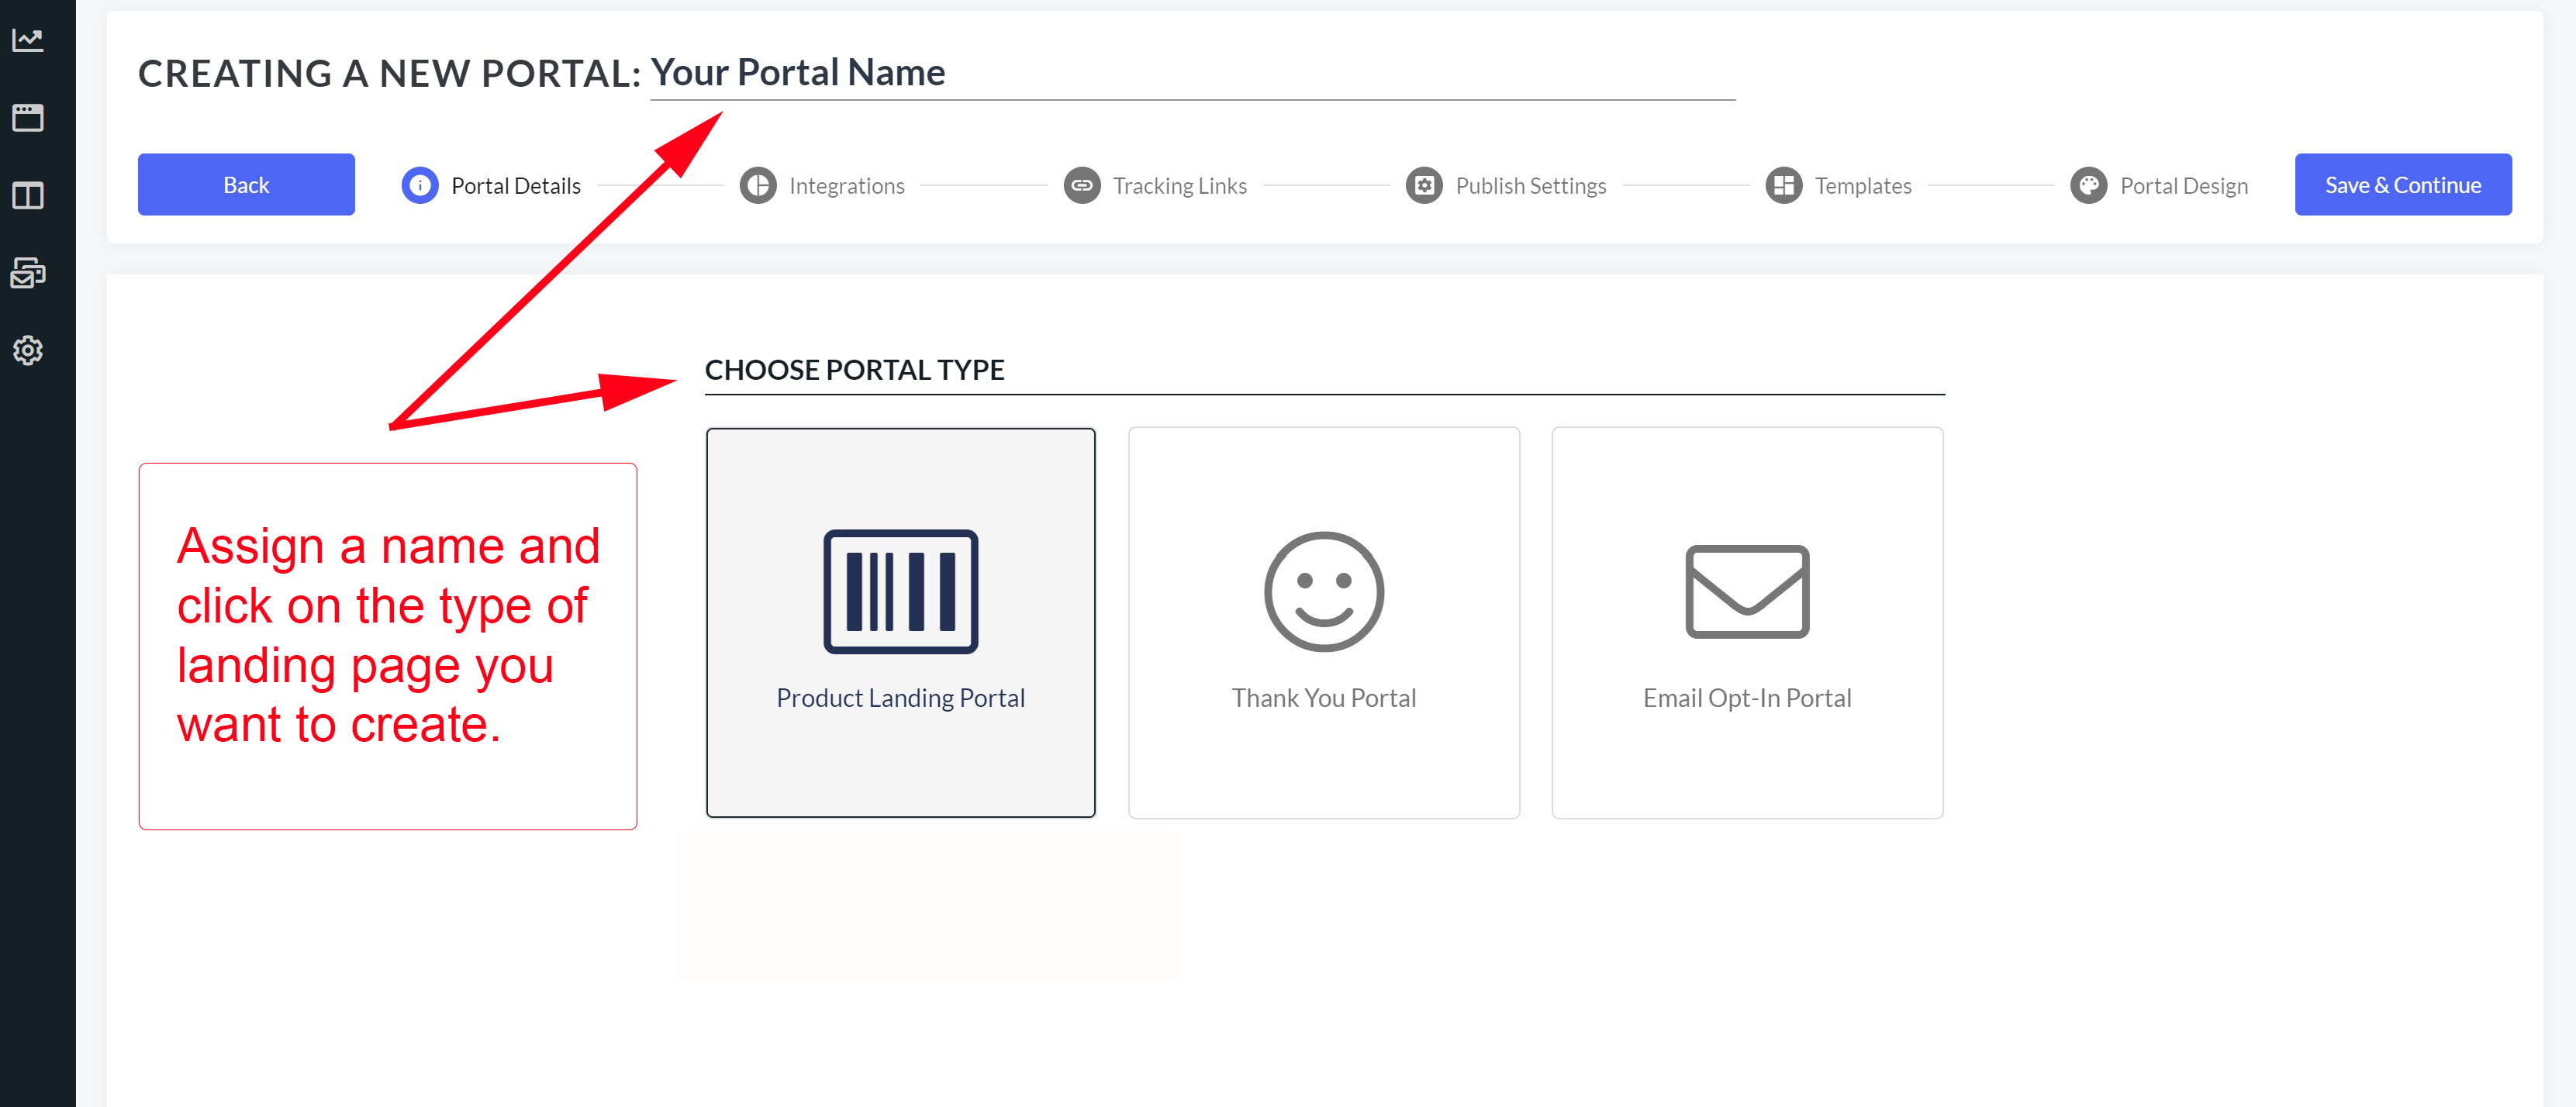
24. Next, name your portal and select the portal type. Click on the blue Save & Continue button in the top right corner.
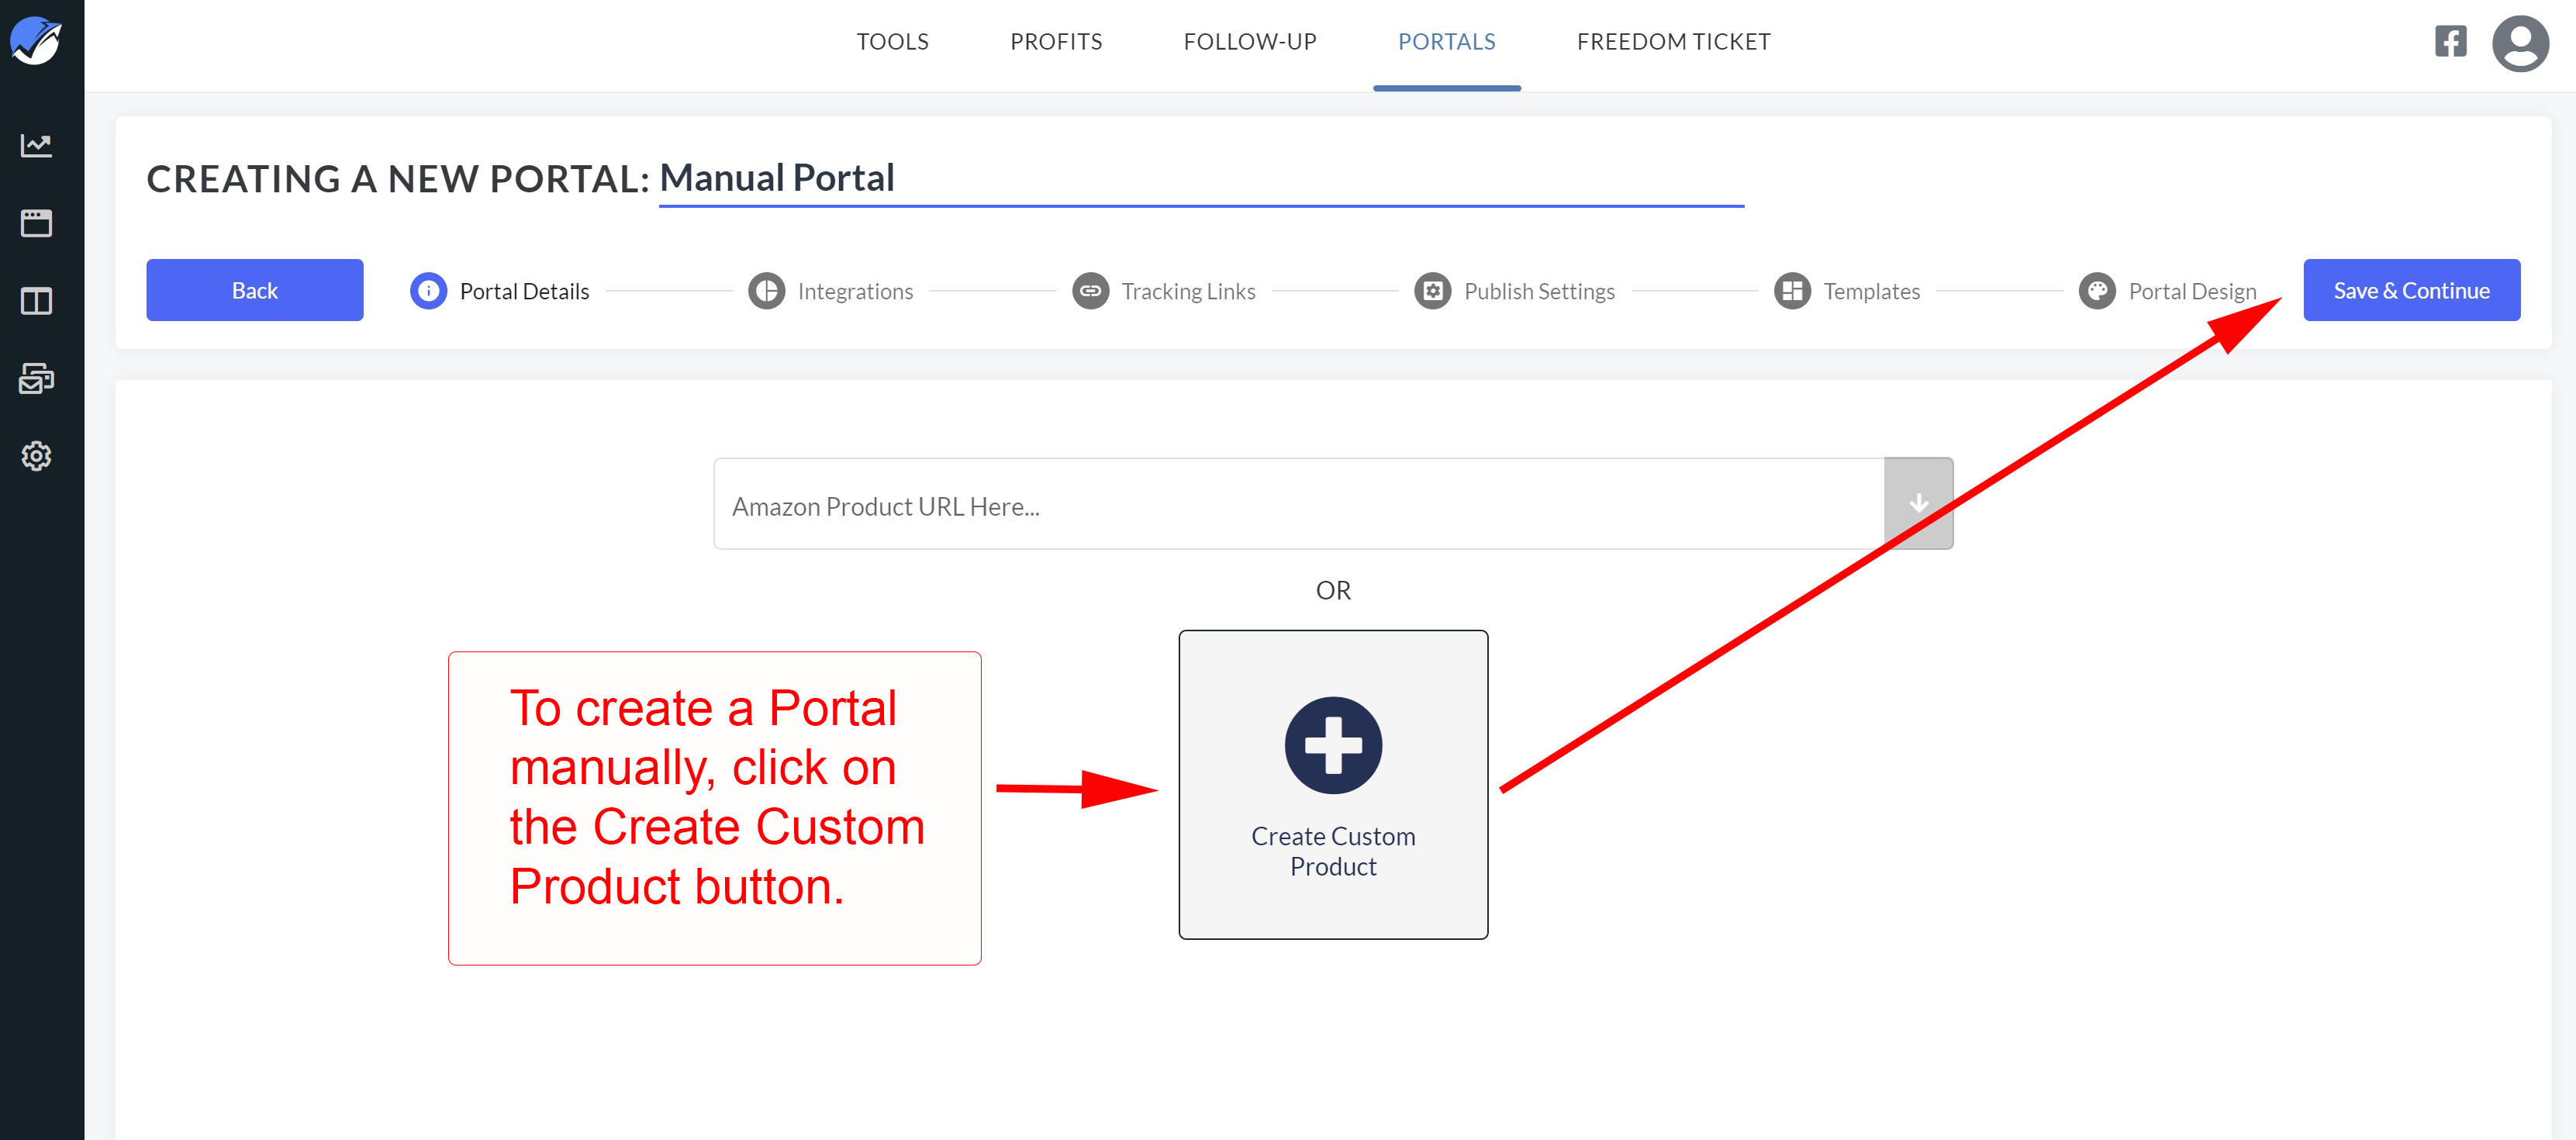
25. Select the Create Custom Product button, and click Save & Continue.
26. Next, manually enter the text, and upload the individual images, you want to appear on your landing page.
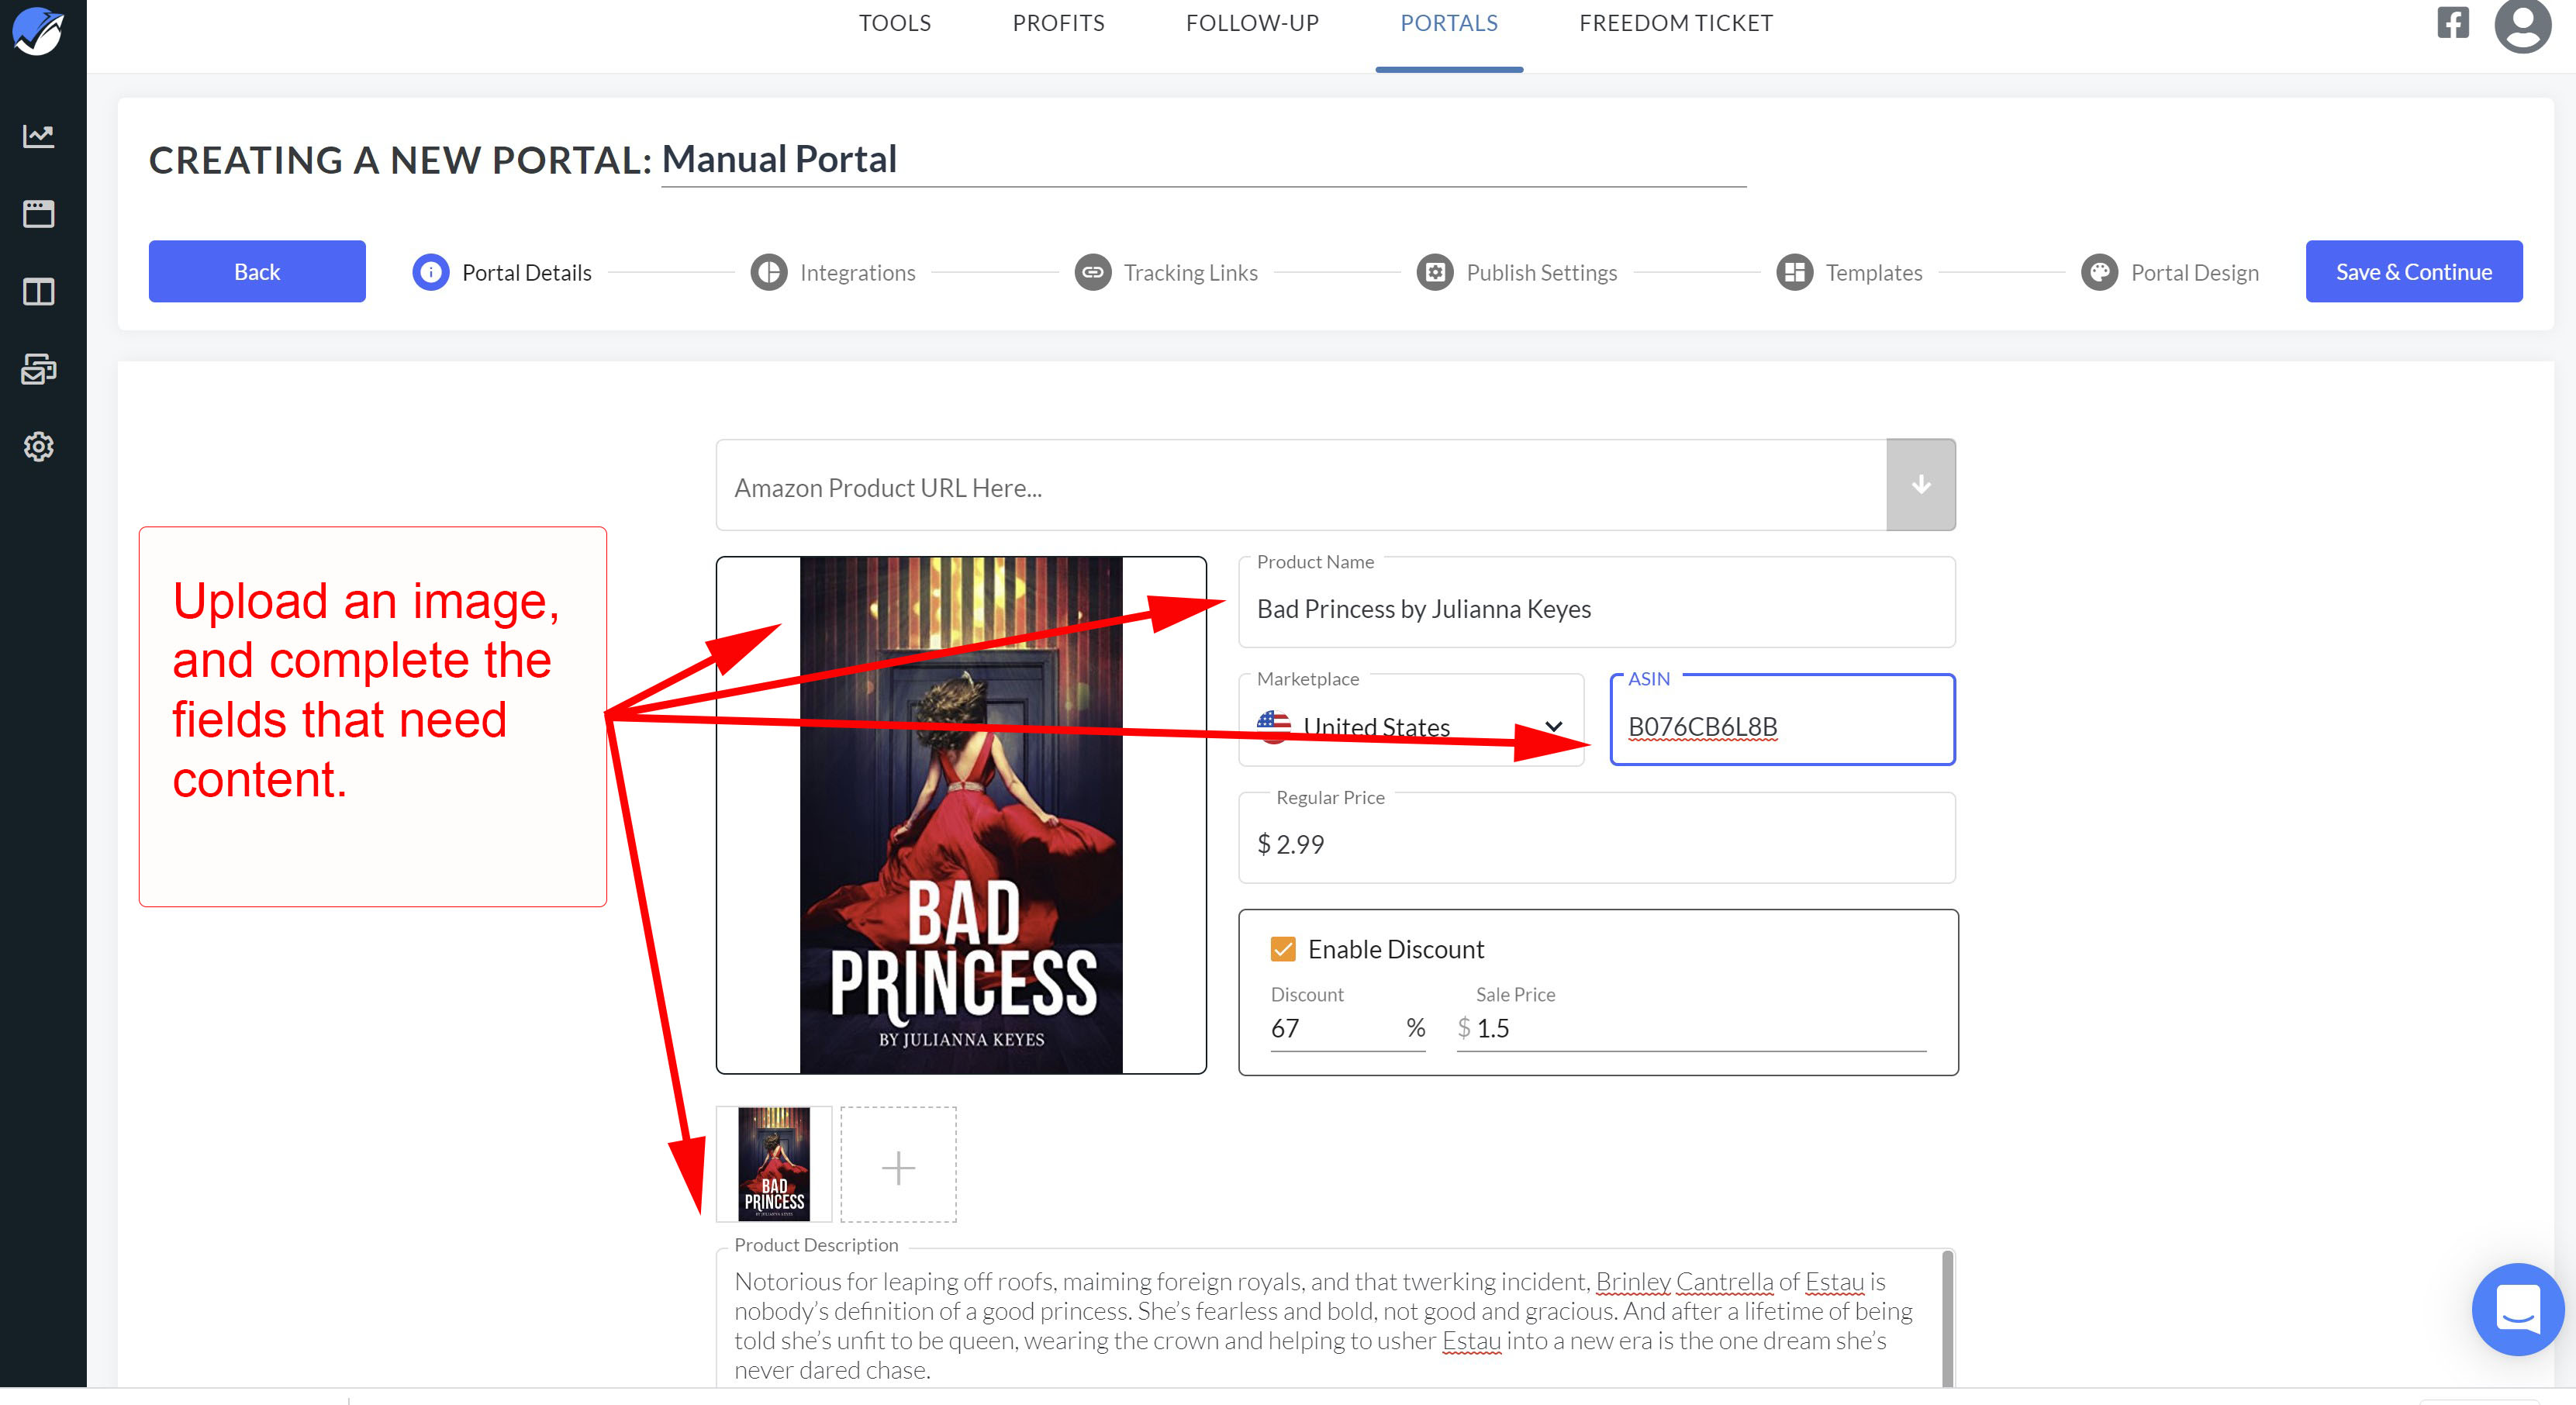
27. Proceed through the stages of building your site just as you did with the imported listing.
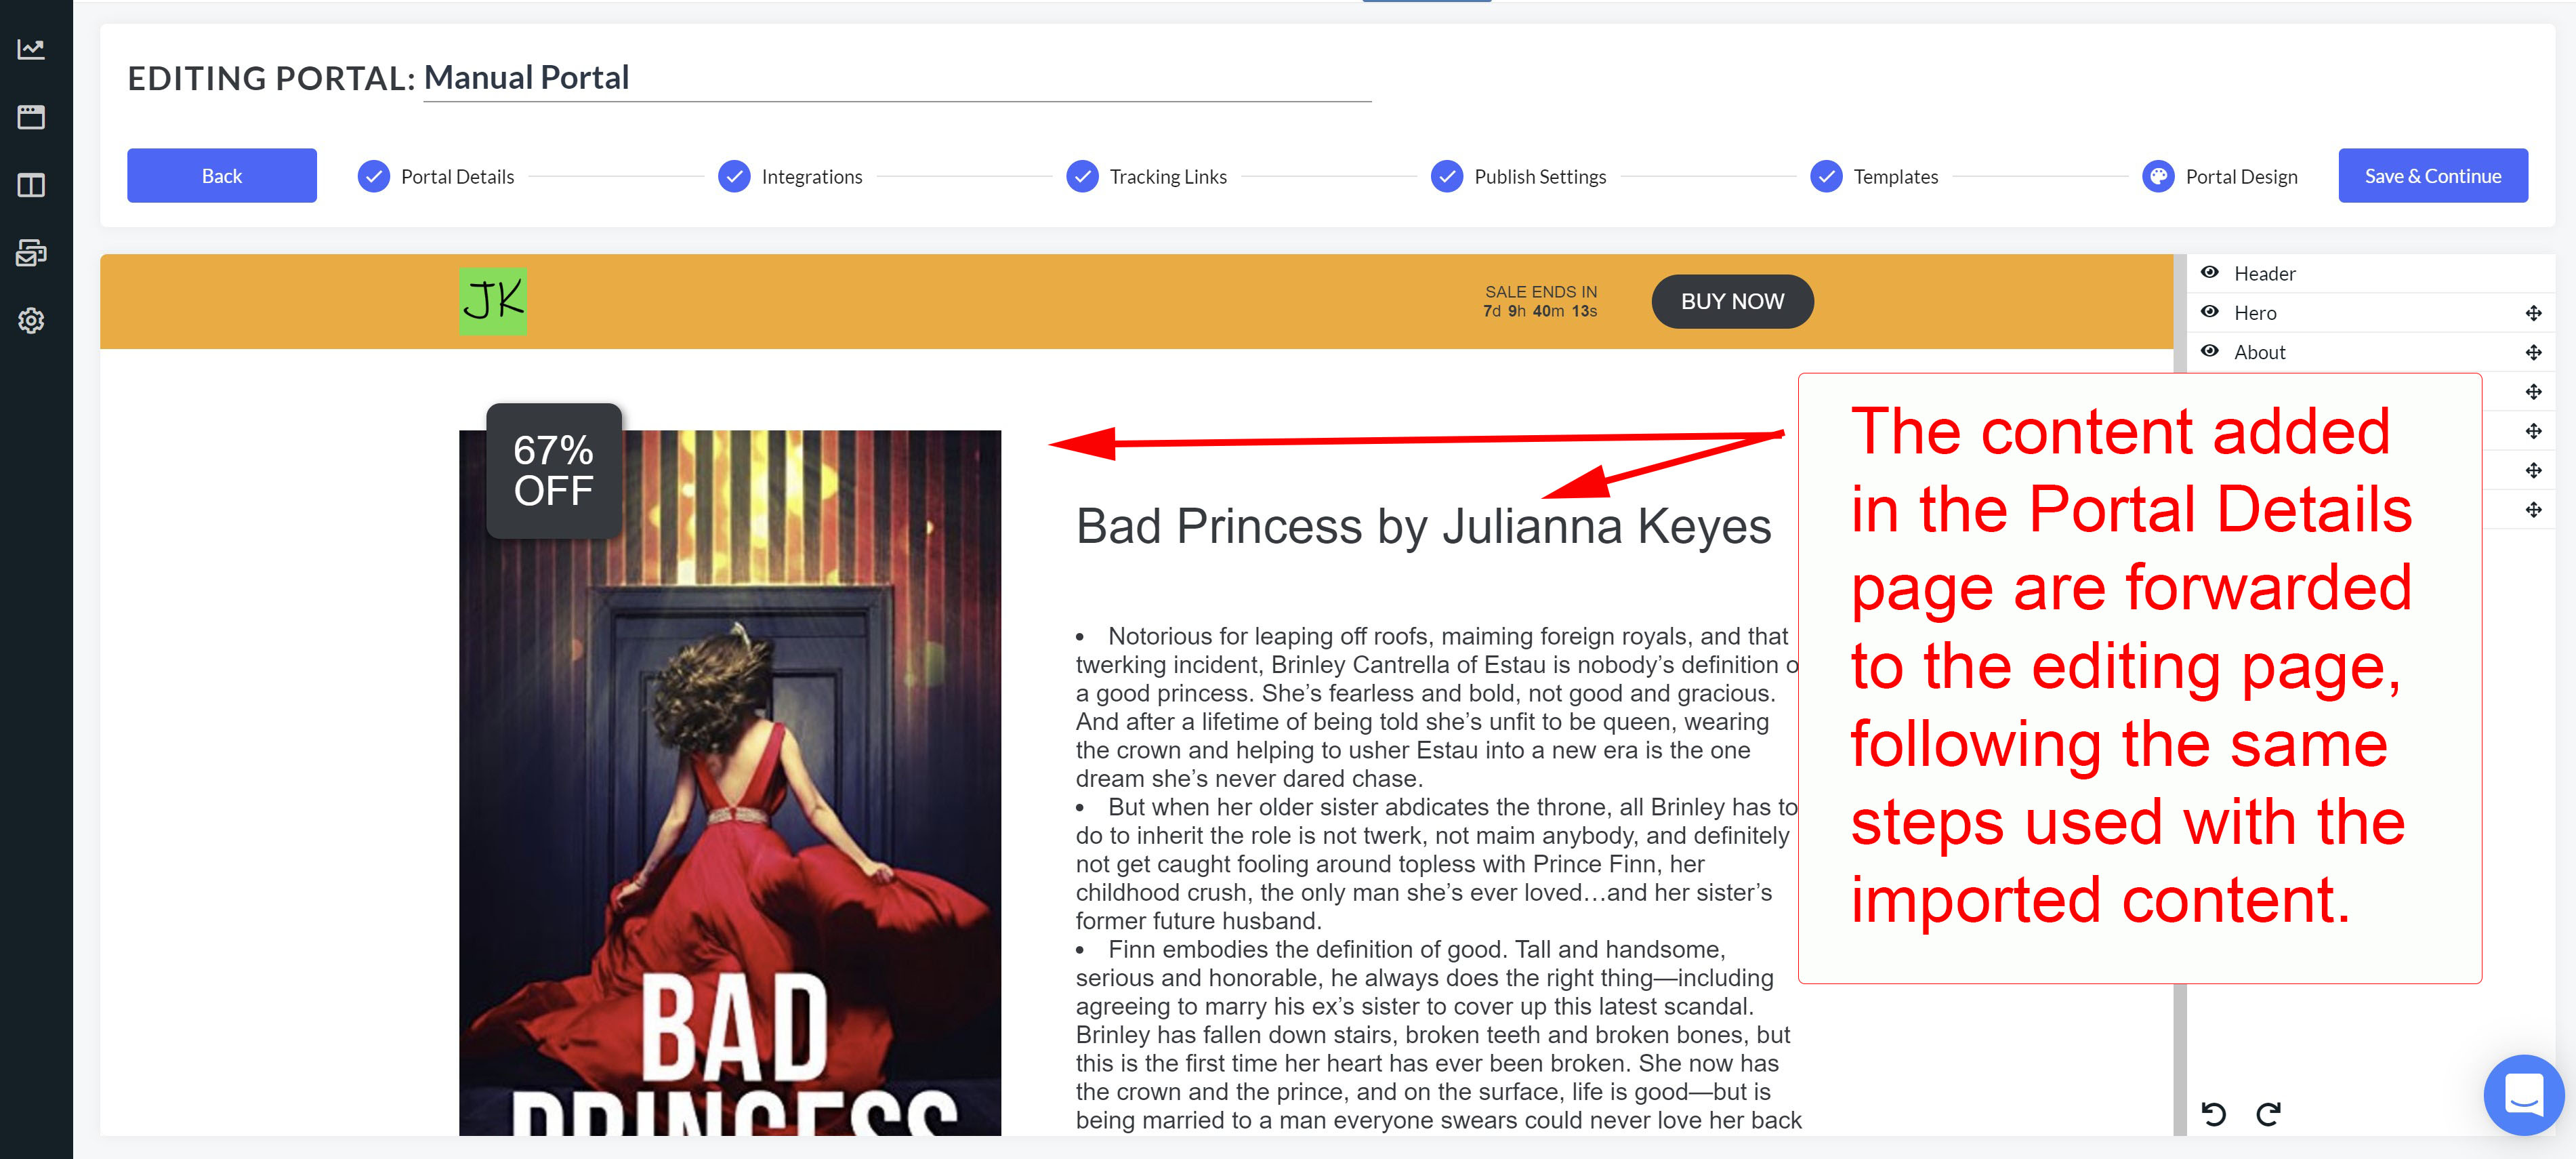
28. The background colors on the page default to match Amazon, but you can change them to anything you like, to match another platform, or to reinforce your own branding.
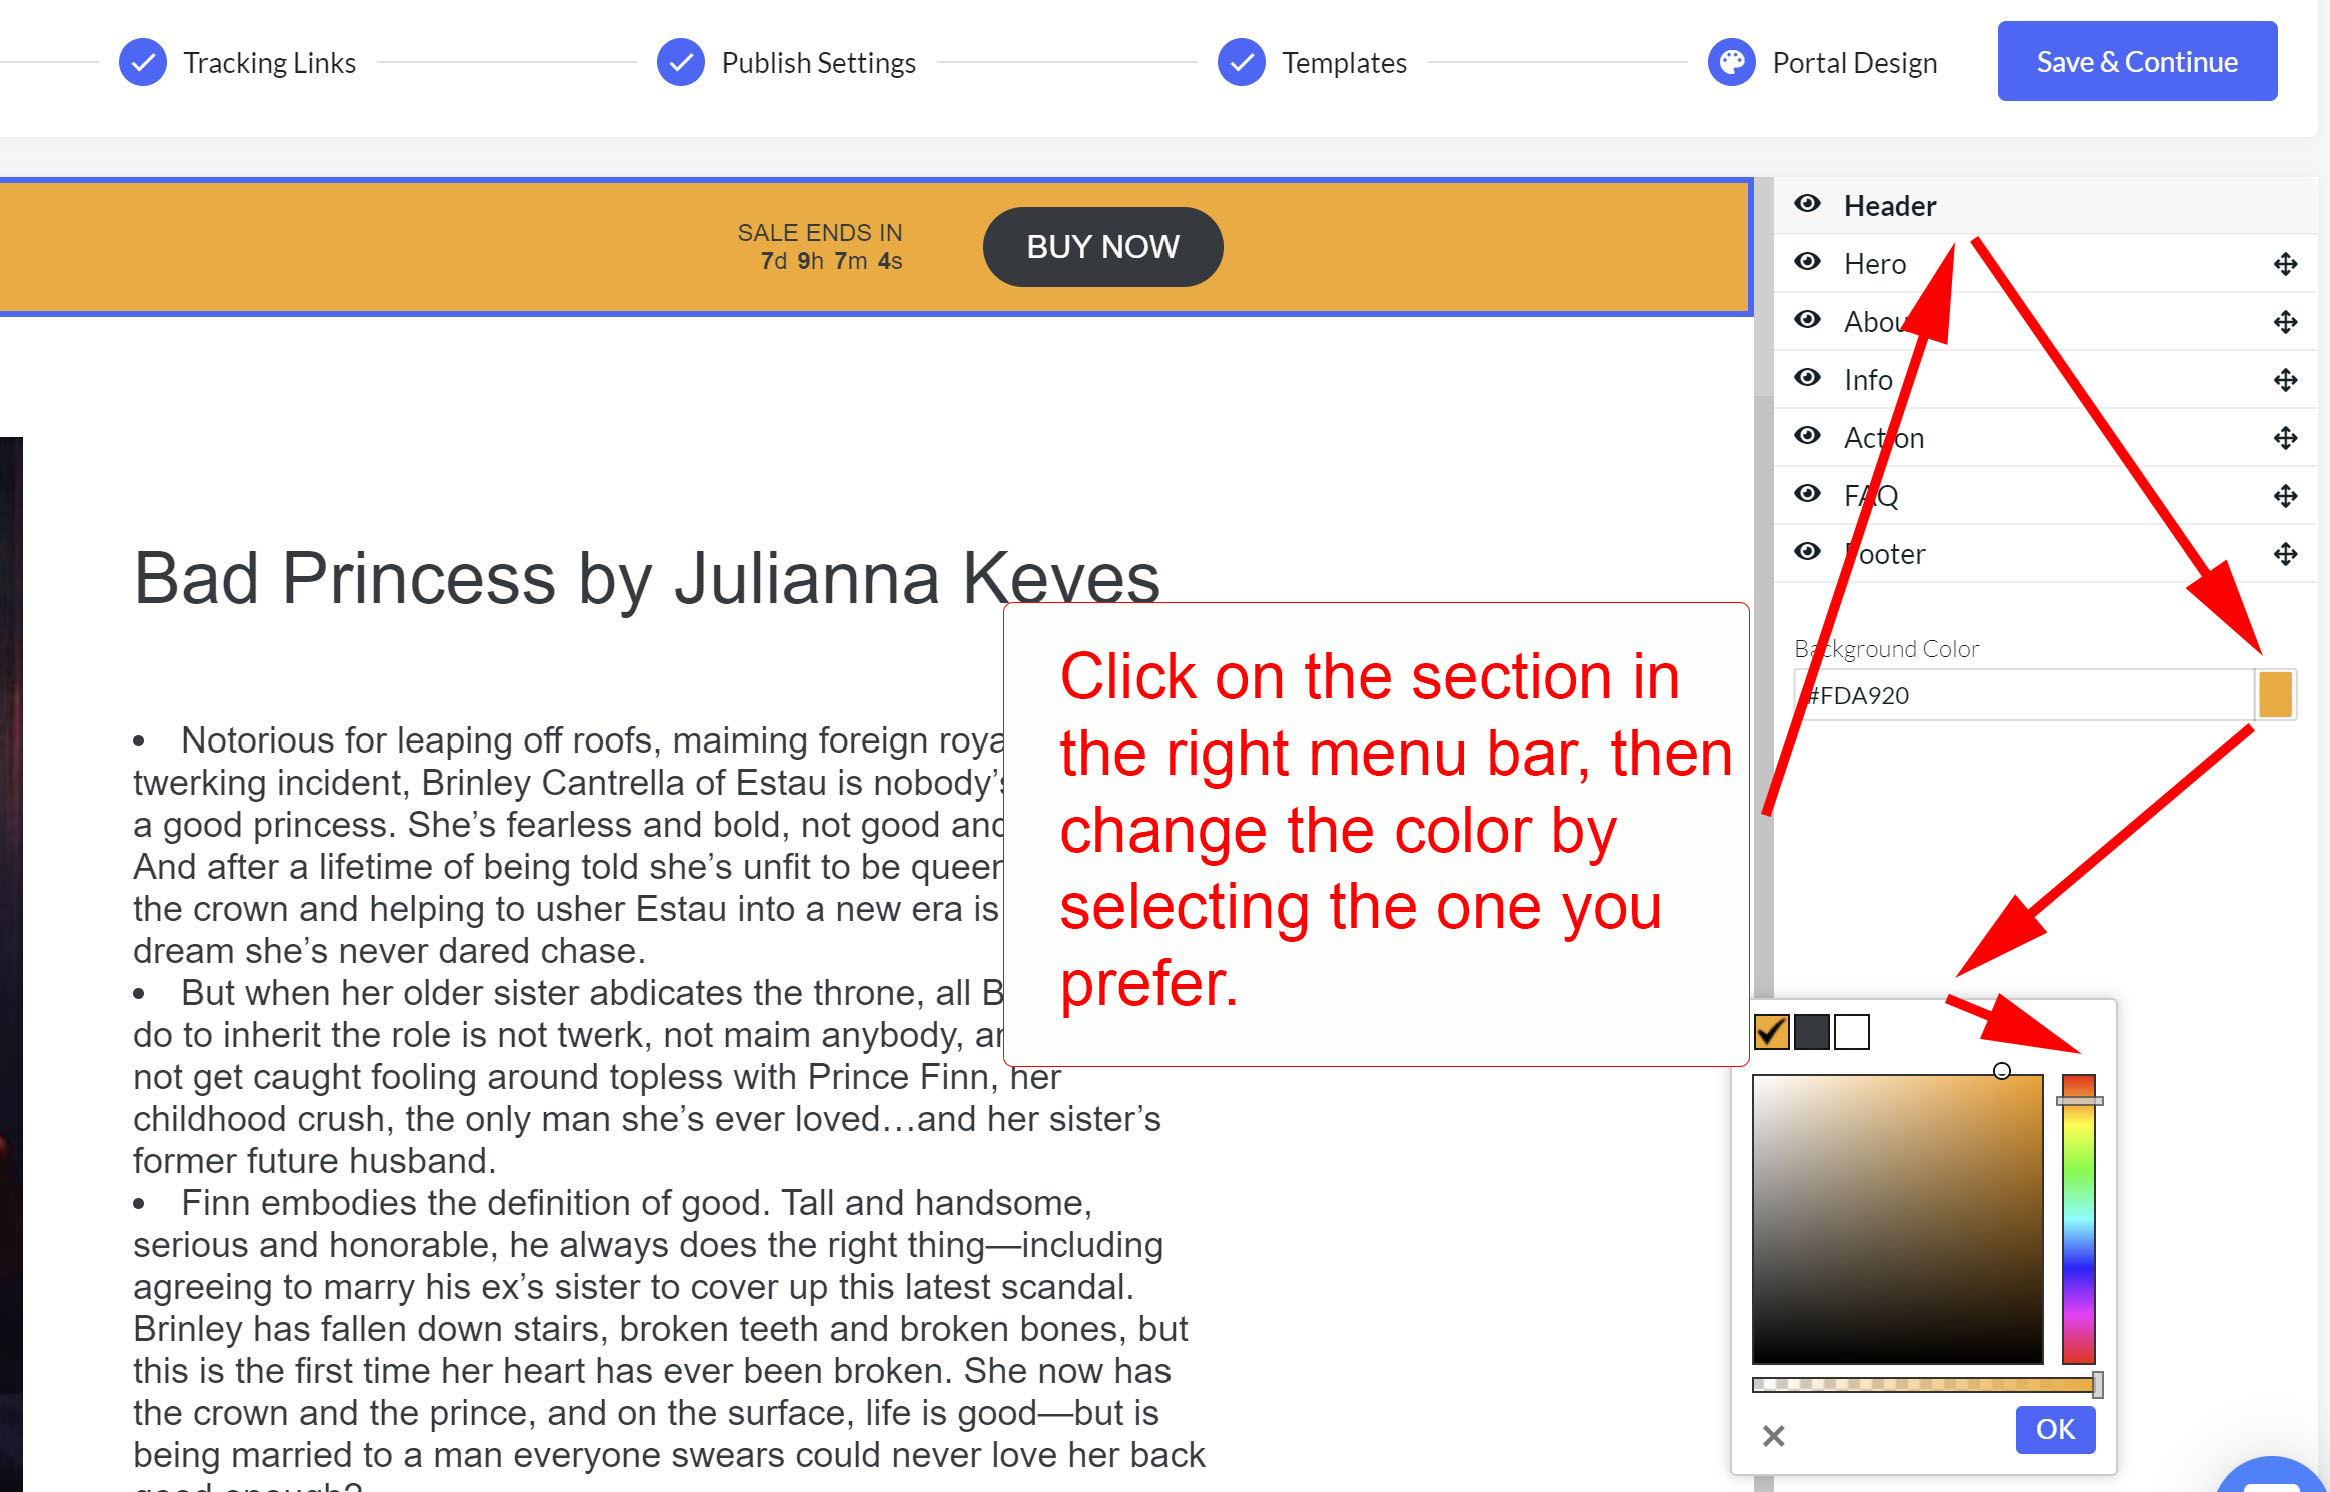
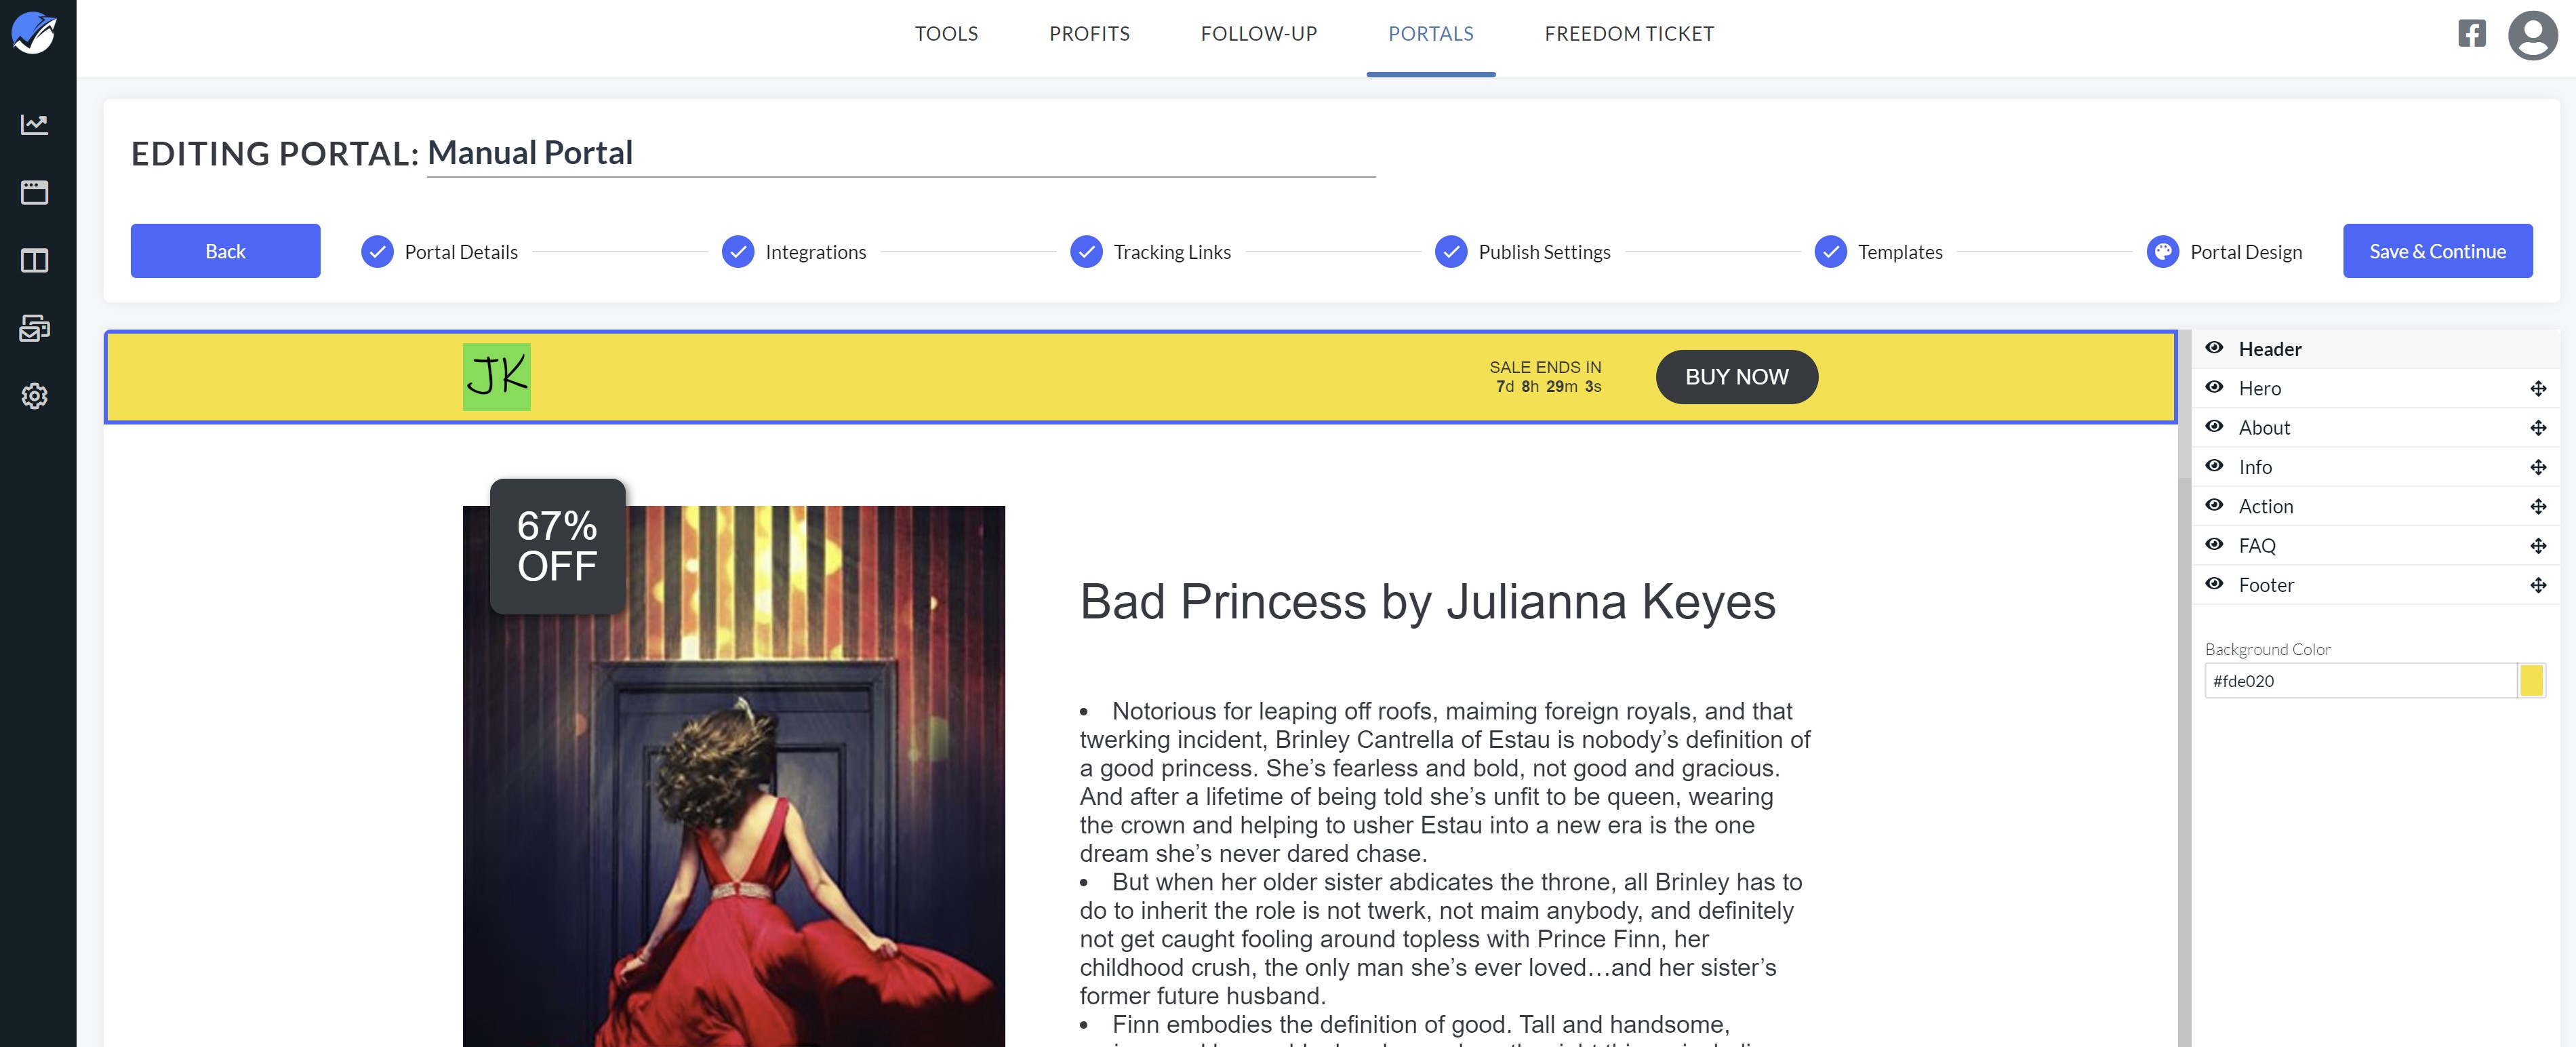
You can also change the color by typing in the Hex color code number in the Background Color field.
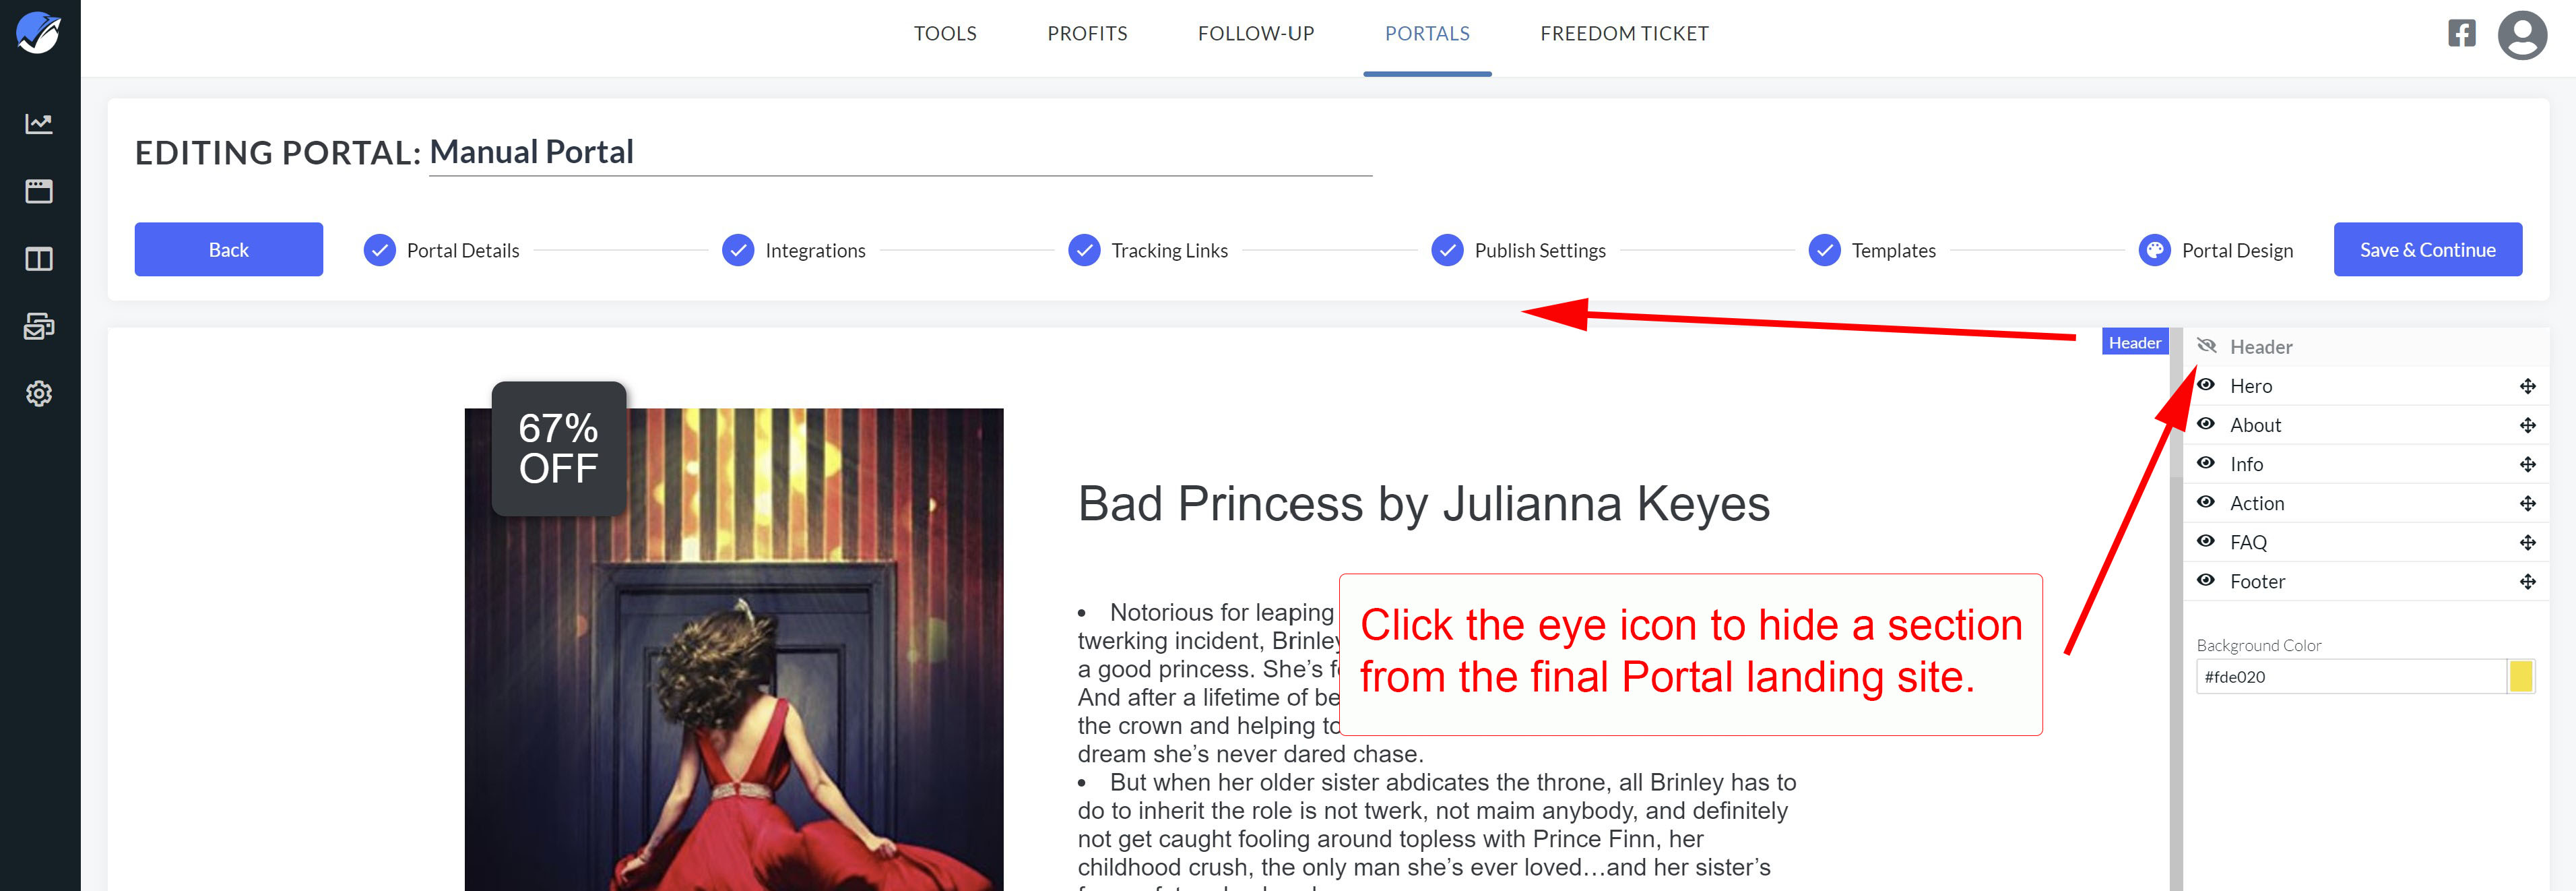
29. Too many sections? It's easy to hide a section of the Portals page. Simply click on the eye icon to the left of any section in the right side menu to remove it from sight.
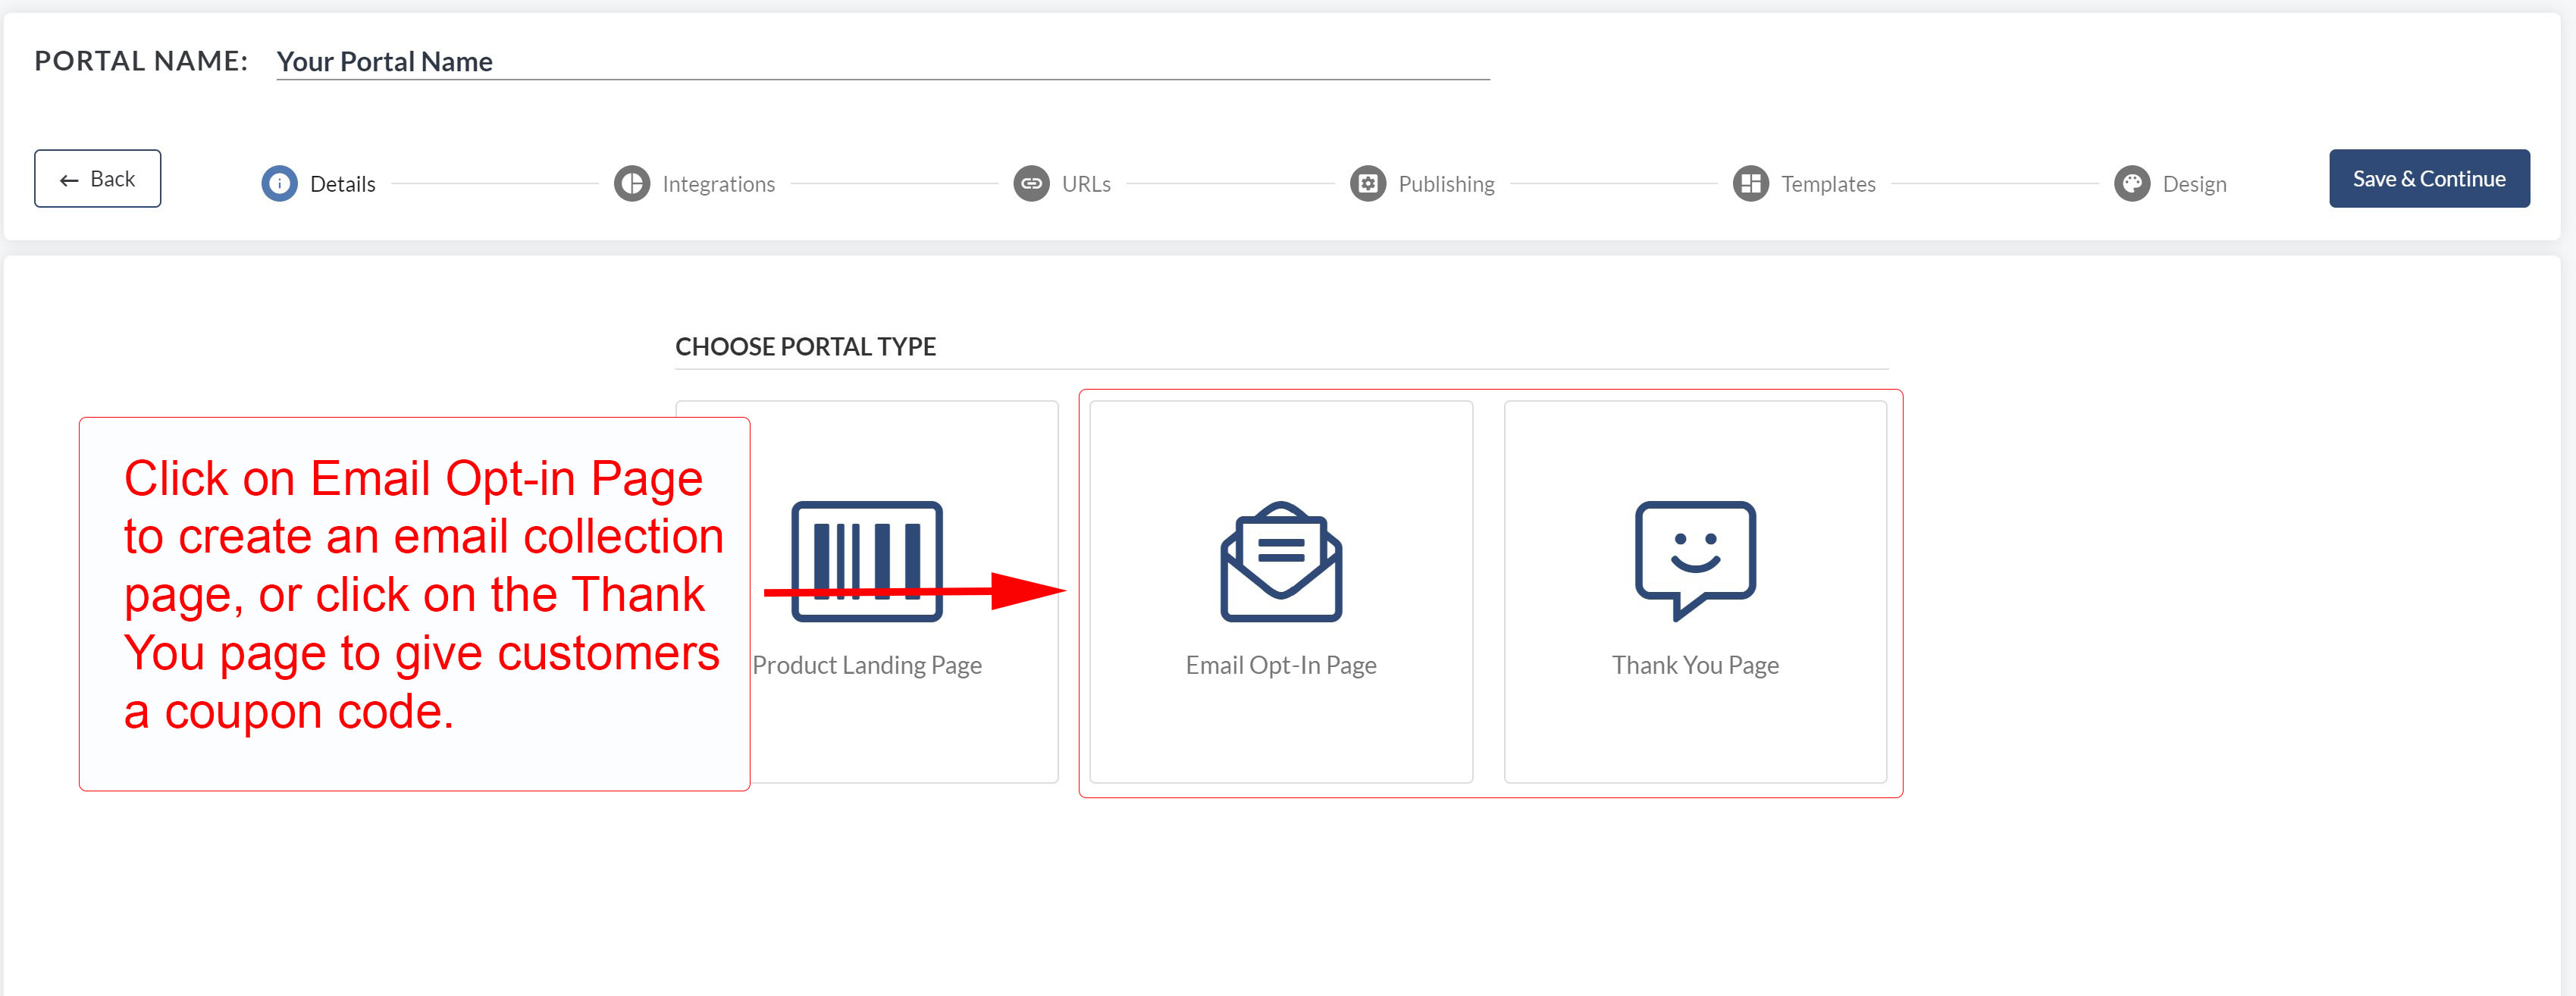
30. To create the Email Collection and Thank You Portals, you will follow similar steps. Instead of clicking on the Product Landing Page button, click on either the Email Opt-in Page or the Thank You Page buttons.
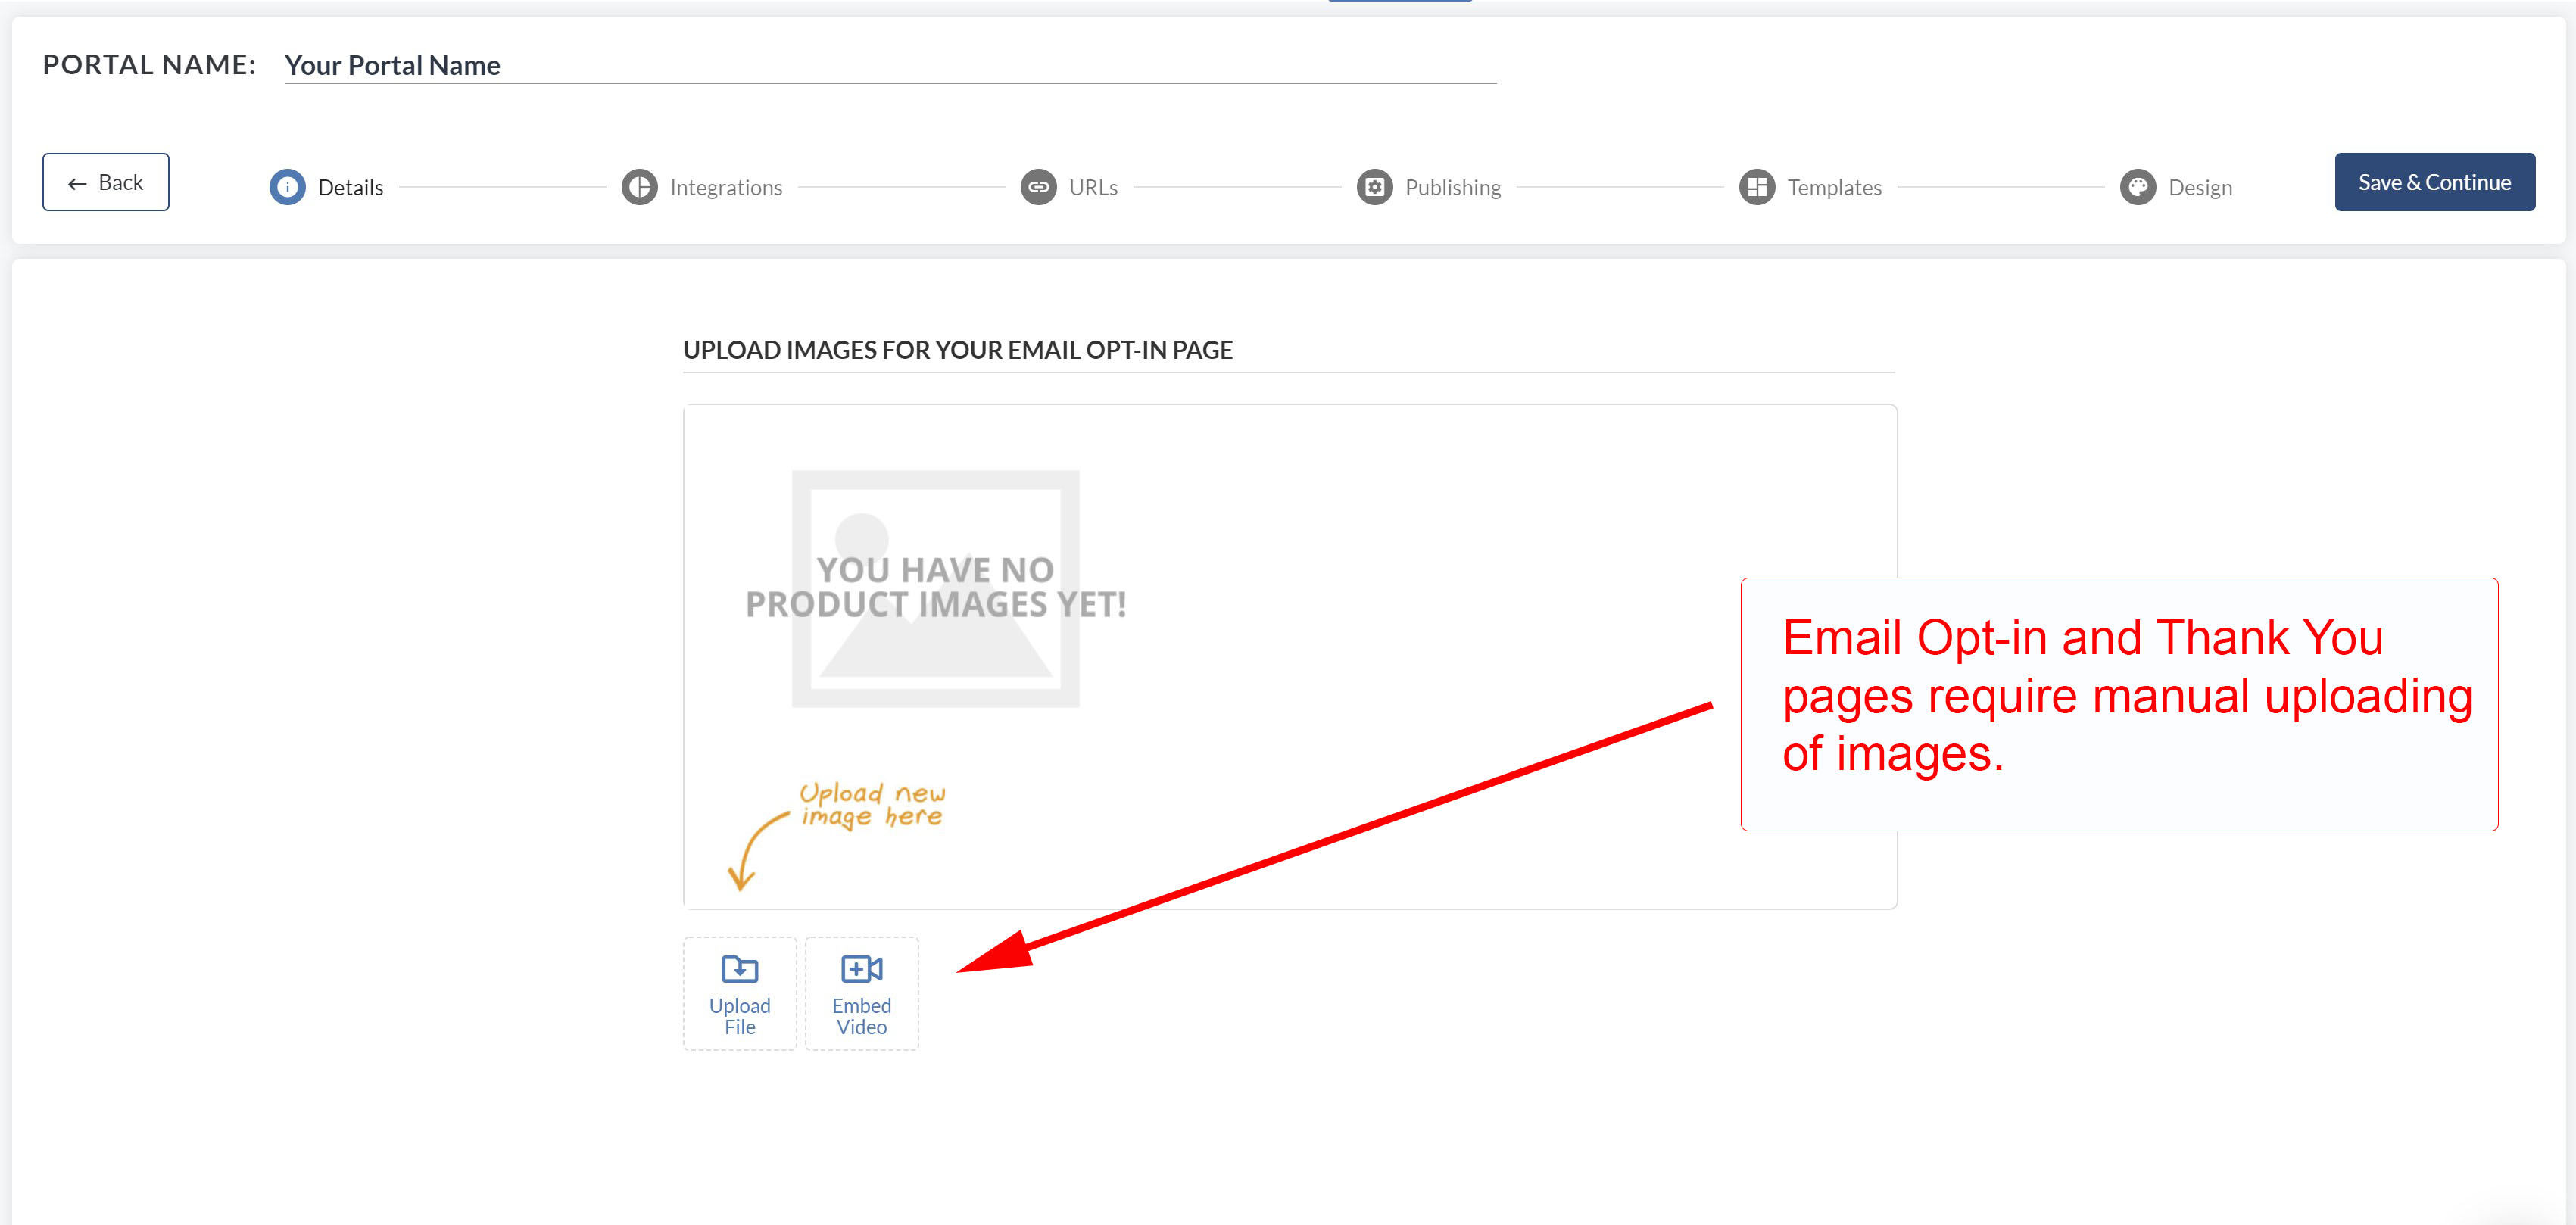
31. Because these landing pages are much simpler in design and purpose, Portals requires you to manually upload images and hand-type text. You can also upload a video, allowing you to speak directly to your customers, if you like. When you have uploaded all the digital content, click the blue Save & Continue button in the top, right corner to move forward to the landing page.
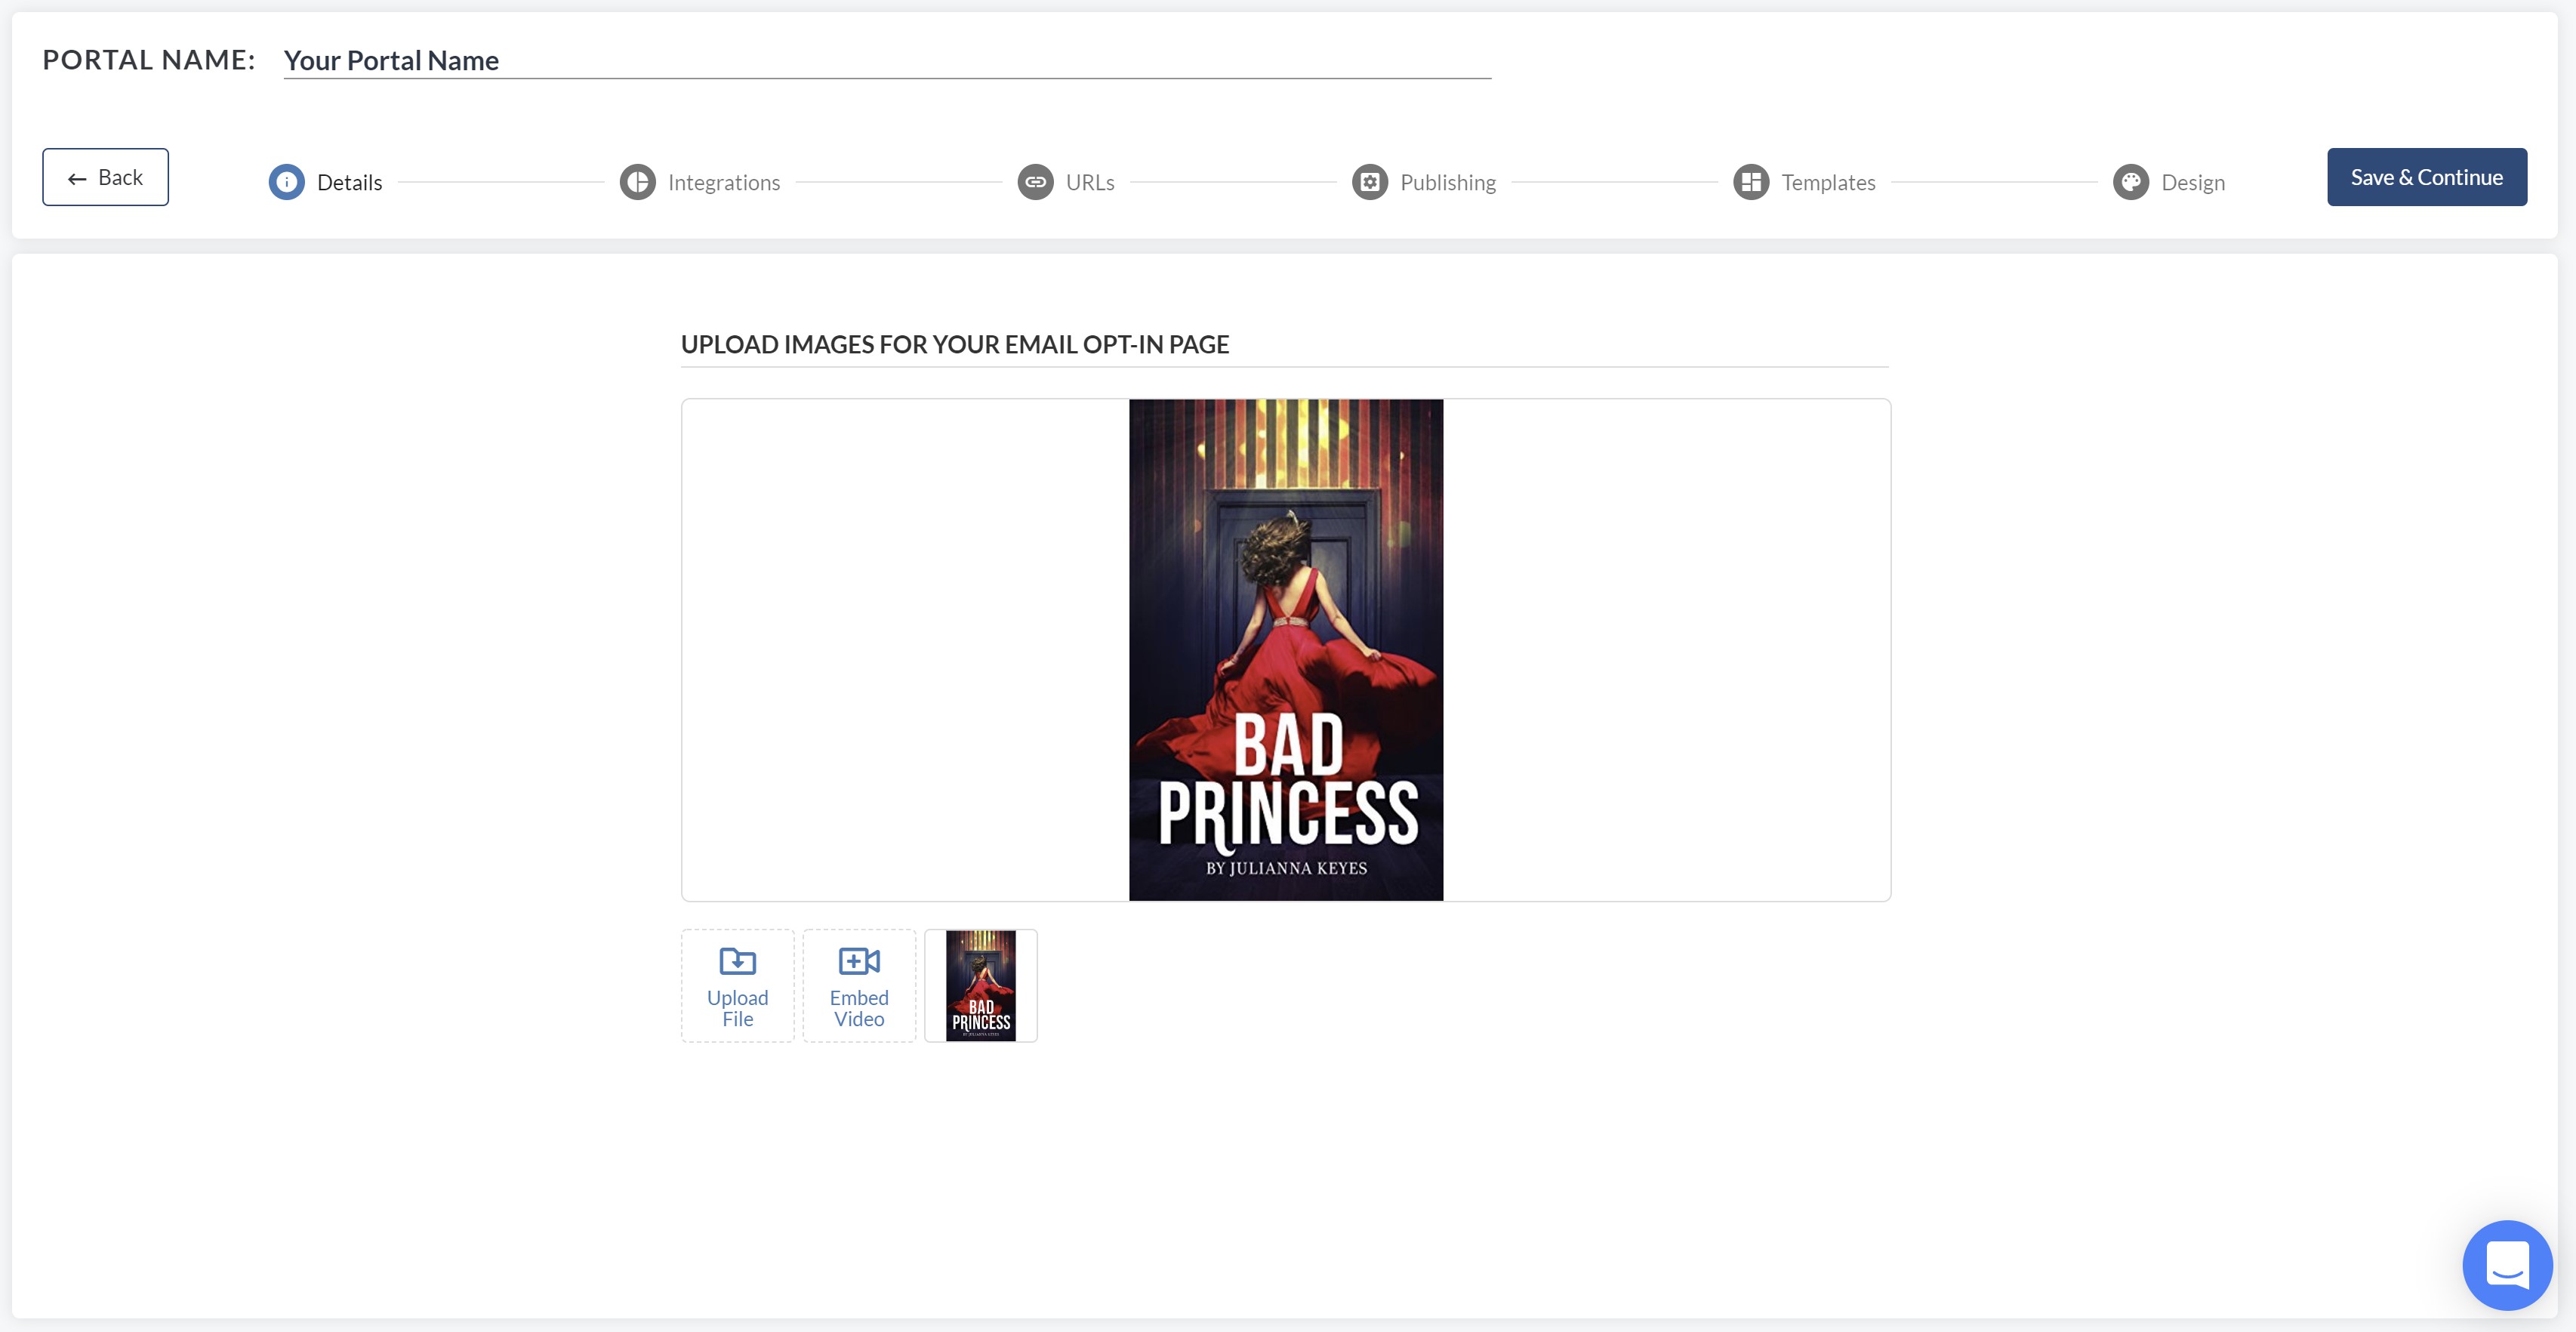
32. To edit text in these landing pages, simply click into the text field, delete the Latin placeholders and type in what you want the page to say. If you try to deploy a landing page with the Latin text still embedded in the page, Portals will give you a warning about it. Simply click on the edit pencil in the left drop-down menu for the page to open it back up for revision.
Once you have confirmed that all the text says what you want it to say, go ahead and deploy your Portal by clicking on the slider located next to the file in your list. Your newly created Portal is live in 1-2 minutes and you can turn it off again at any time.
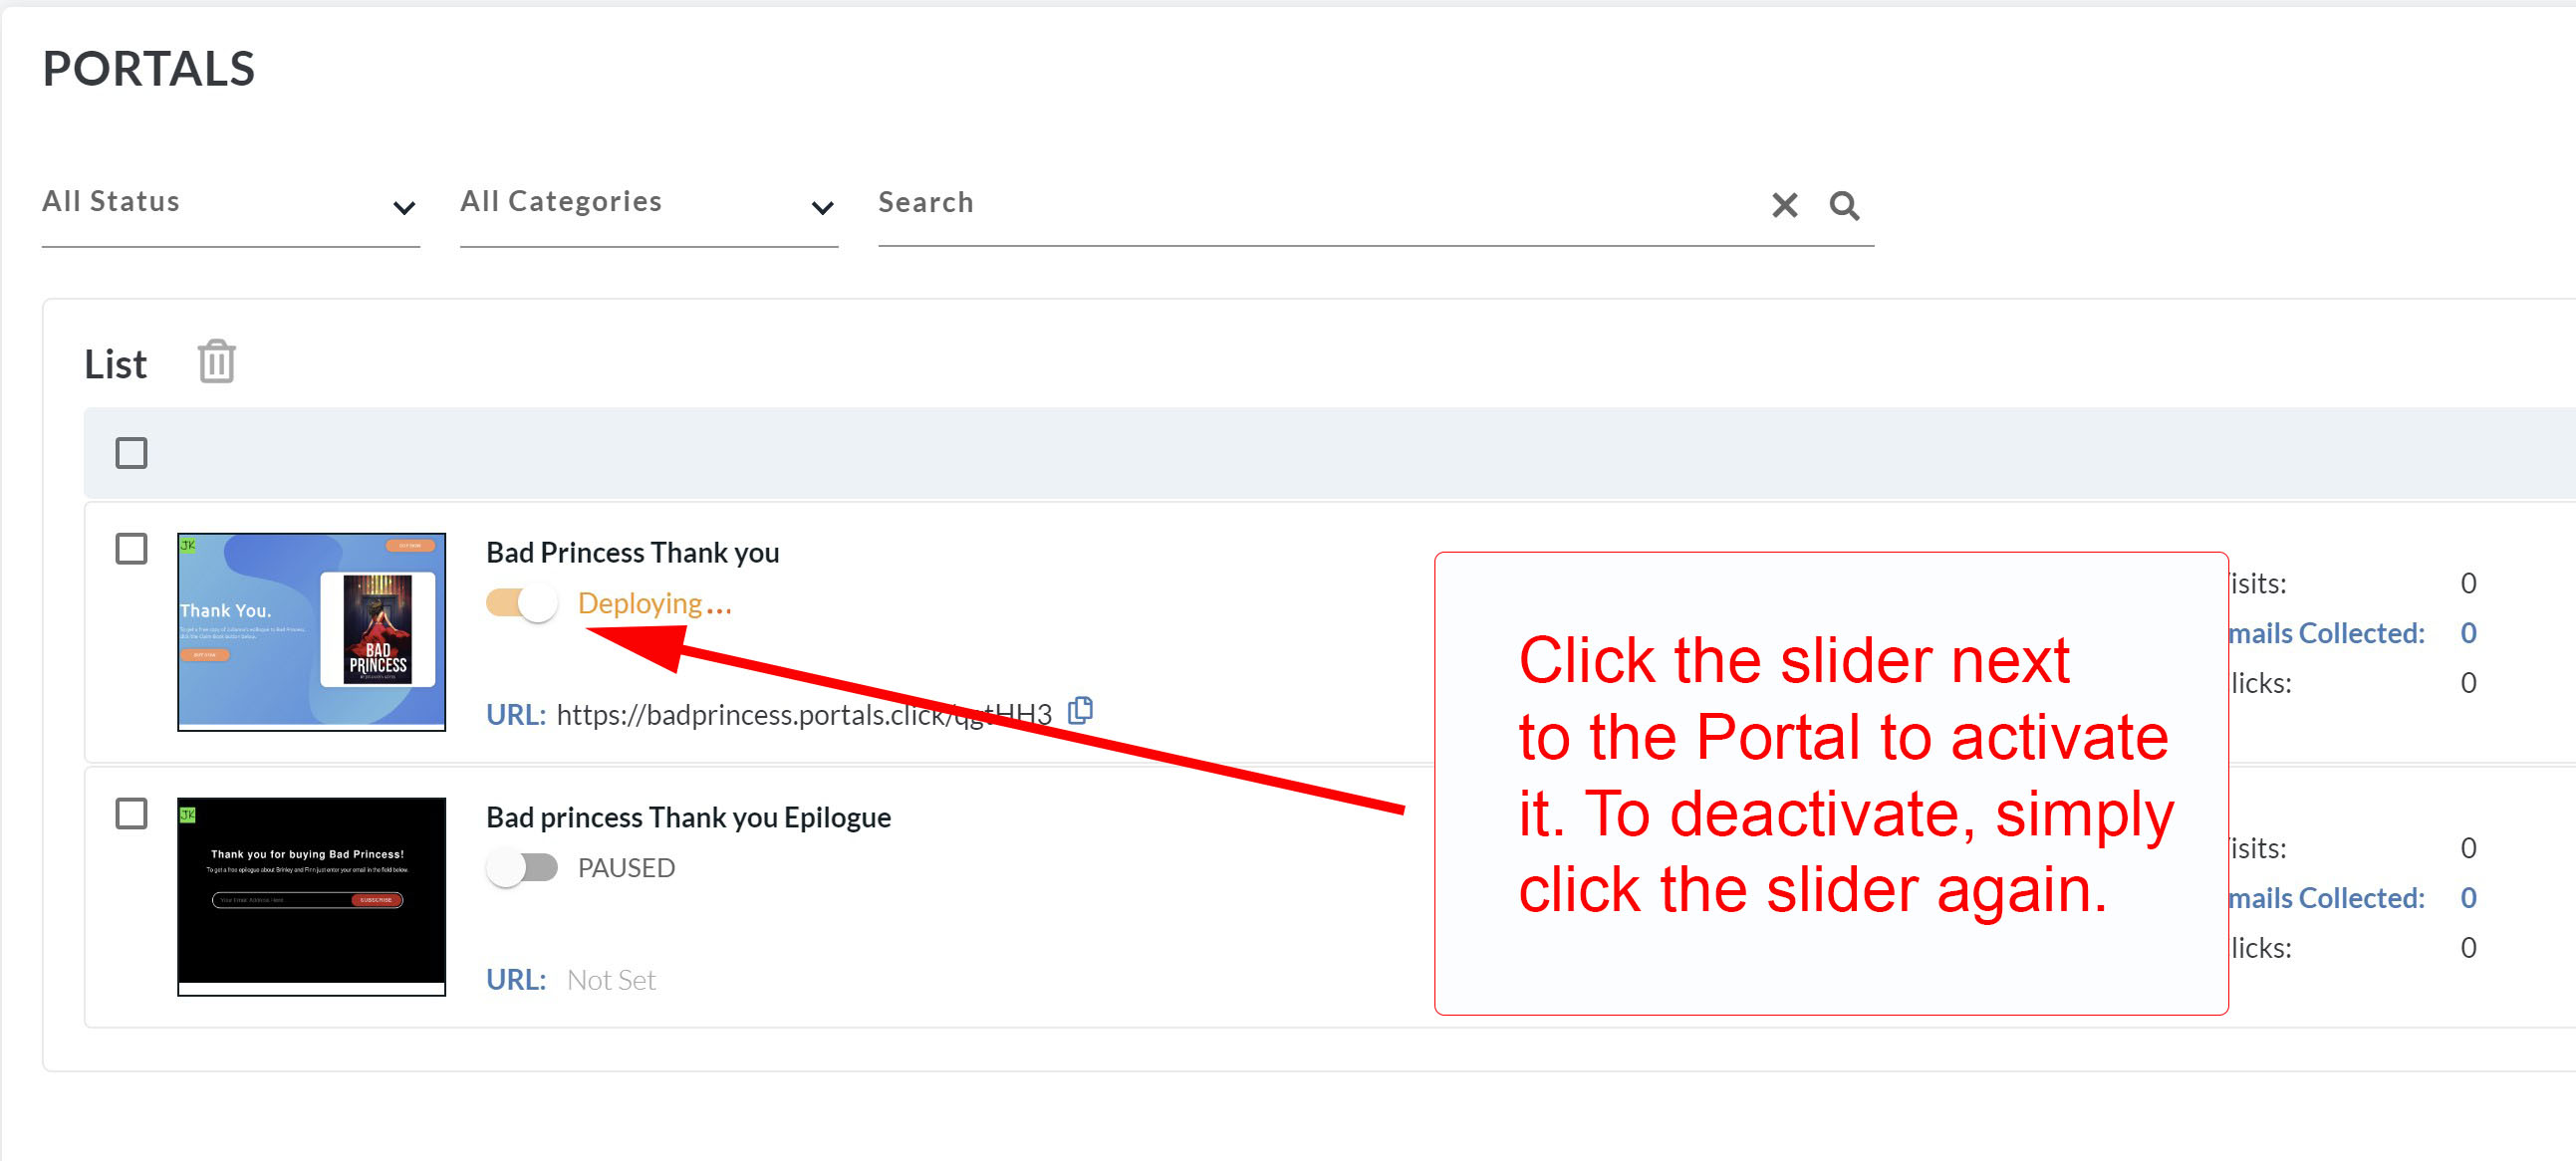
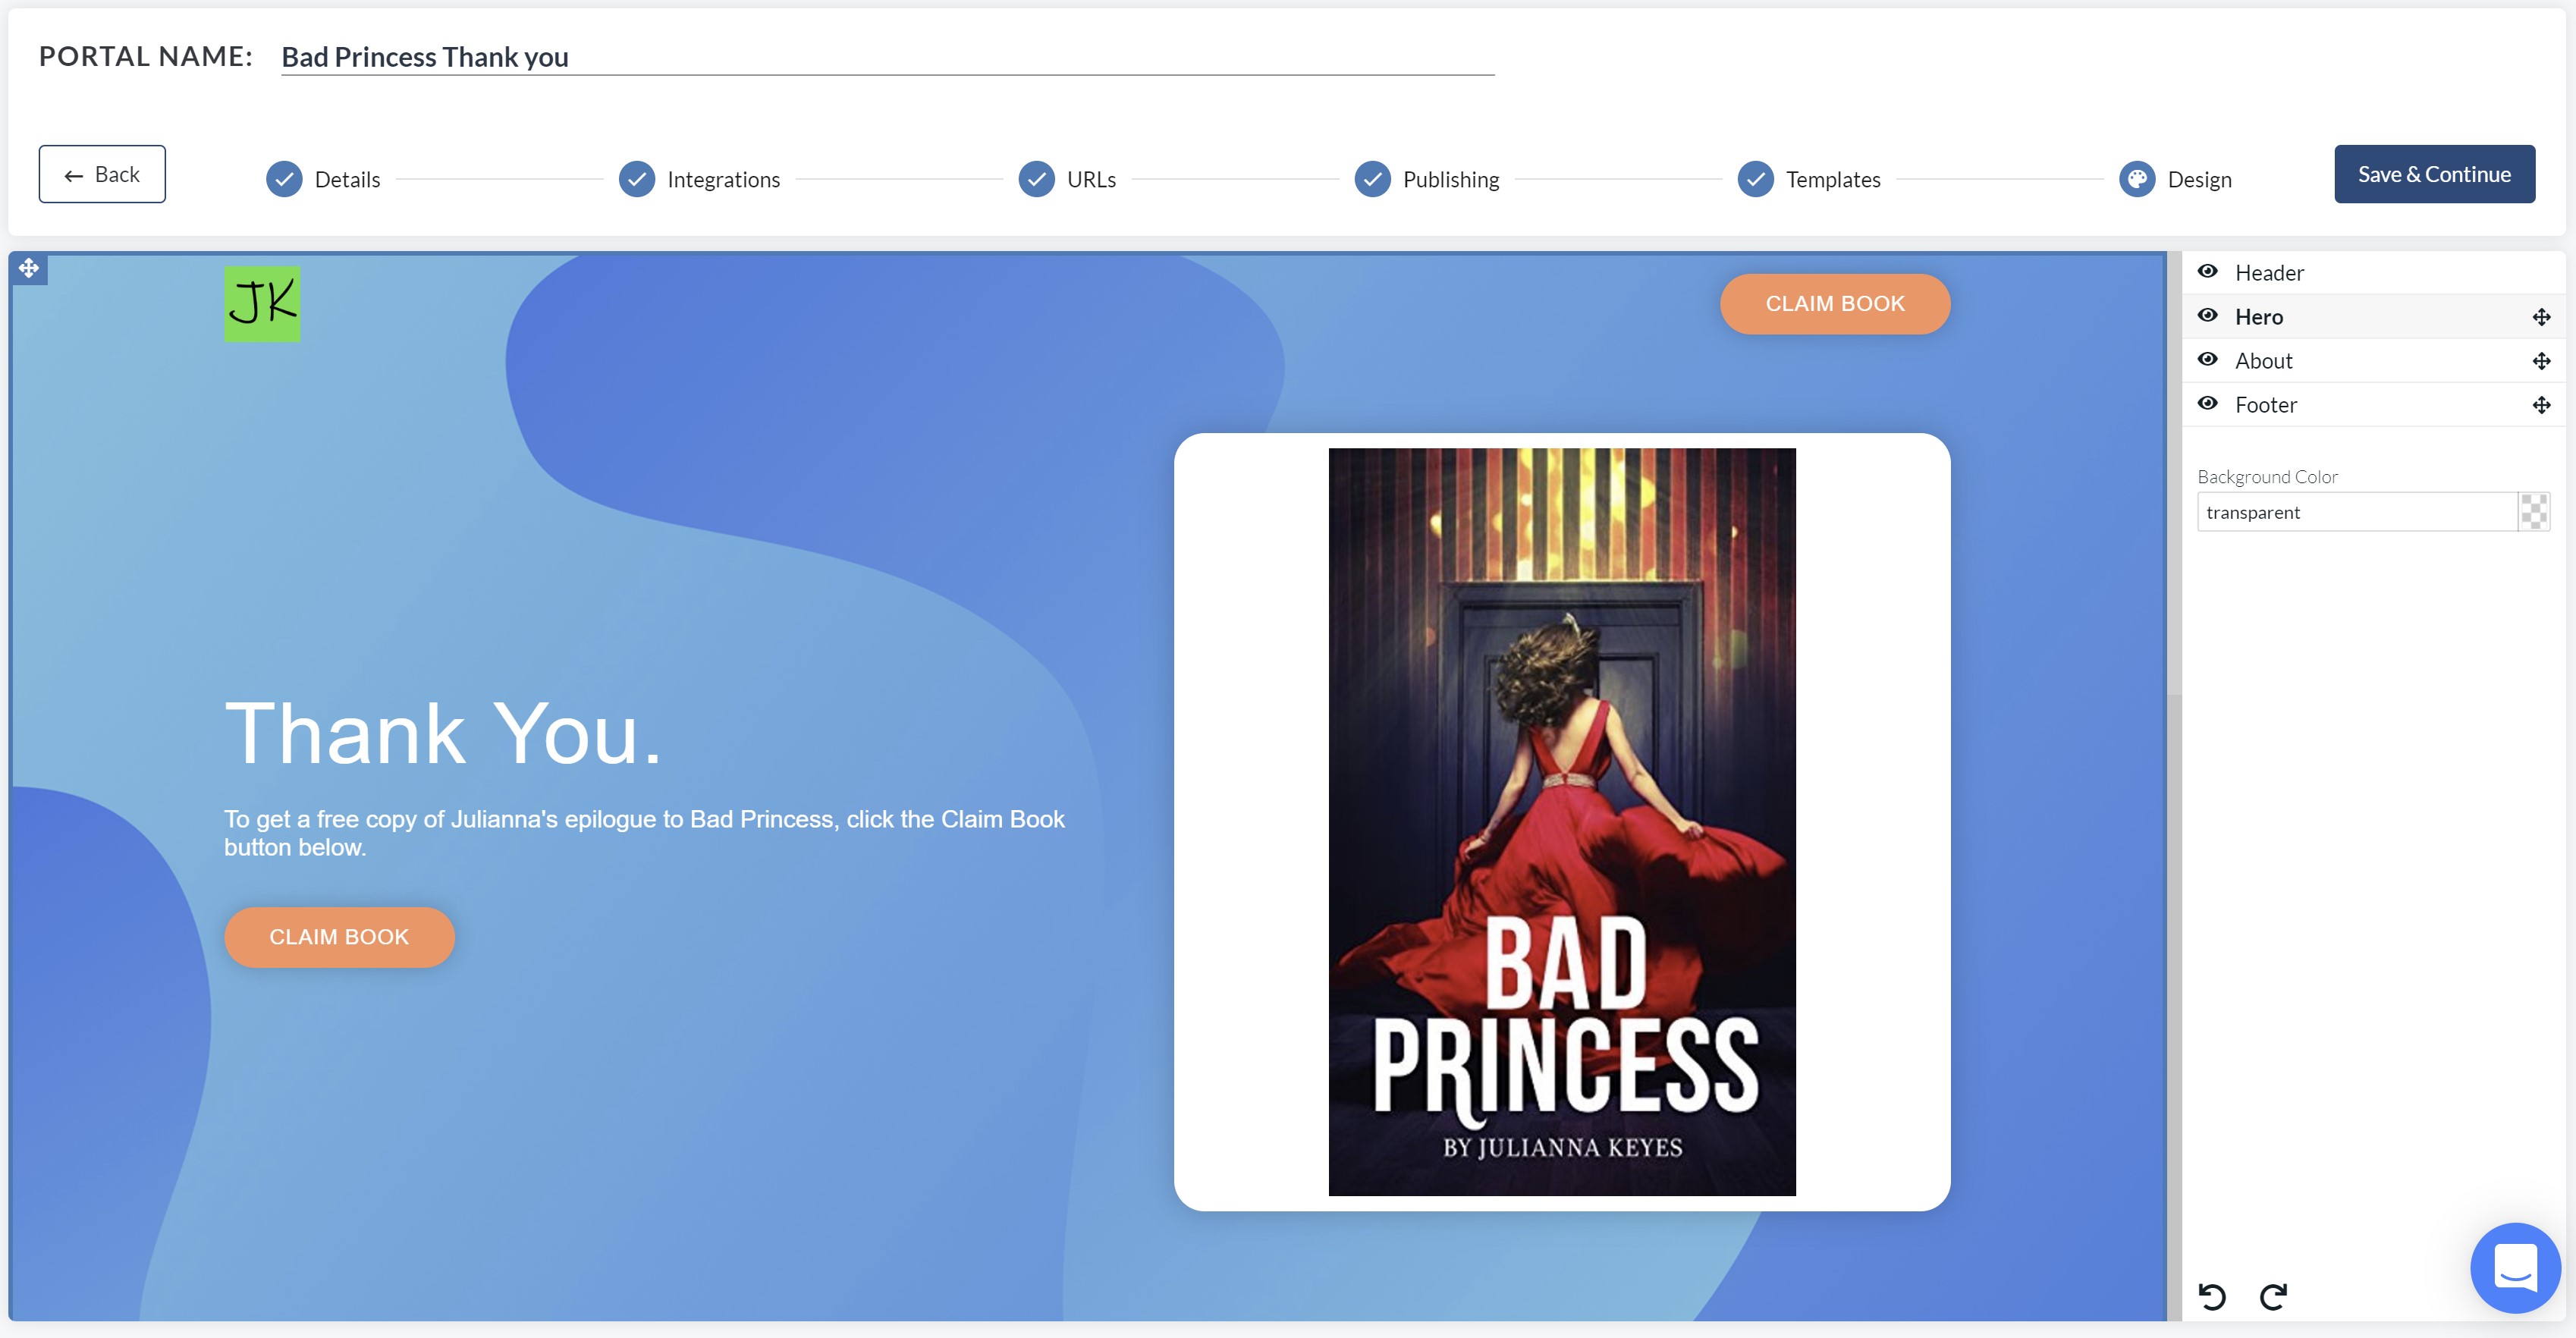
33. The final Thank You page using the Ocean Premade Template will look like this:
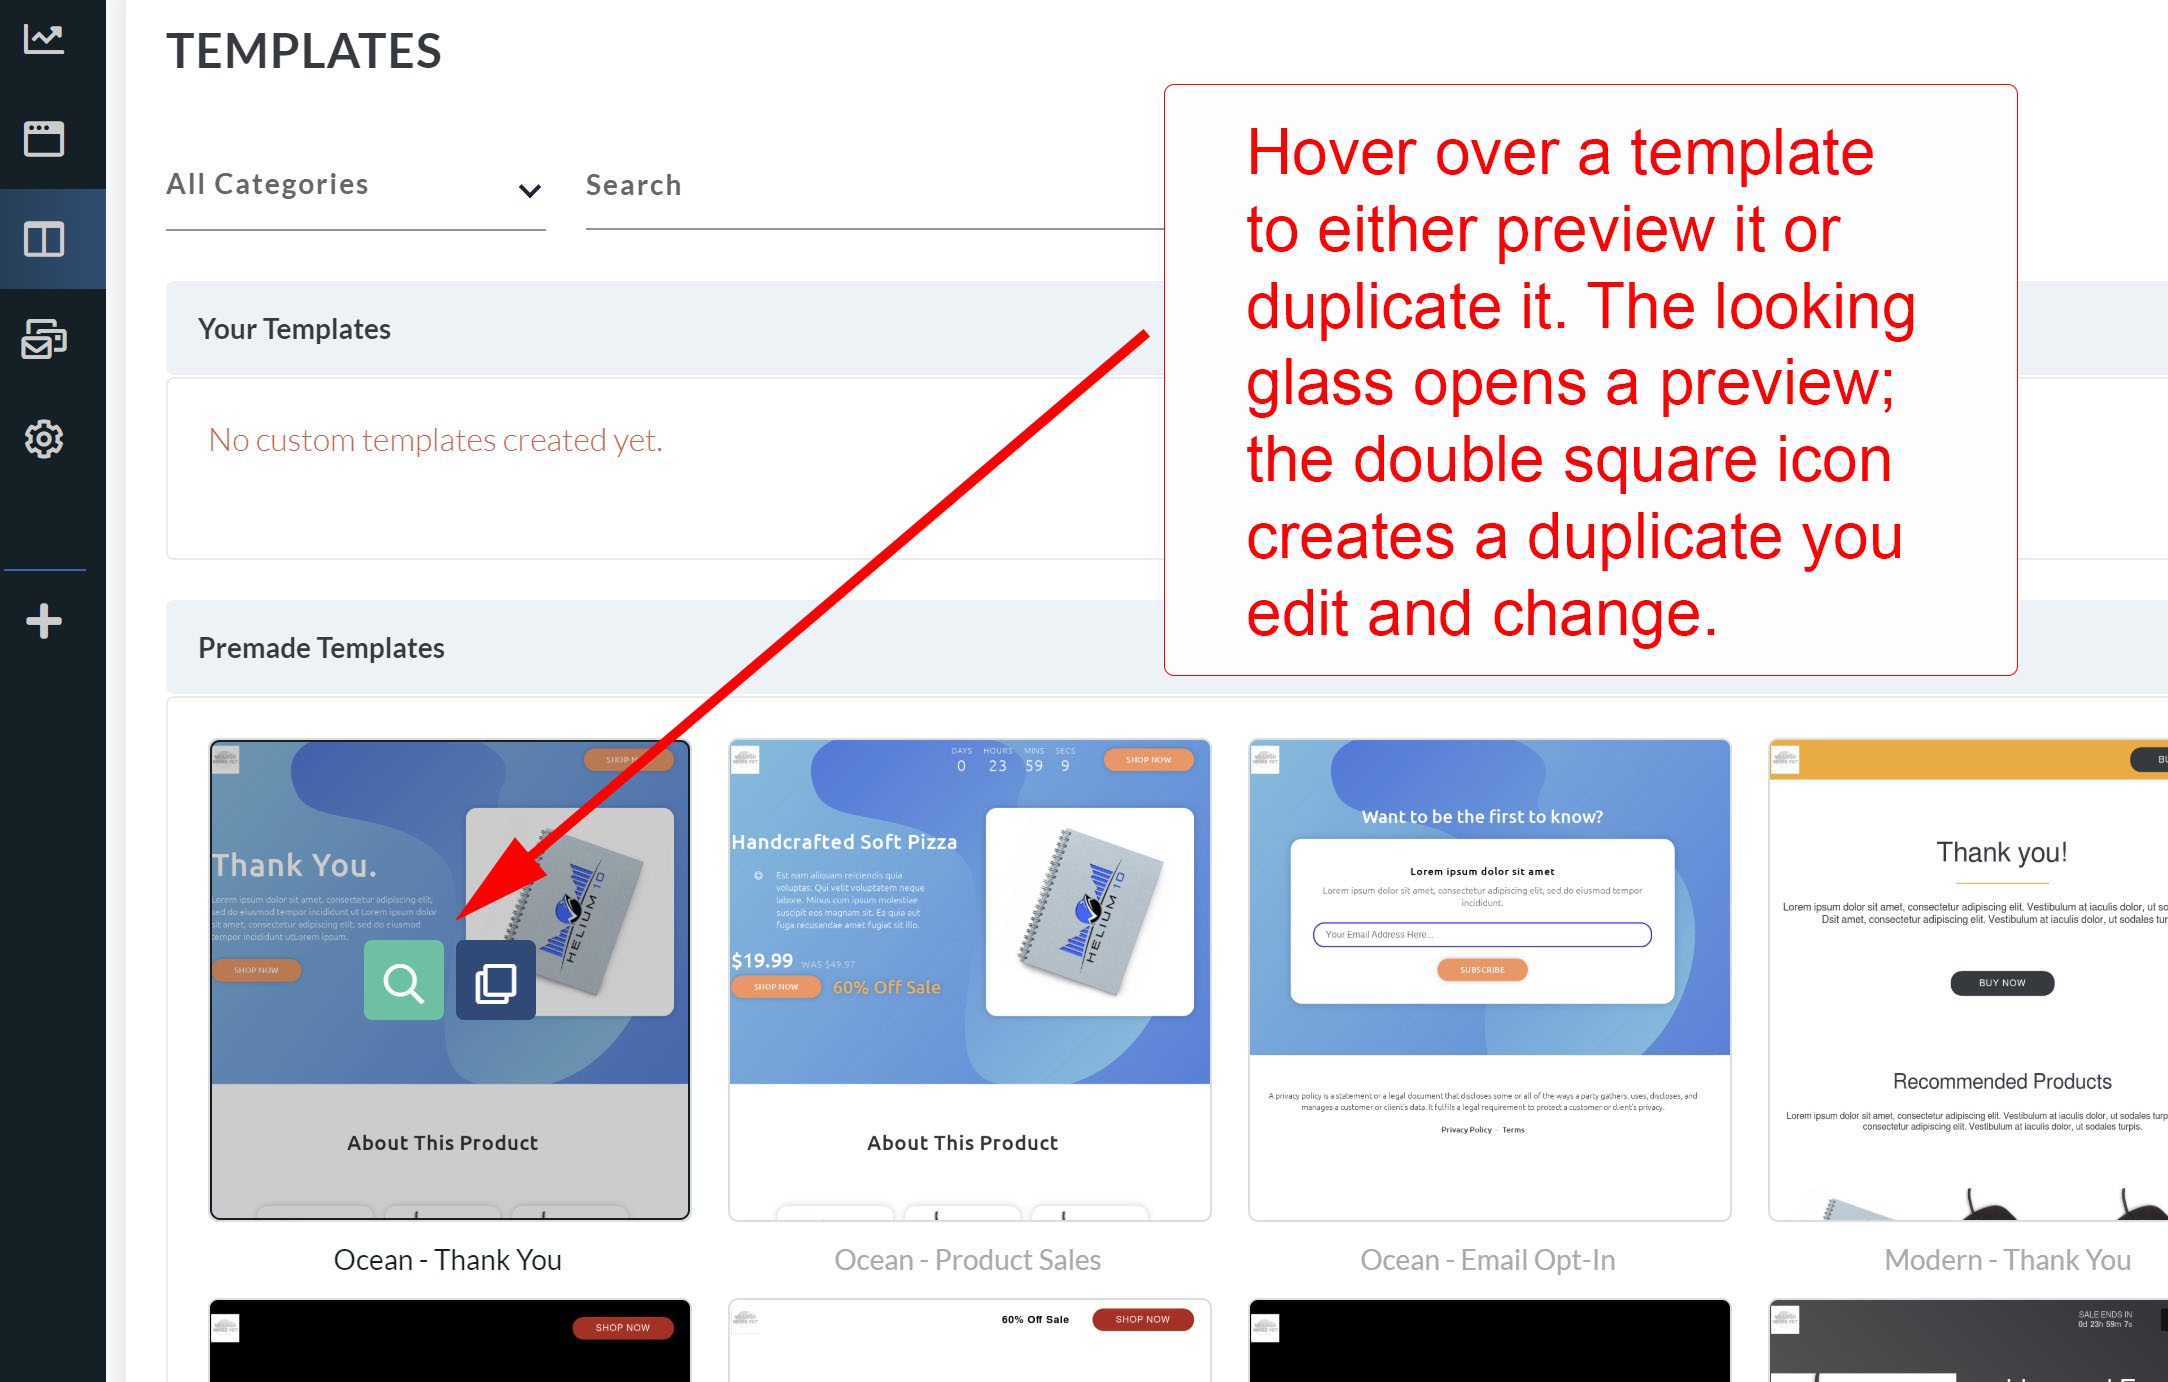
34. Portals comes with a variety of templates, and the library will grow over time. To see the premade templates, click on the third tab, under Portals, on the left side menu. This section of the tool lets you see all the available templates in Portals.
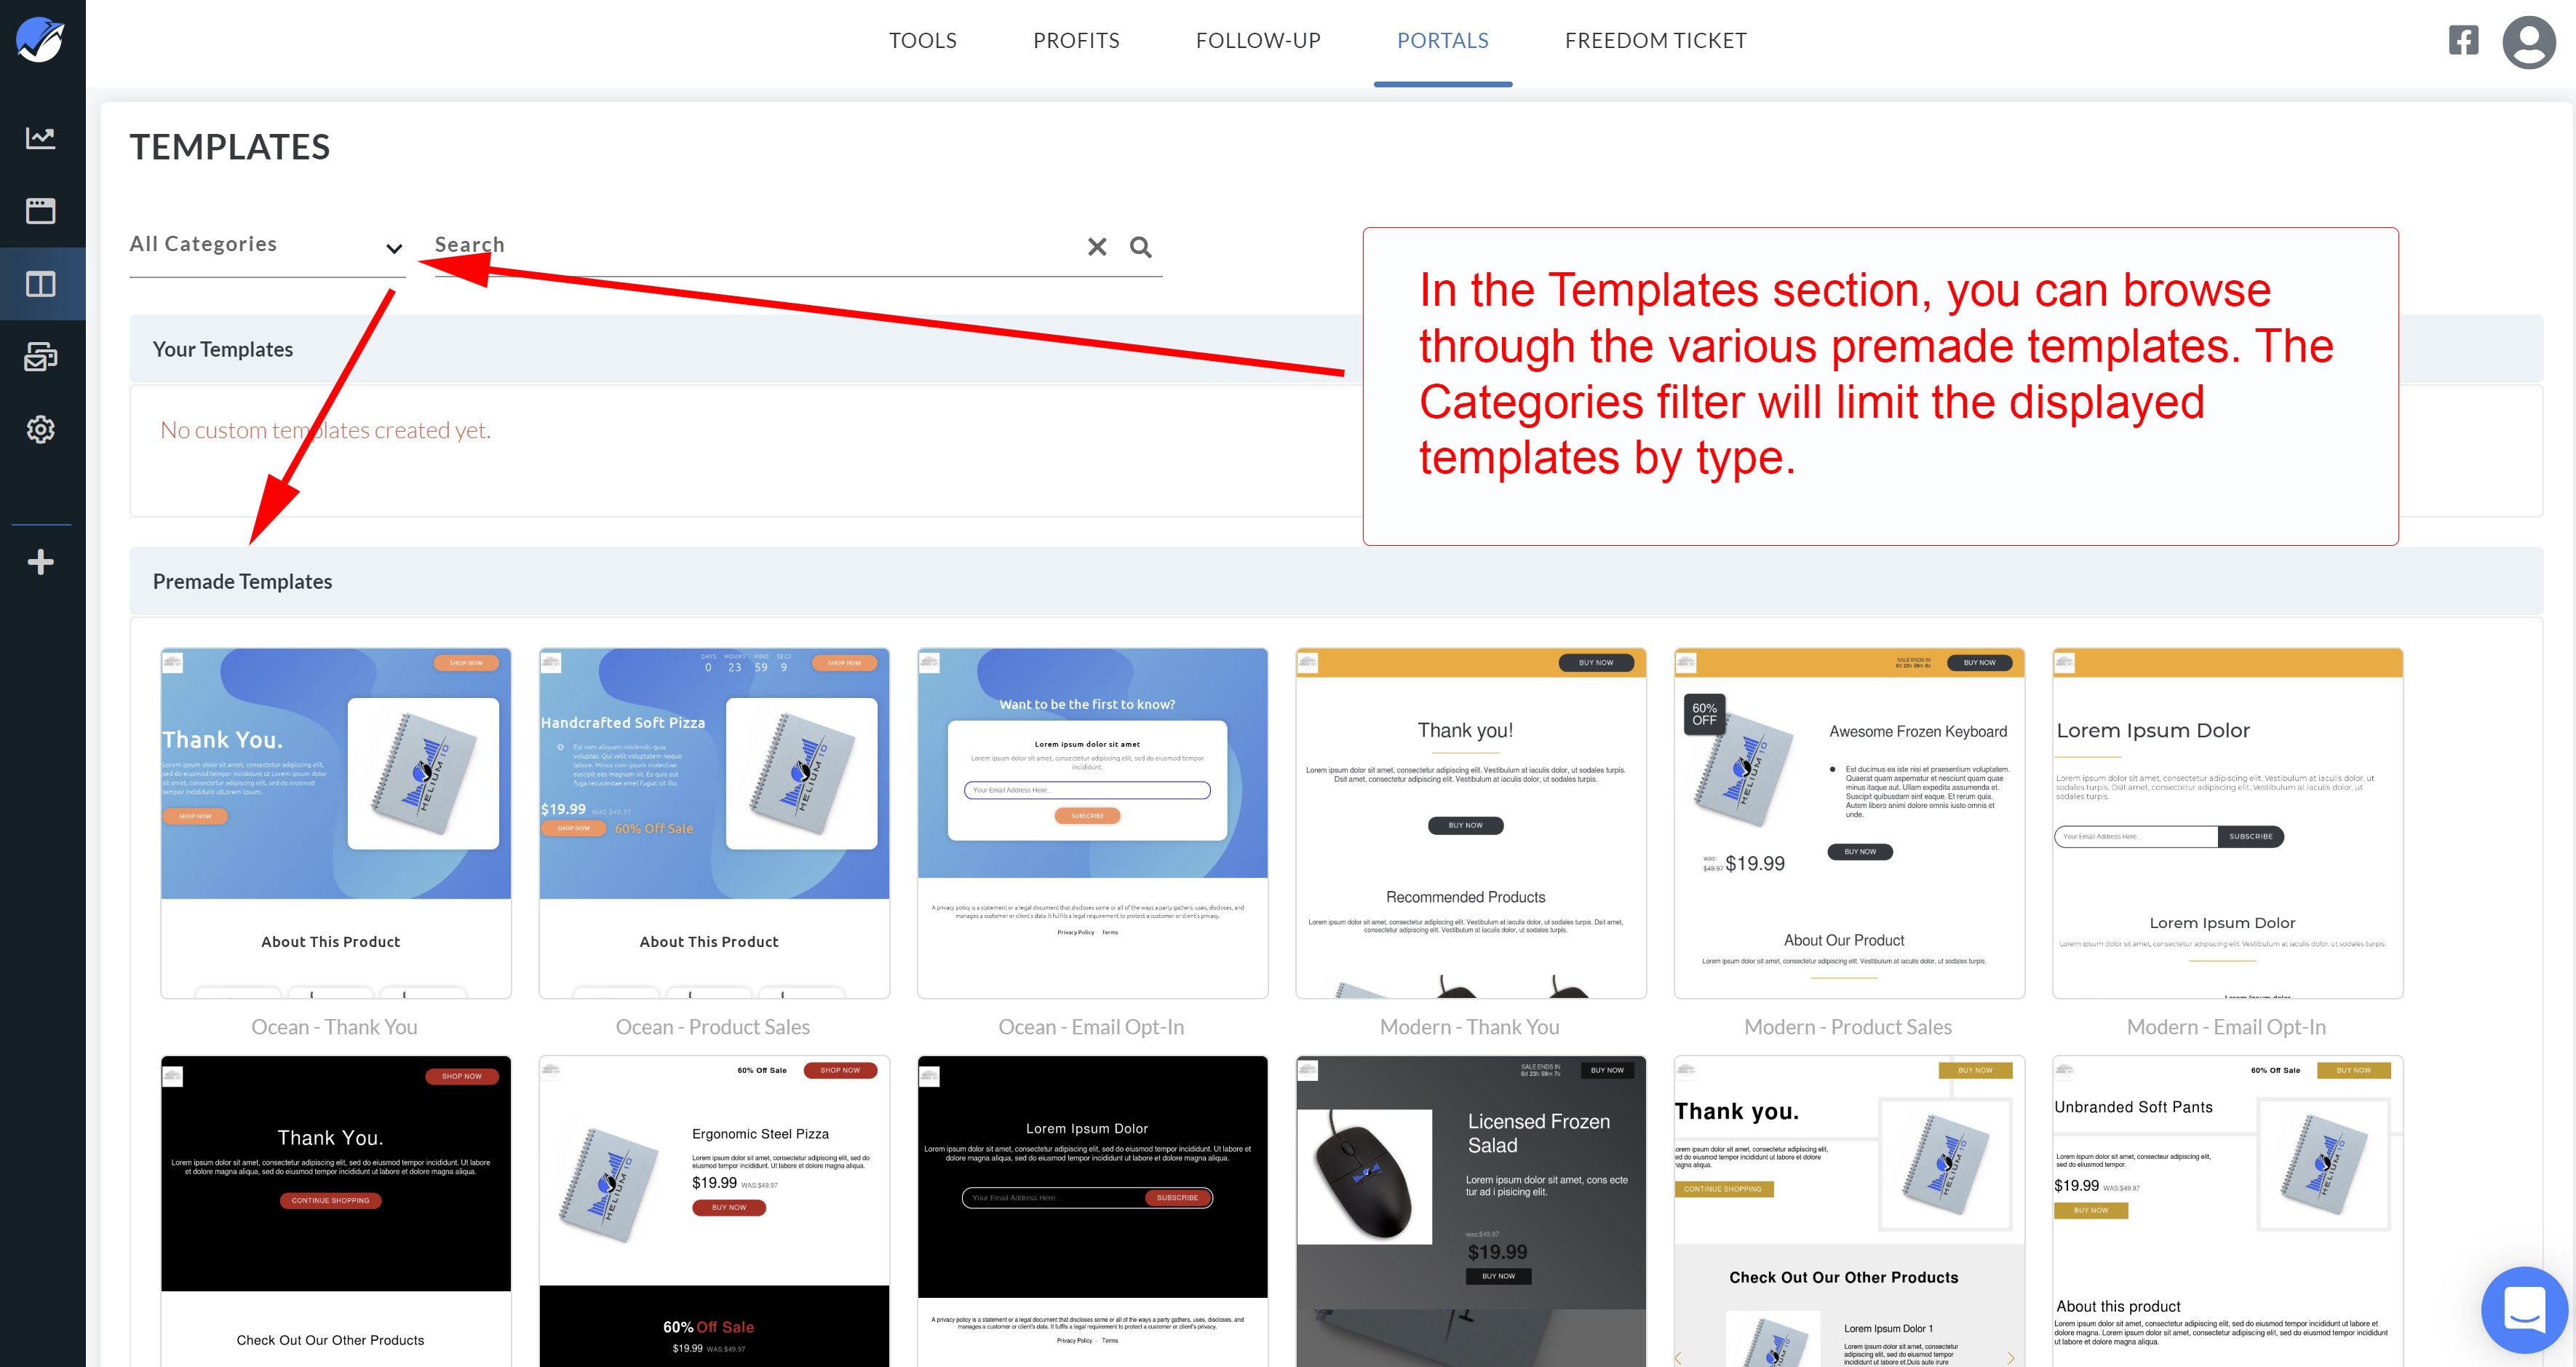
You can either duplicate a template from this window to rename and edit, or preview its design and layout.
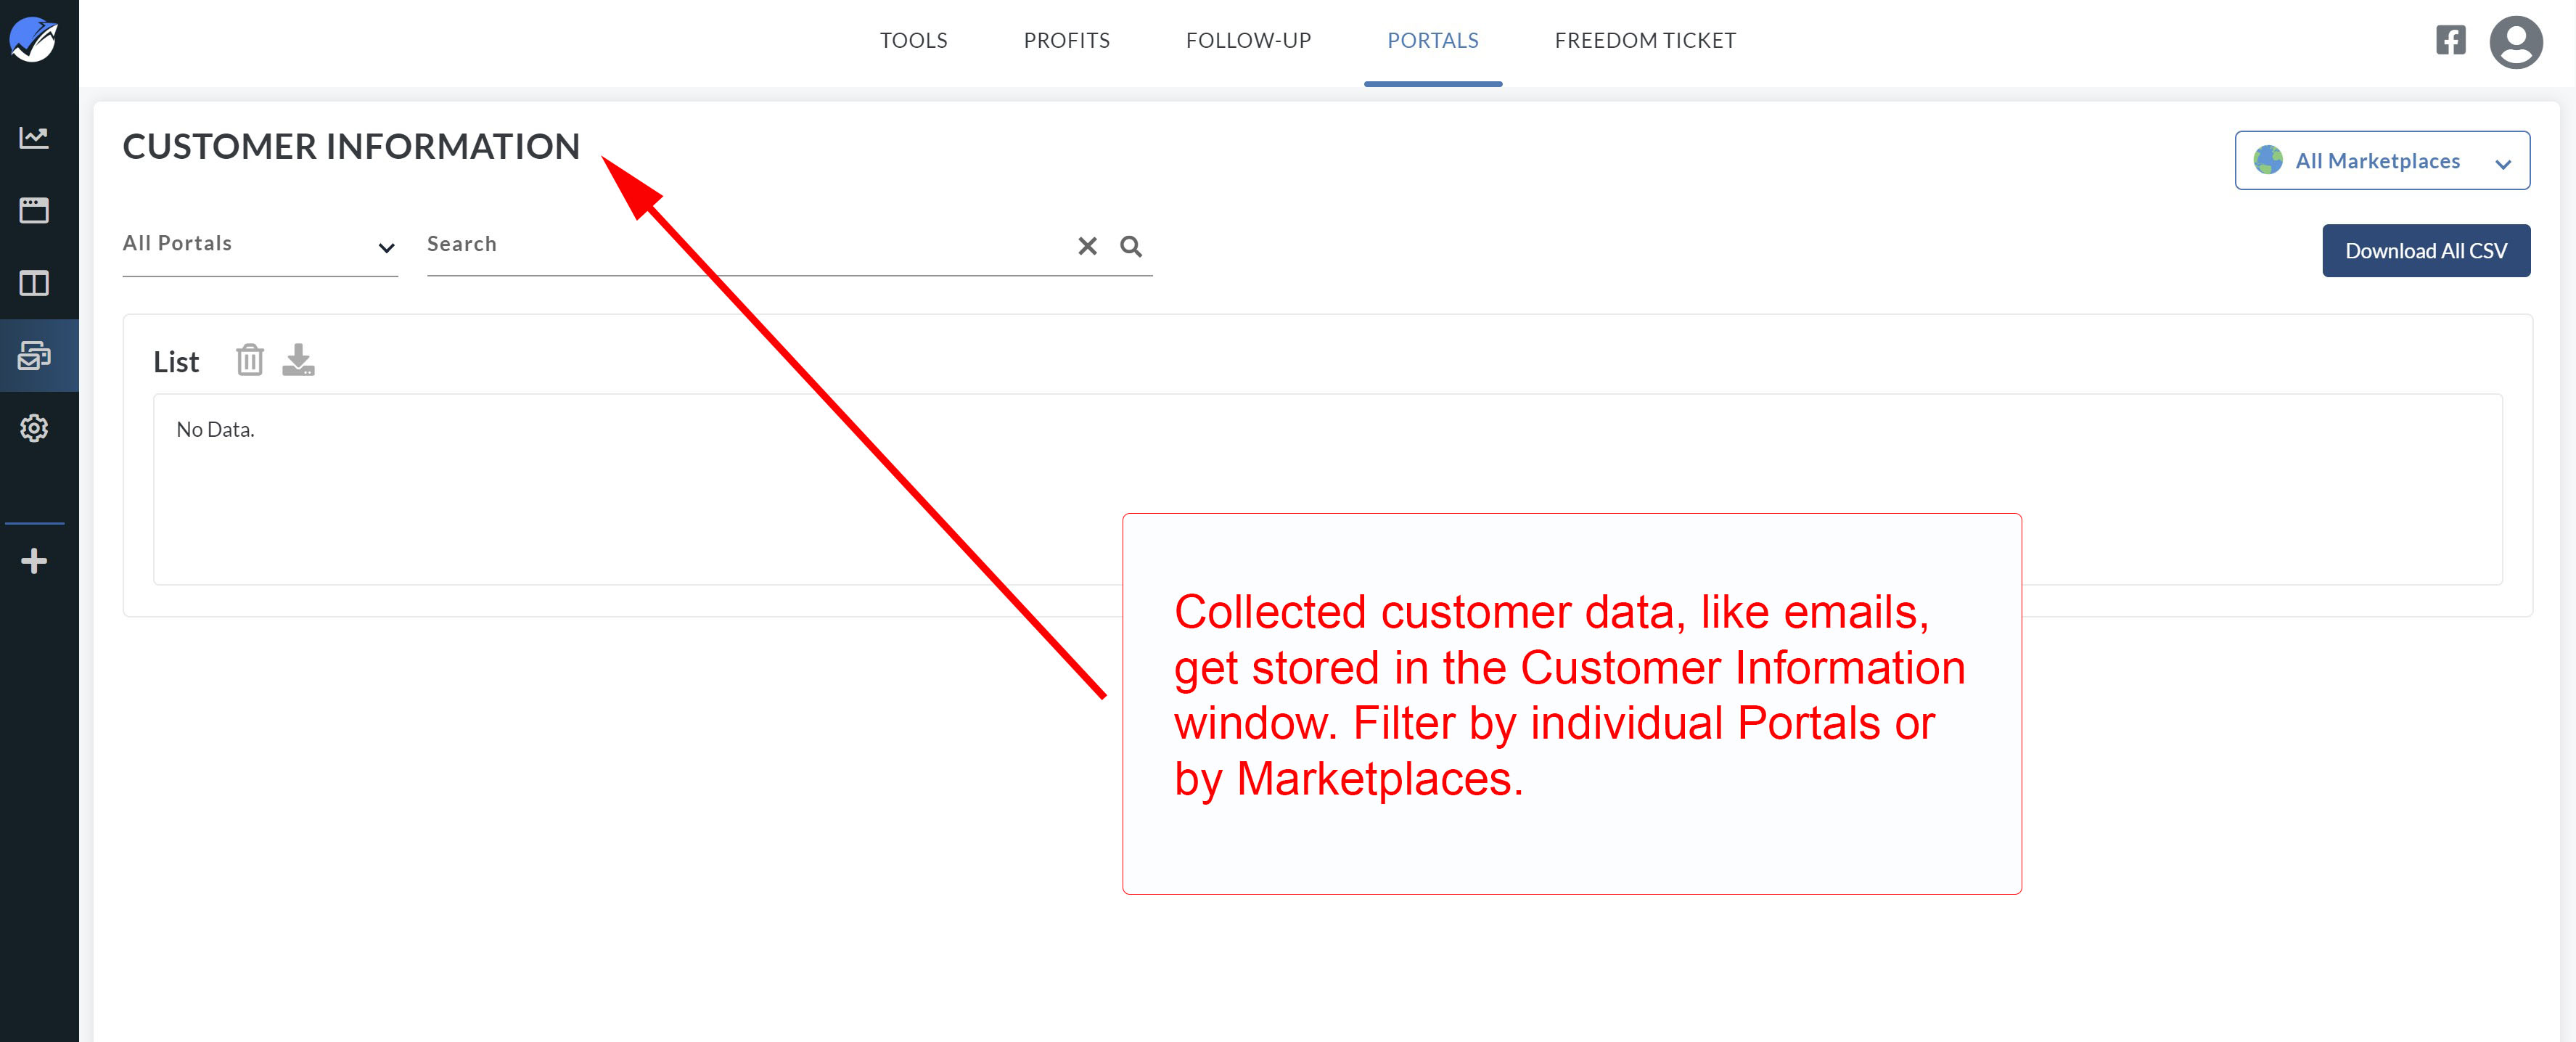
35. The final section in Portals is the Customer Information window. Portals collects and saves customer emails when you require it as part of a marketing promotion. This window displays all the emails that have been stored. You can now use this information to target these warm customers, based on their previous interest in your products. Helium 10 recommends that you always follow any government laws and policies relative to customer privacy and the collection of customer data.
To learn more about using Portals, you can watch the PRO Training videos created by Helium 10's product manager Barcus.
Create a Free Helium 10 Account Today!
Start with the free extension: Download the Helium 10 Chrome Extension.
Comments
Article is closed for comments.