![]()
This article is organized into four parts.
The first section covers methods you can use to create a purchase order inside Inventory Management.
The second and third sections cover the process of working with either Local or Direct purchase orders (as some of the steps are different). A Direct Purchase Order is created when you send your product directly from the manufacturer to Amazon. A Local Purchase Order is created when you are sending your product from a local or non-Amazon warehouse to an Amazon warehouse.
The final section explains how the inventory data is accessed or recorded after the process concludes.
I. Stage One in Creating a Purchase Order
There are two places in Inventory Management where you can create Purchase Orders. The first 10 steps of the process are the same, whether you are creating a Local Shipment Purchase Order, or a Direct Shipment Purchase Order.
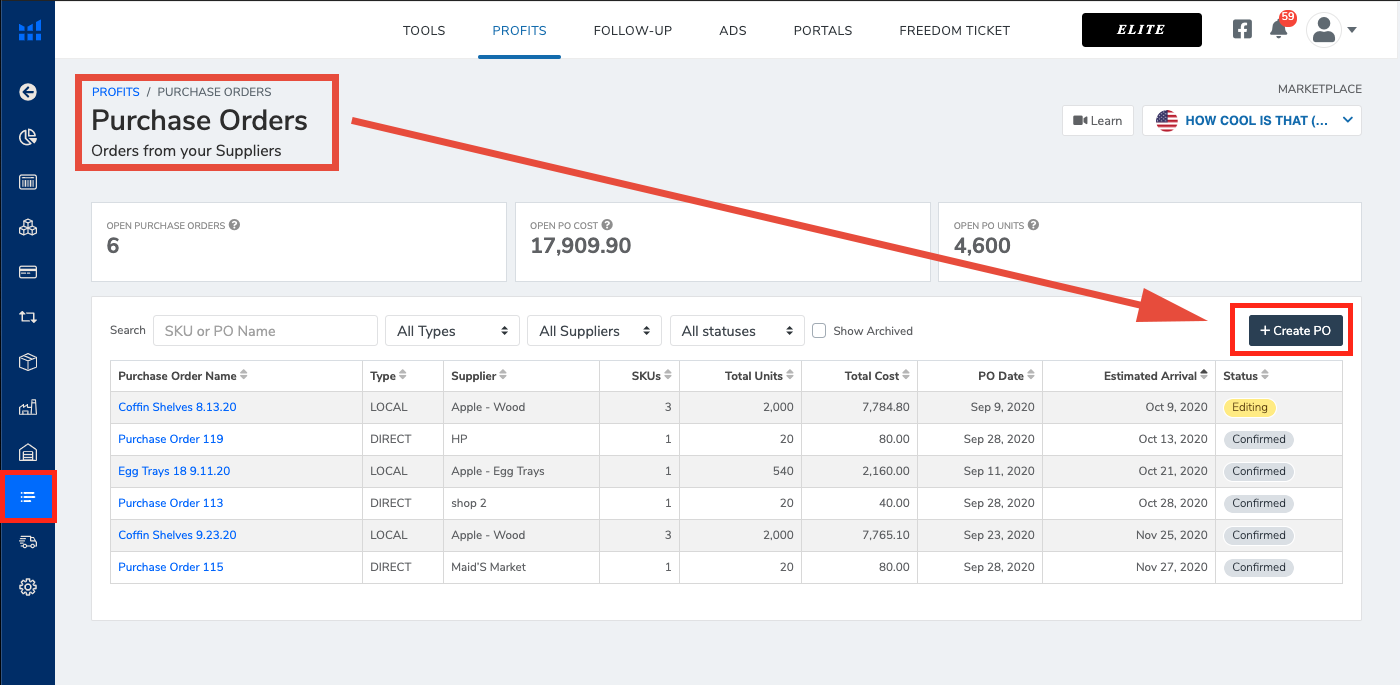
1. From the Purchase Orders page, click the + Create PO Button.
2. Or, from the Restock Suggestions Page, select at least one product with the checkbox on the left and click the Actions Button and choose Create Purchase Order.
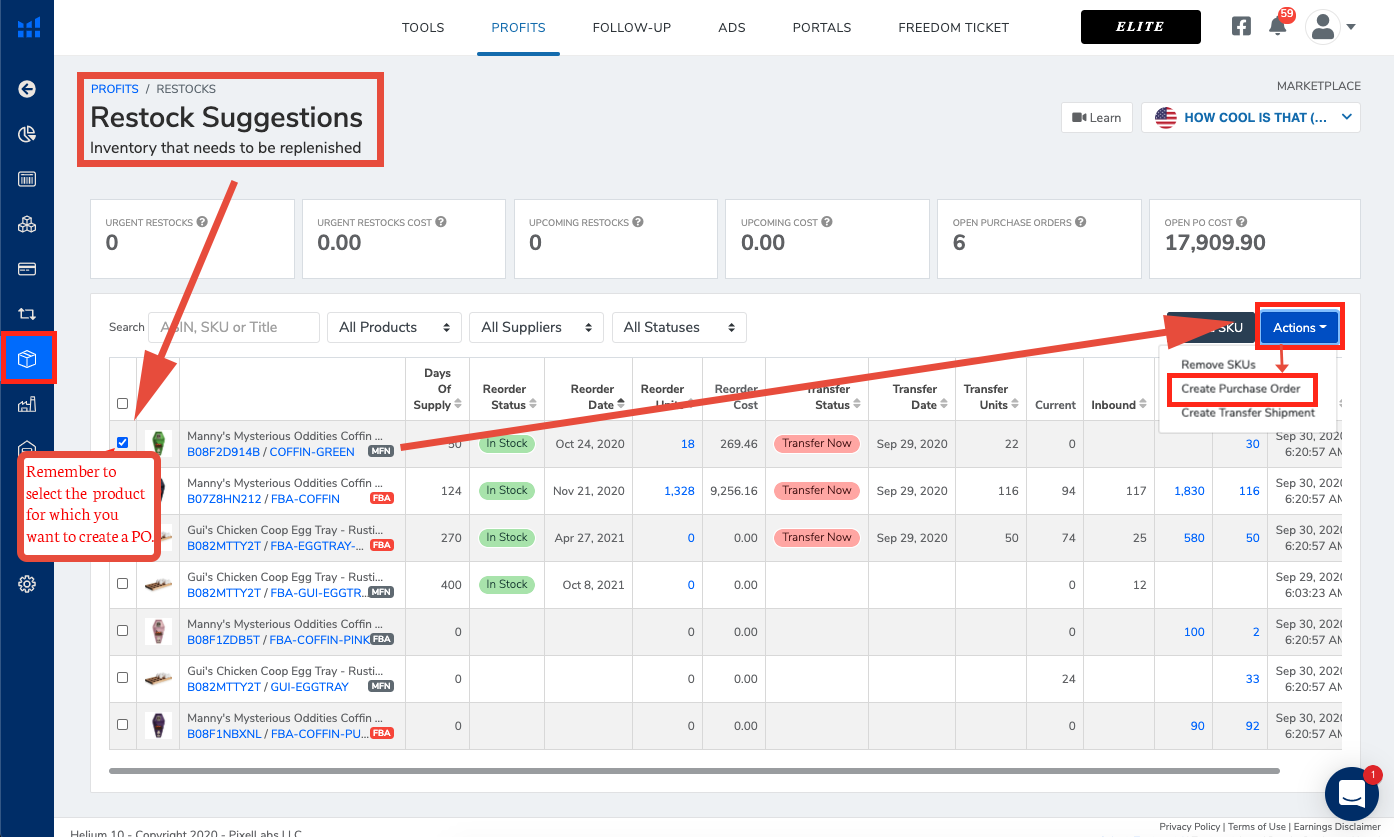
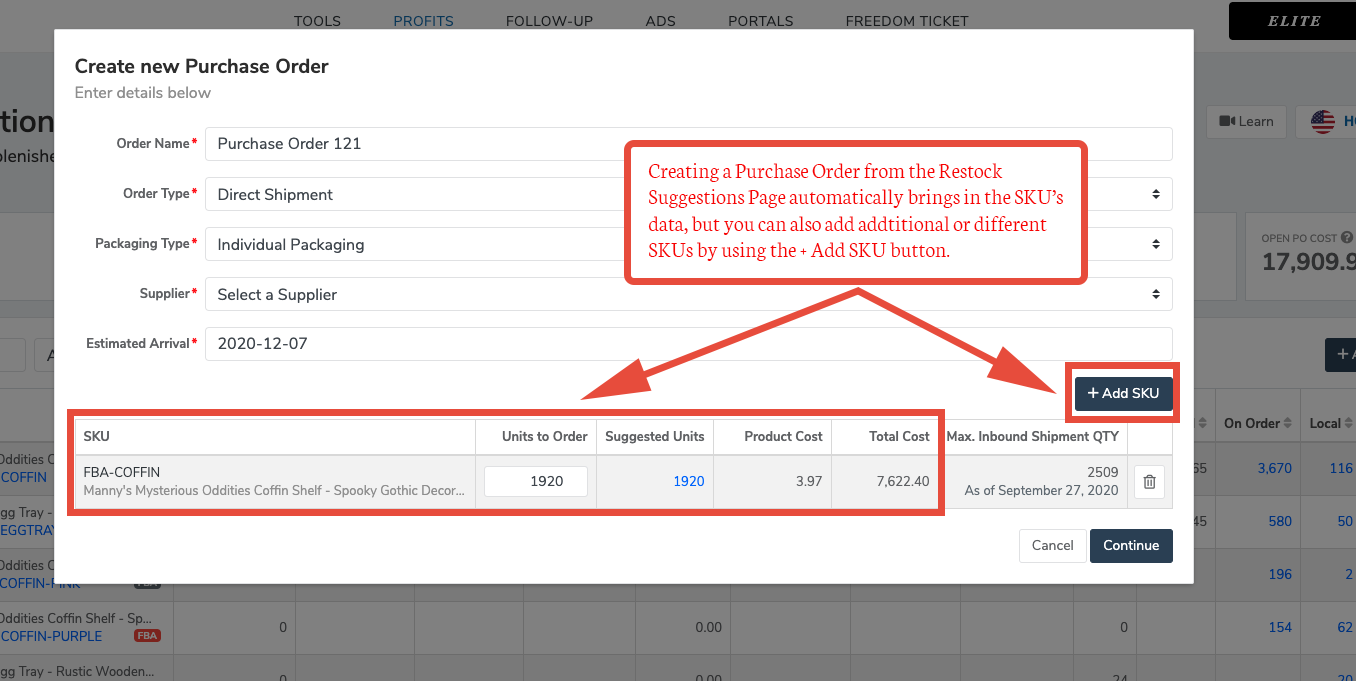
Both options work the same way, but creating the Purchase Order from the Restock Suggestion Page also pre-populates your selected SKUs on the Purchase Order. You can also add additional SKUs to the Purchase Order by clicking the + Add SKU button.
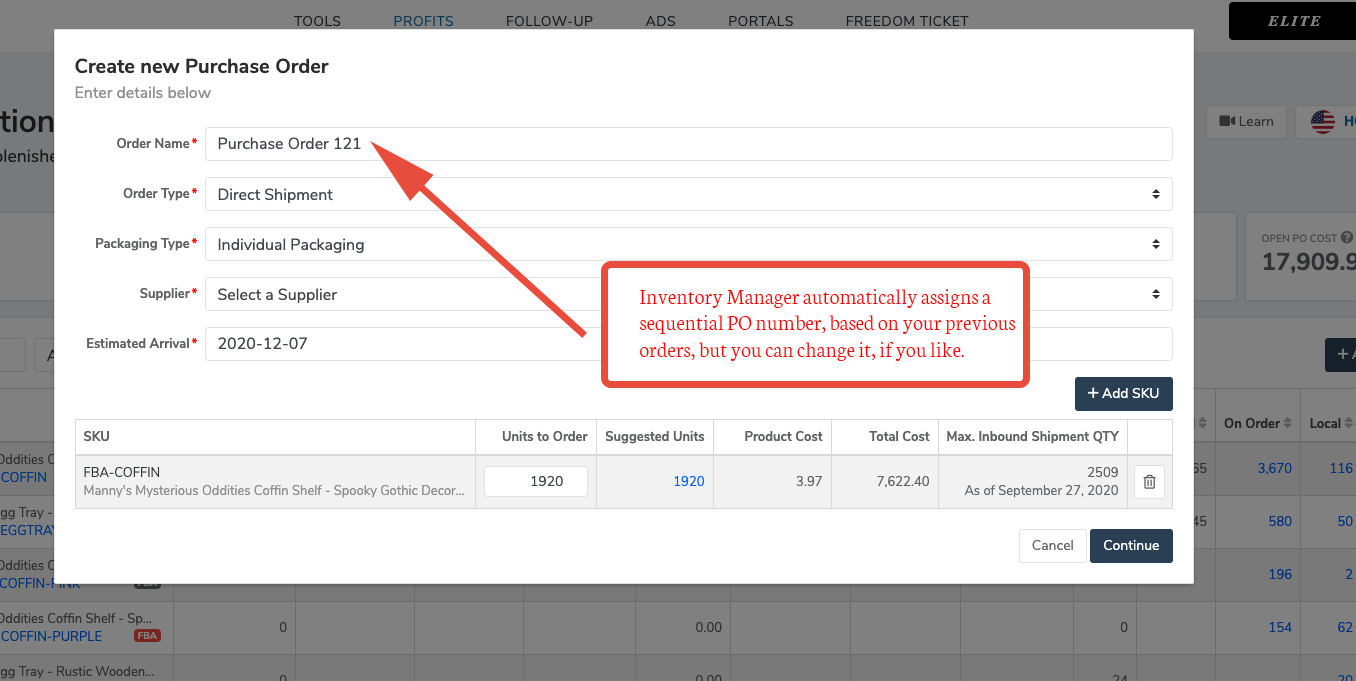
3. On the Create new Purchase Order window, you can add a custom Purchase Order Name. Inventory Management pre-populates this field with a sequential PO number, but you can edit it here.
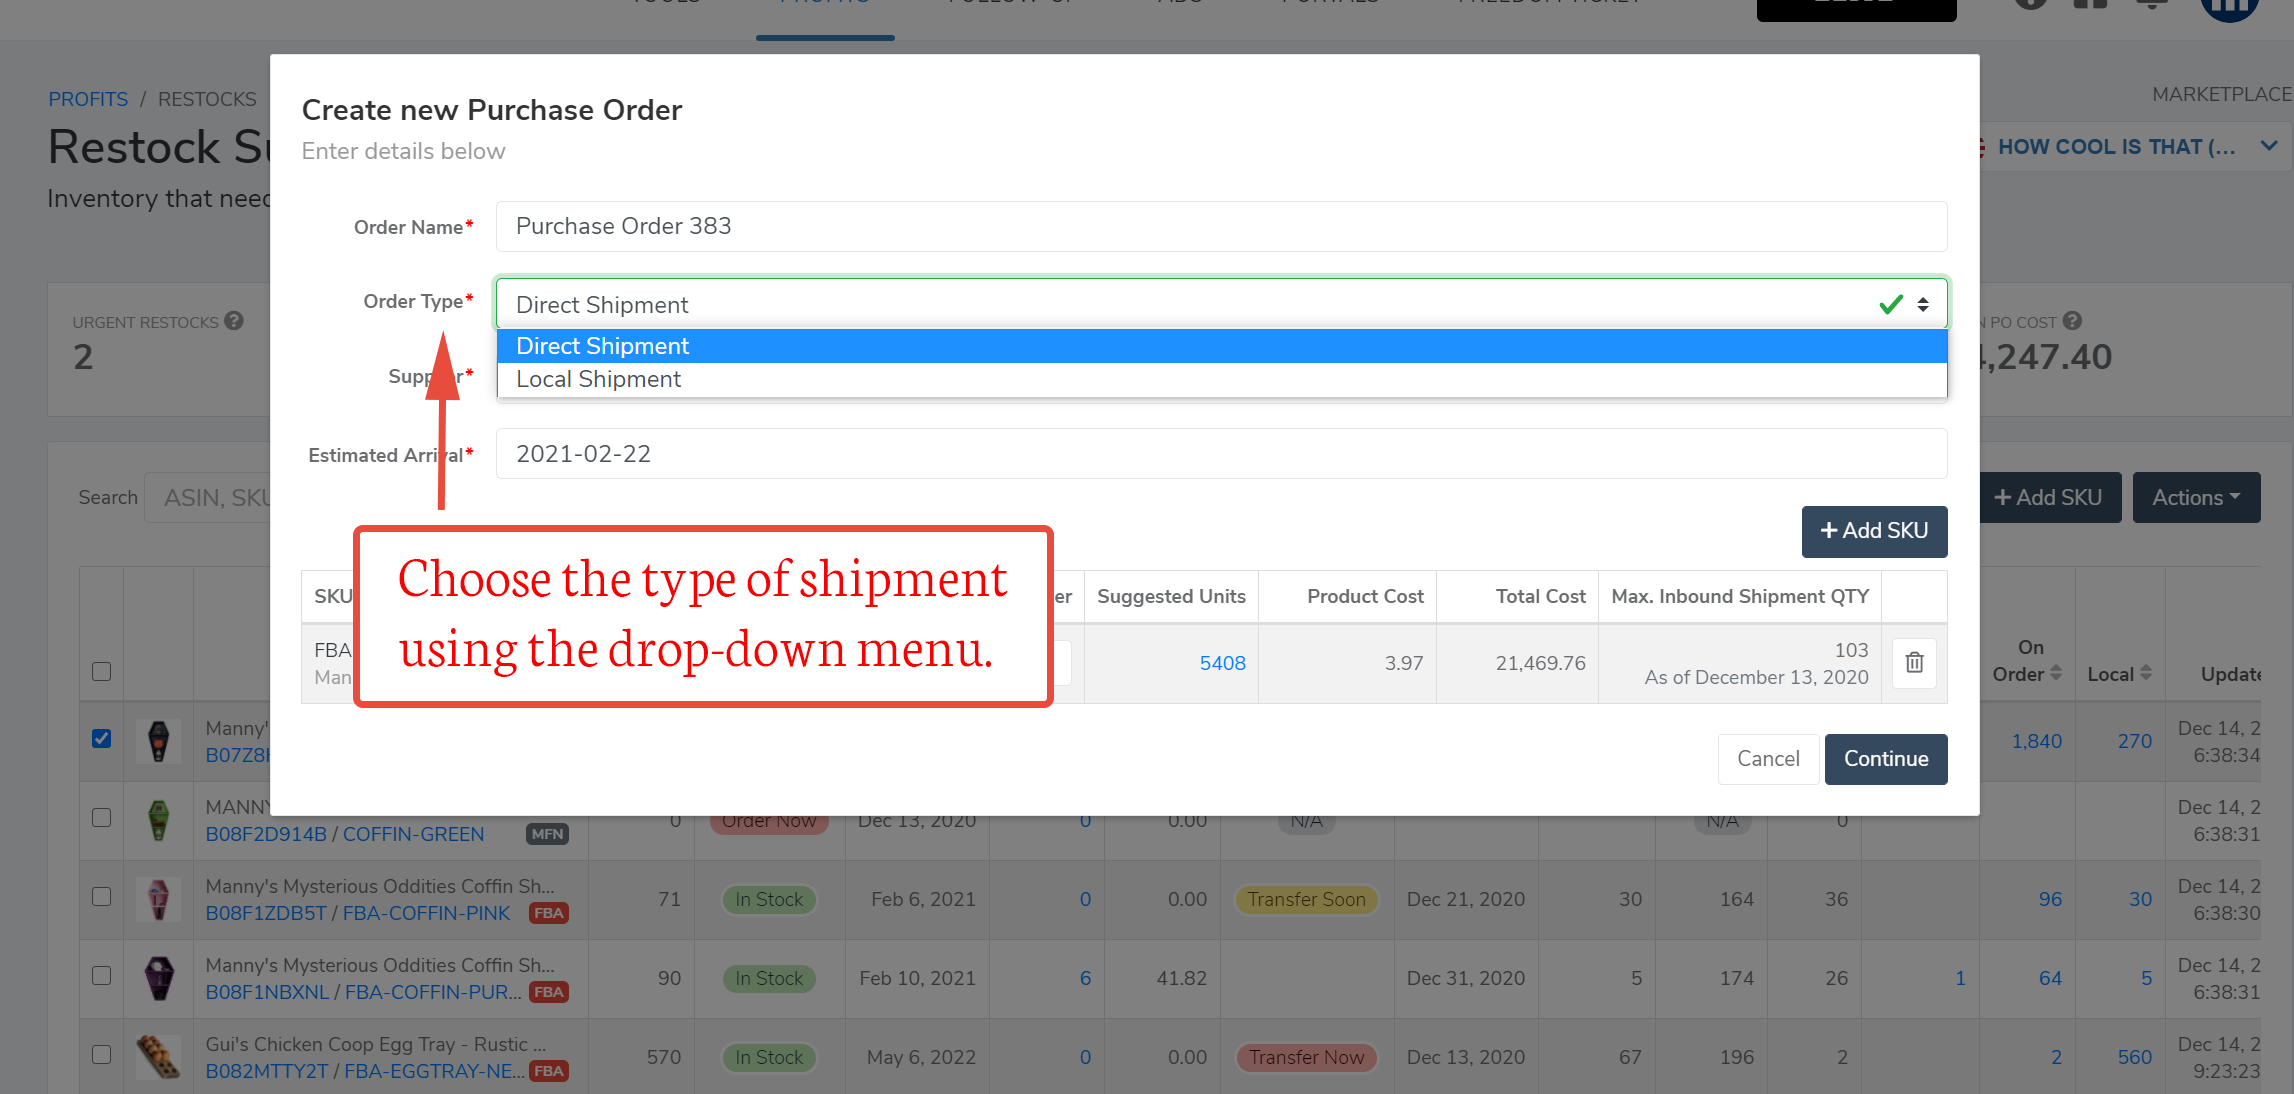
4. Next, you will need to choose whether you are sending the product from your manufacturer directly to Amazon, or to your Local warehouse.
- If you will be sending this order directly to Amazon, you will choose Direct Shipment
- If you will be sending this order to your Local warehouse, you will choose Local Shipment
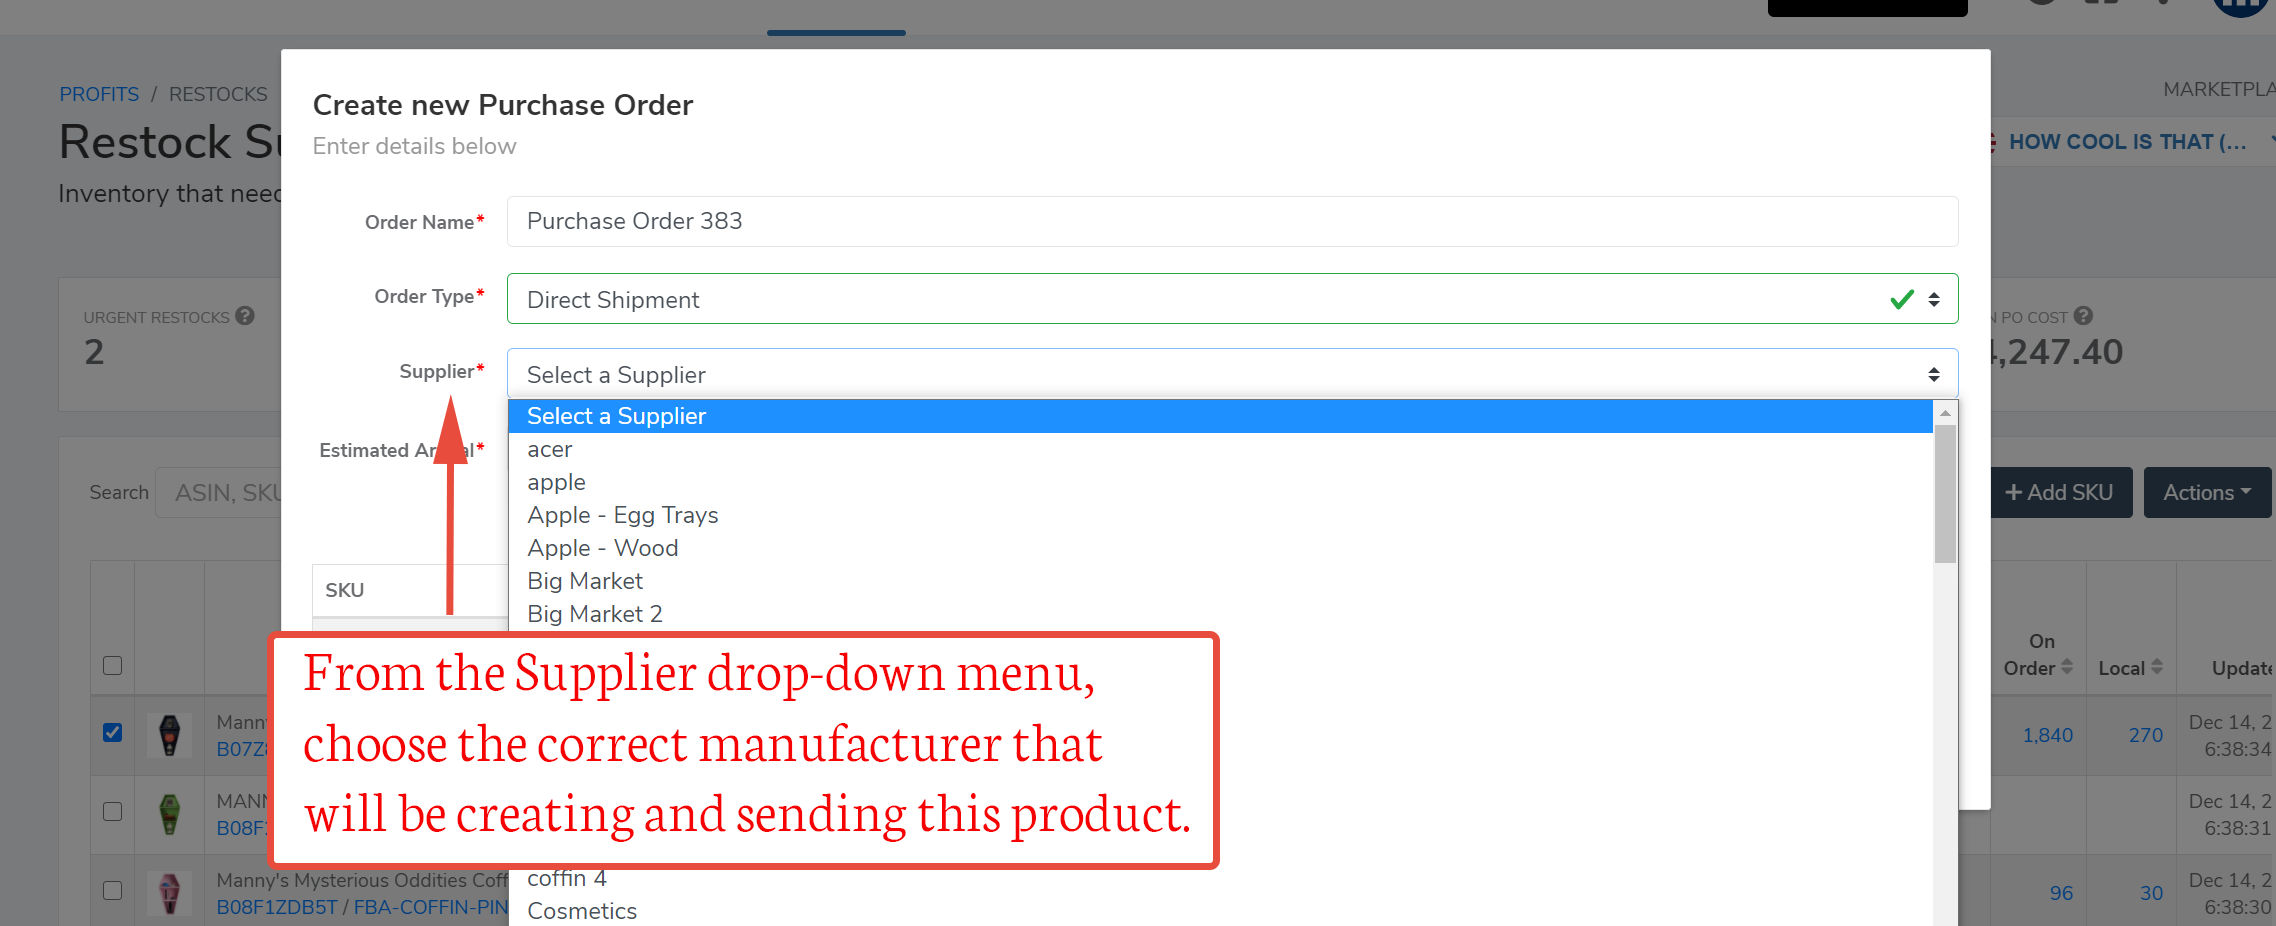
5. Next, use the drop-down menu for Supplier, to select the supplier which will manufacture and ship the product for this purchase order.
The Estimated Arrival time is calculated and applied by Inventory Management based on your Lead Time settings. If you think the processing and shipping time will take more or less time, you can edit it on this screen.
In addition, Inventory Management automatically fills the fields for Units to Order, Suggested Units, the Product Cost per unit for each SKU, based on your previously entered data. The tool then calculates the total cost and total shipment quantity for the order as well. Inventory Management also shows you the maximum number of units that Amazon accepts for each SKU, helping you avoid the mistake of ordering more inventory than Amazon will accept.
6. If you want to include additional SKUs to the order, click the + Add SKU Button.
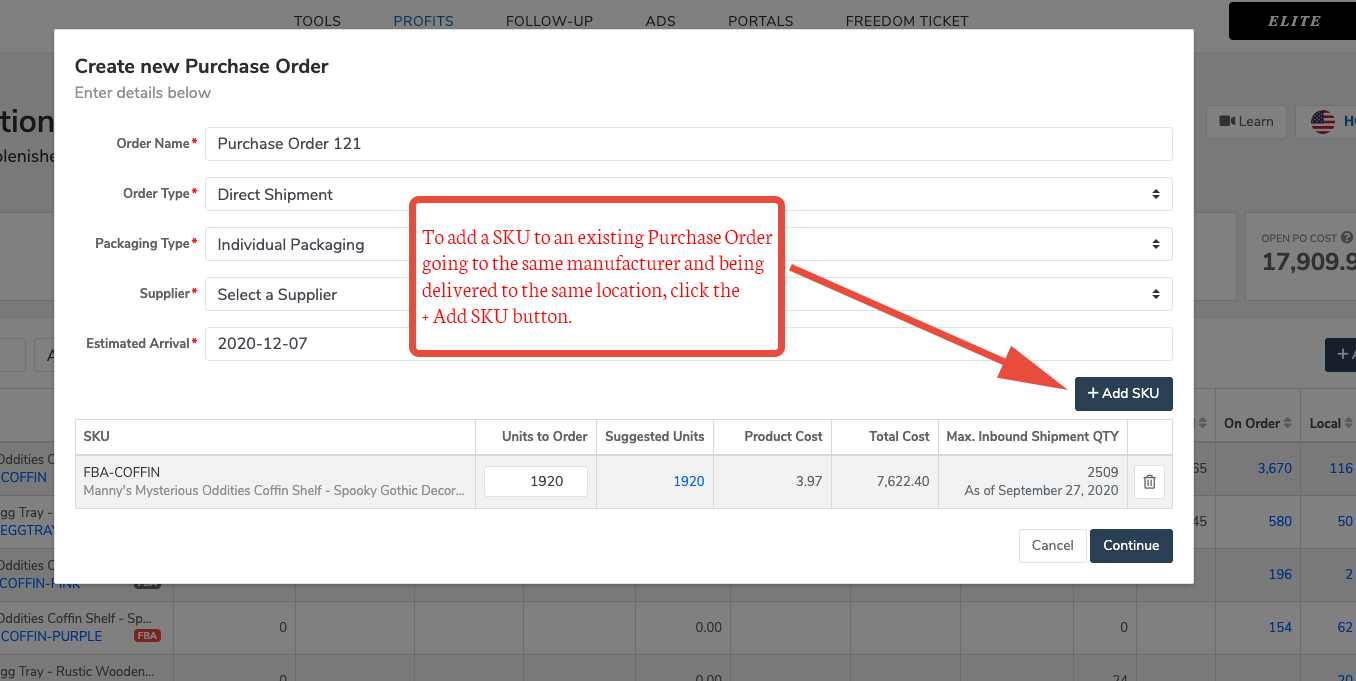
7. When you have selected all your options and added any additional SKUs, click the Continue button to create the Purchase Order.

8. Once you have created an order, the Purchase Order Screen will open with the details of that order.
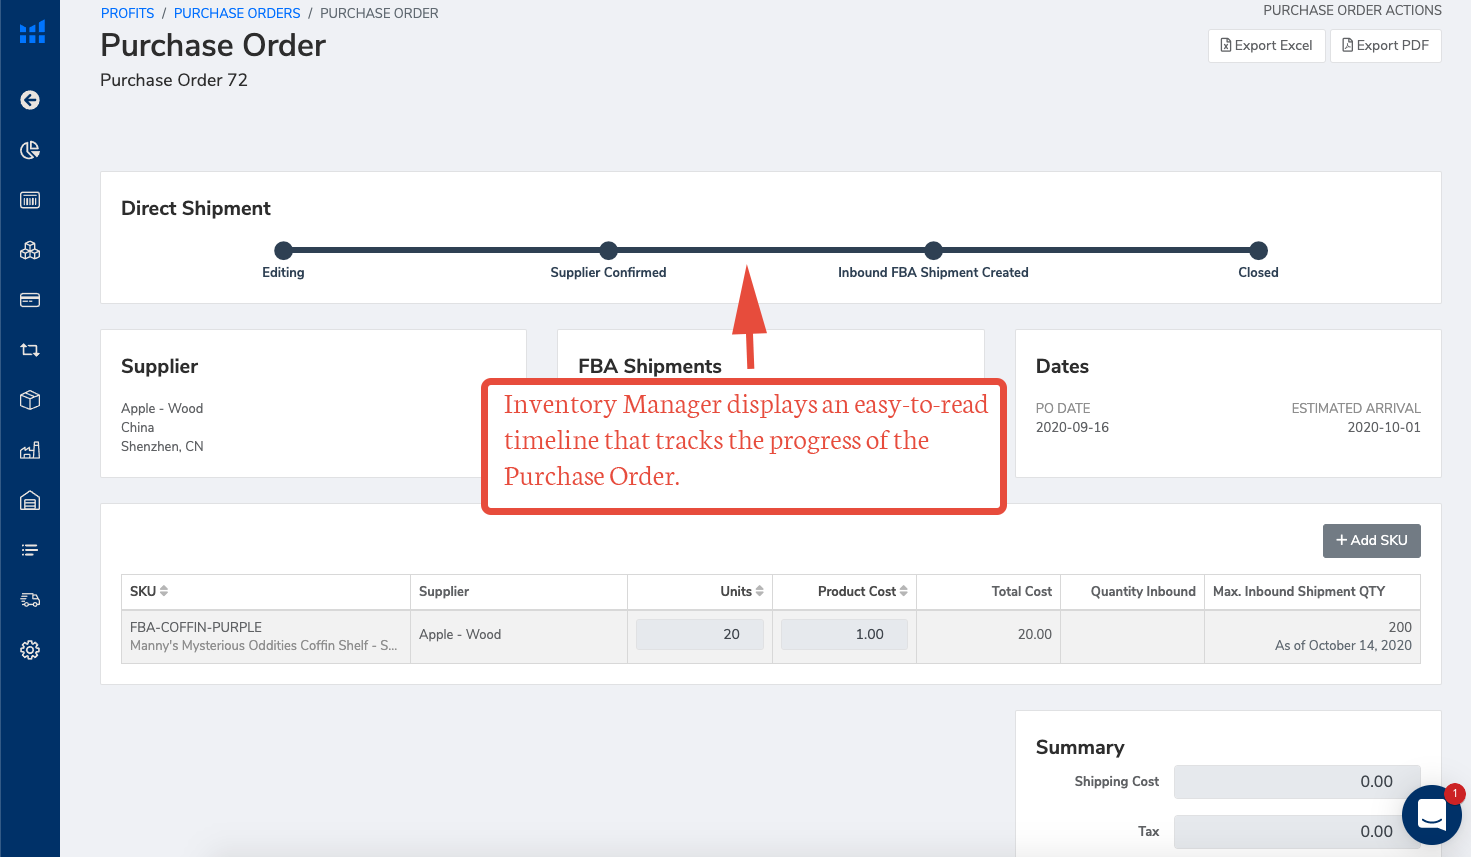
At the top of the screen, Inventory Management tracks the status of your Purchase Order. Based on whether the purchase order is Local or Direct, slightly different statuses are displayed, but both show the development stages from start to finish.
9. After creating a Purchase Order in Inventory Management, you must also send it to your Supplier. You can export the Purchase Order as an Excel or PDF document, and email it to them directly.
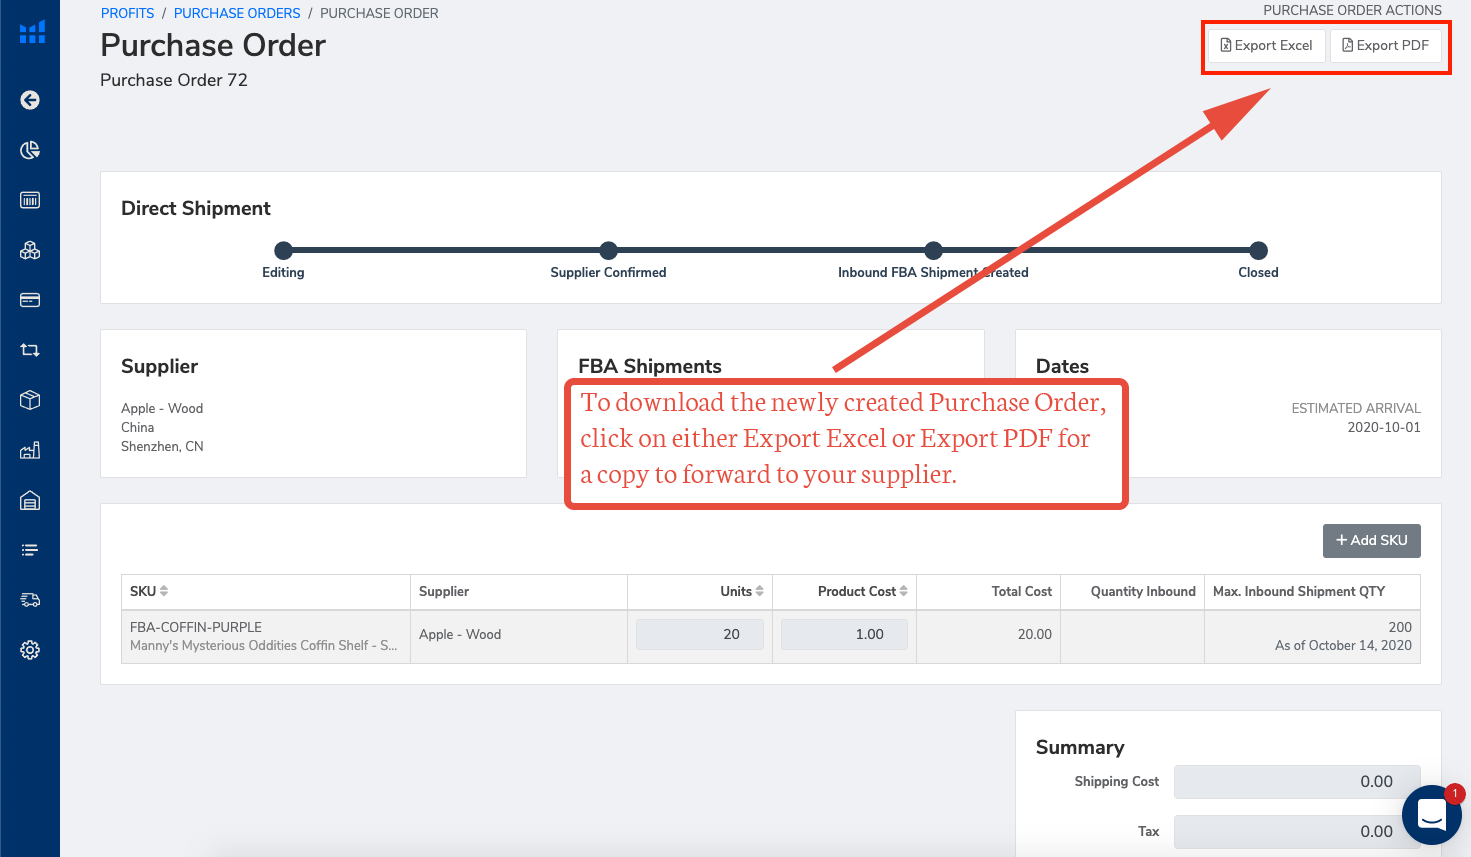
10. Once your supplier has confirmed this order, use the Mark Confirmed button to manually advance the status of the PO inside Inventory Management.

As you advance the status of the Purchase Order, the status tag on the Purchase Orders Page updates as well.
Until this point in the process, the creation of a Purchase Order has been the same, whether you are creating a Local Shipment or a Direct Shipment. Now the process diverges slightly, because you need to create additional documentation for orders shipping directly to Amazon.
II. Stage Two in Creating a Purchase Order: Direct Shipment
While you are waiting for the Supplier to manufacture your products, it’s a good time to generate an Inbound FBA Shipment based on the Purchase Order.
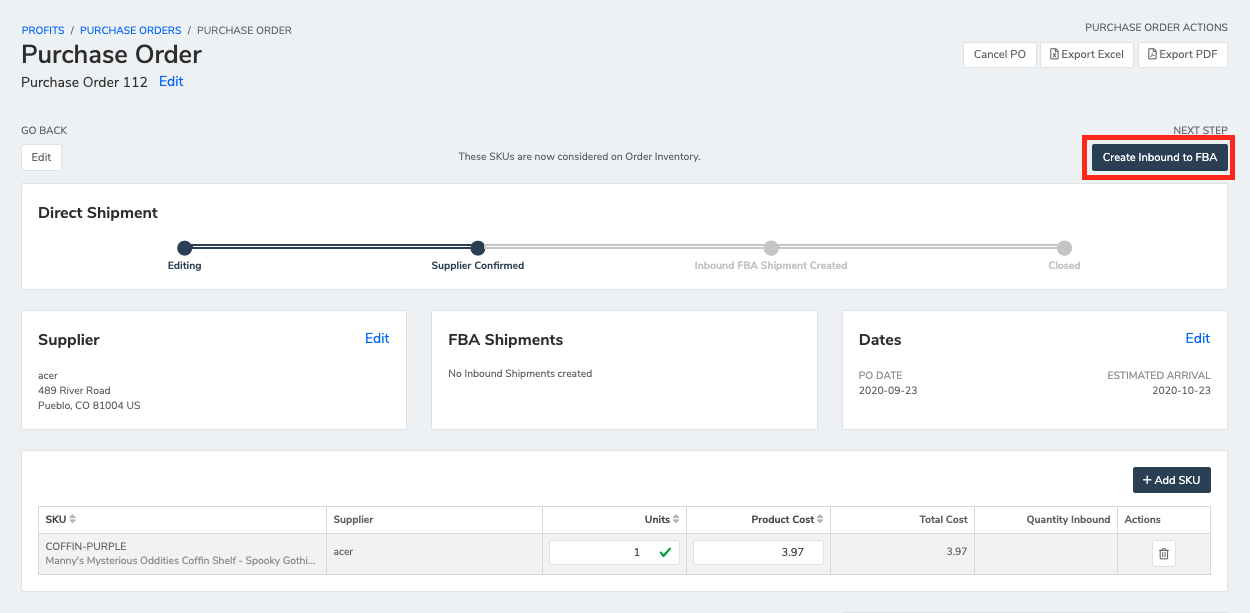
11. Click the Create Inbound to FBA button on the Purchase Order window in Inventory Management to begin the Inbound Shipment request to Seller Central. It’s important to generate the inbound shipment from the purchase order itself so Inventory Management can automatically shift the units recorded within the software. If you don’t do it in this manner, then you will need to manually delete the PO at a later time.
This will open a new window to update the Inbound Shipment Details.

12. Set your Label Preference and Packaging Type.
The From Address field will automatically be pulled from your Supplier, but you can edit this address on the Inbound Shipment by clicking the Edit Address link.
Once you’ve confirmed the number of units to send to Amazon, click Continue. Inventory Management forwards this request directly to Amazon, which generates a list of Shipment IDs, Units per Shipment, FBA Location and the selected Label Type. Inventory Management collects that data and imports it to your Helium 10 account.
13. Confirm your shipment to automatically add this Purchase Order to your Inbound Inventory in the Restock Suggestions window, and as a Working Shipment in Seller Central.

When you click Confirm Shipment, you will be taken to your Inbound FBA Shipments window, where Inventory Management has created a new row for the shipment.
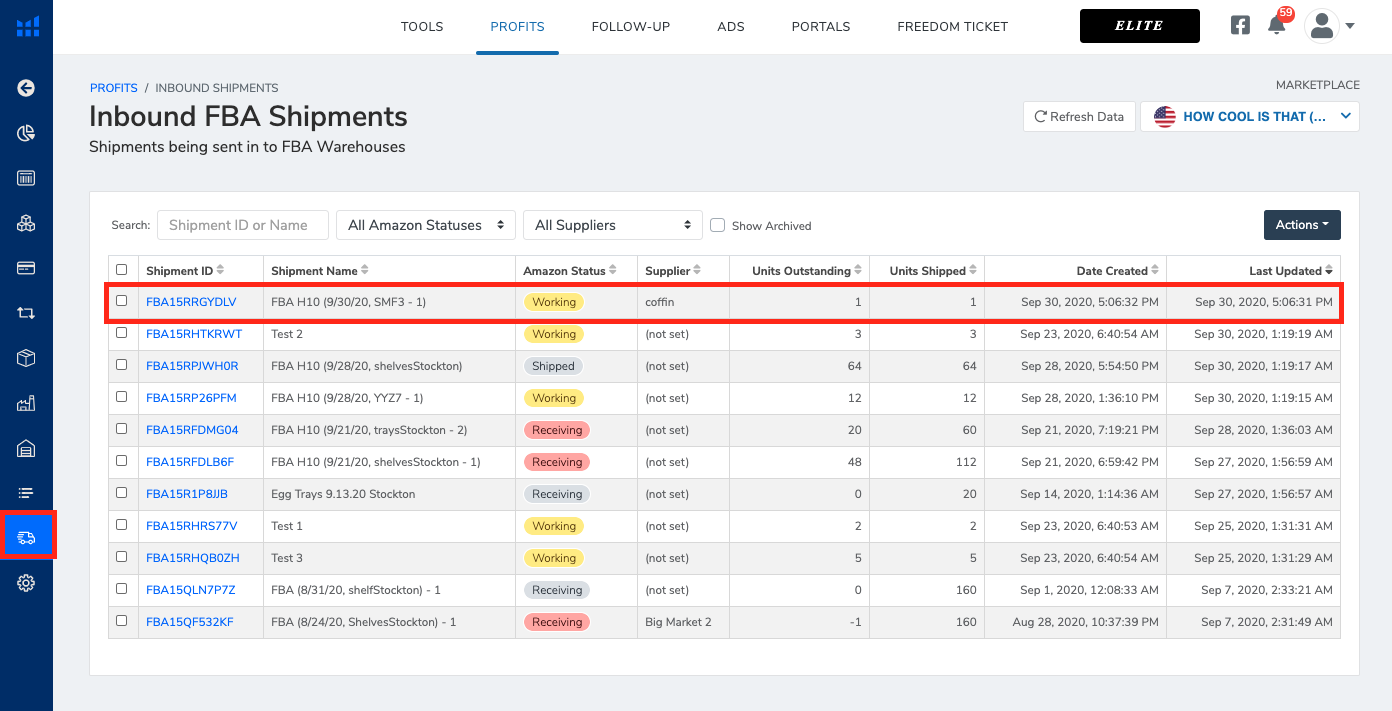
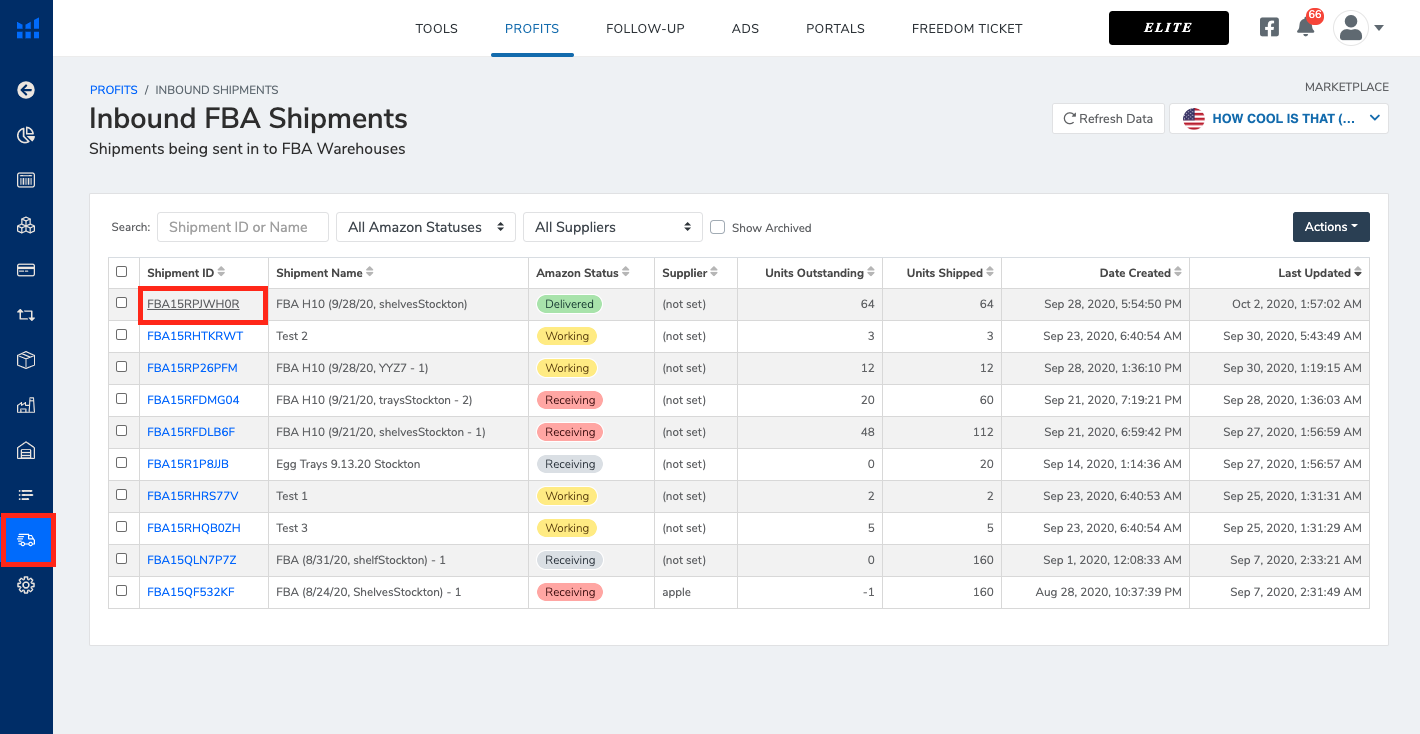
14. At this point, you will need to log into Seller Central to complete the shipment order. To open the Inbound Shipment from Helium 10, click on the linked Shipment ID. This will take you to the individual FBA Shipment window for this order.
15. From the FBA Shipment window, click on the Inbound Shipment ID, marked by its blue linked text.
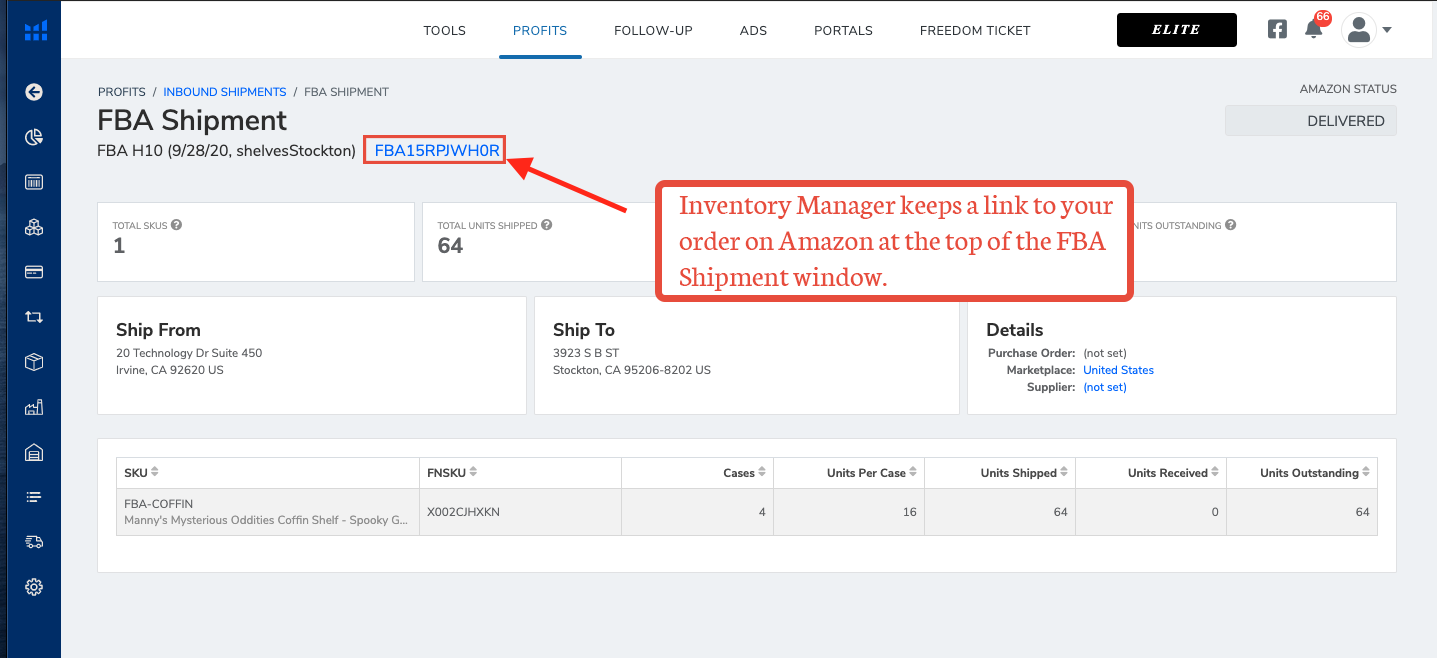
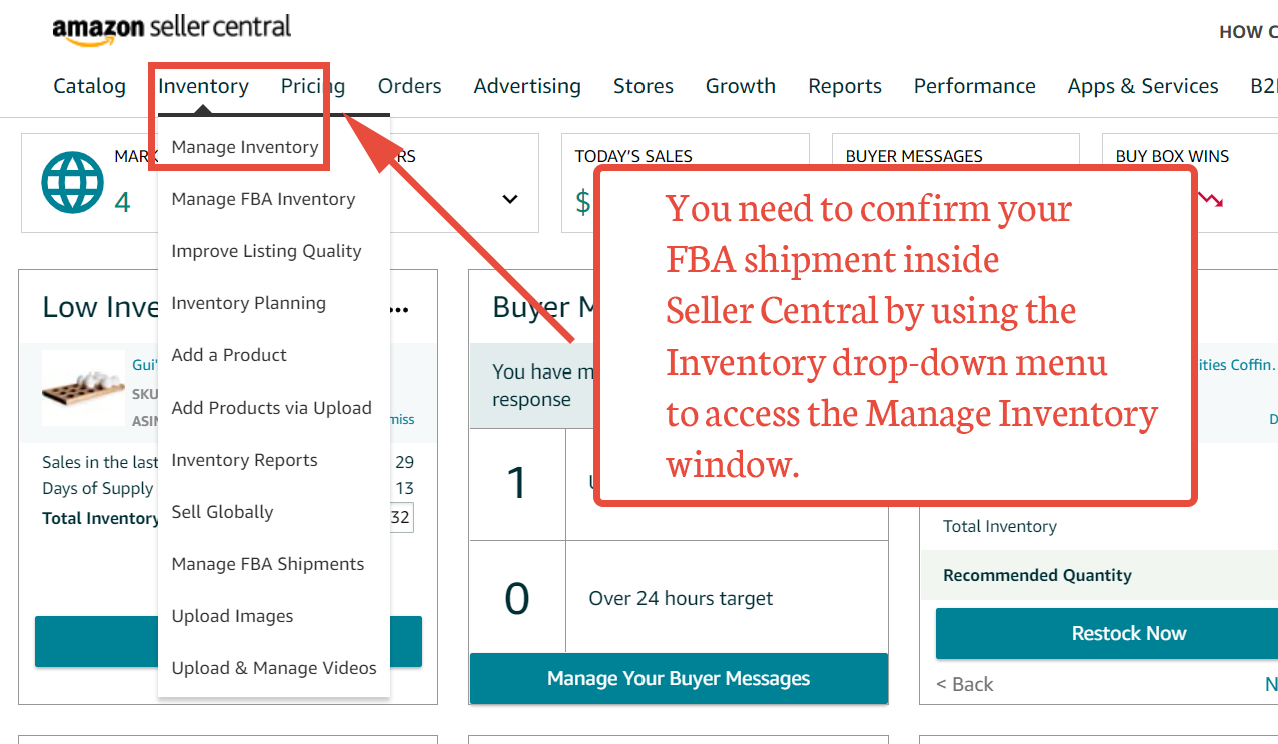
You can also navigate directly to the Inbound Shipment inside Seller Central by clicking on the Inventory drop-down menu, and click on Manage Inventory.
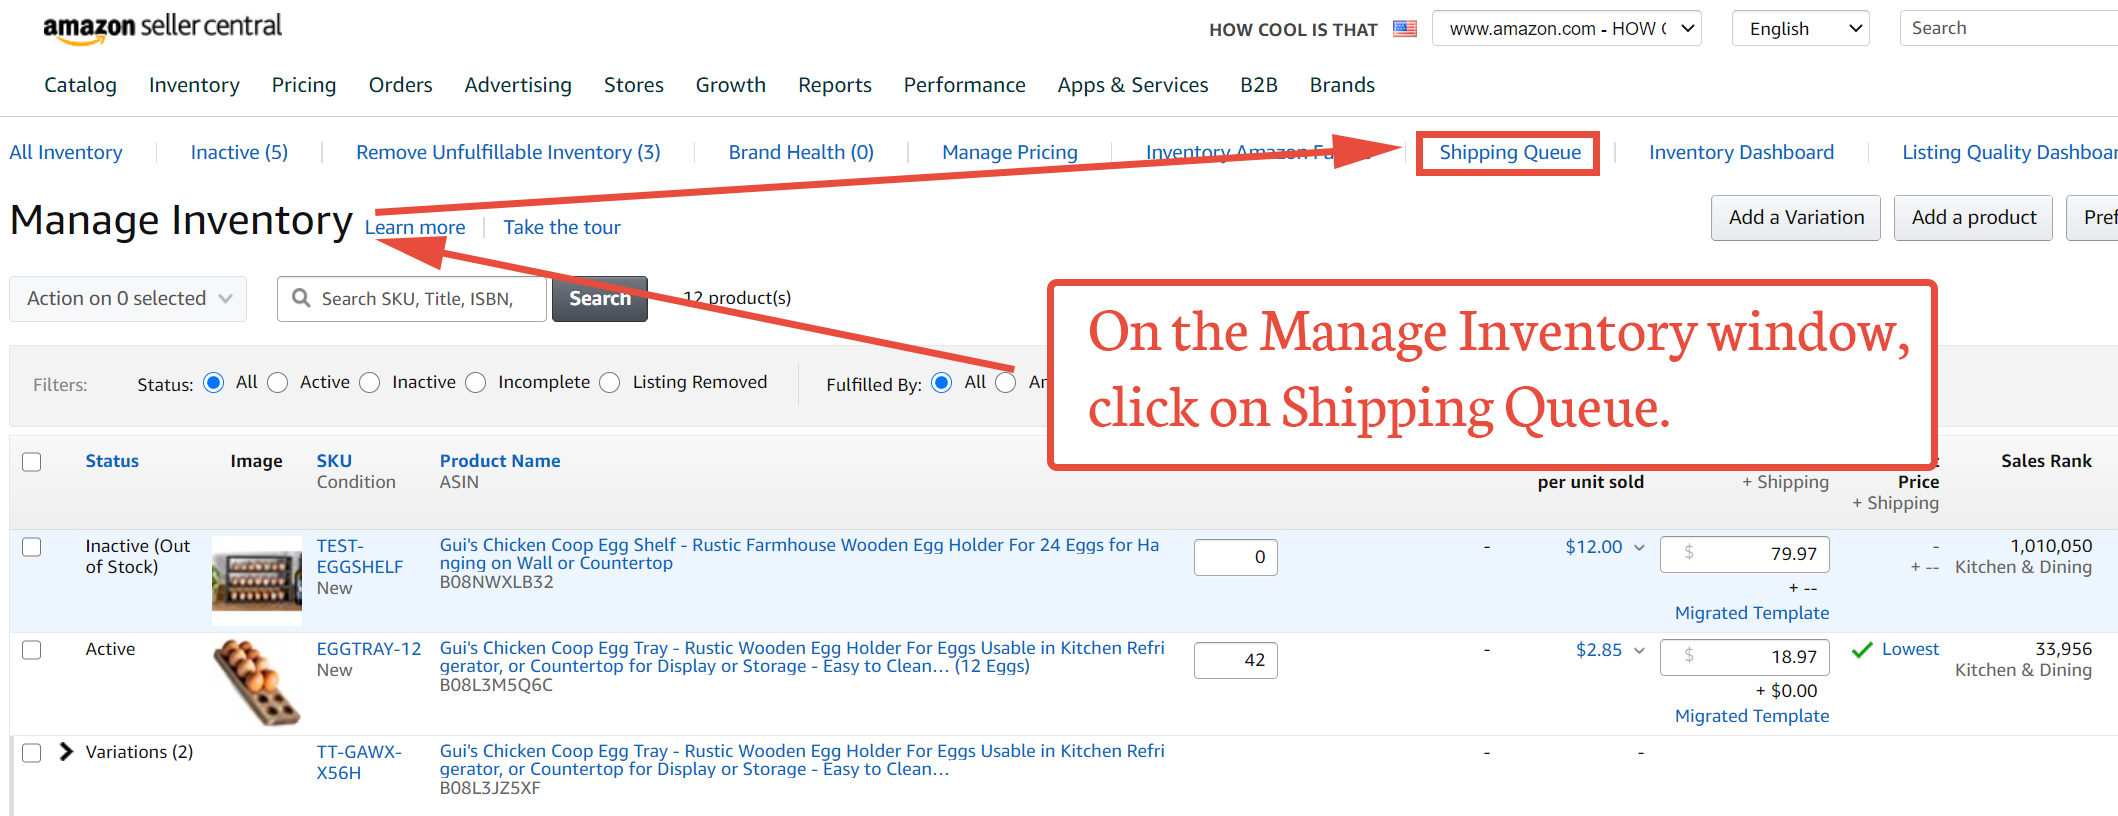
16. From the Manage Inventory window, click on Shipping Queue.
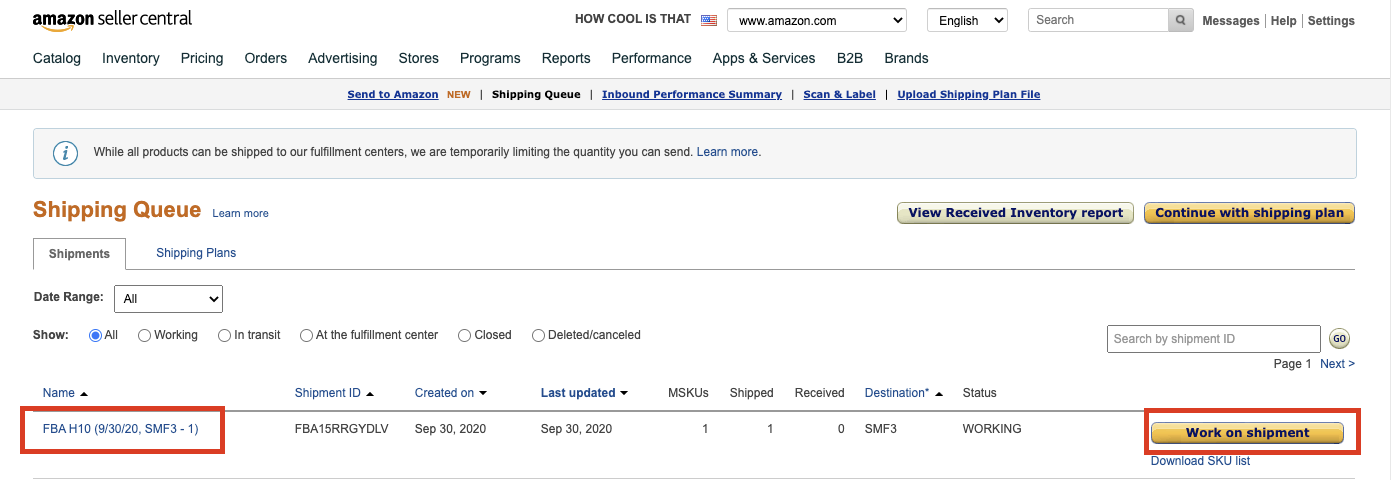
17. Locate the shipment you just created in Helium 10. Click on Work on Shipment to complete the process in Seller Central.
III. Stage Two in Creating a Purchase Order: Local Shipment
When receiving a shipment to your local warehouse, you will not be completing any steps in Seller Central. Later, if and when you need to ship from your warehouse to Amazon, you’ll use the Transfer Shipment process.
11. When your supplier informs you that the shipment has been sent and is en route to your local warehouse, return to the Purchase Order window for this order, and update the status by clicking the Mark In Transit To Warehouse button.
12. After the inventory arrives at your local warehouse, update the status by clicking the Receiving button.
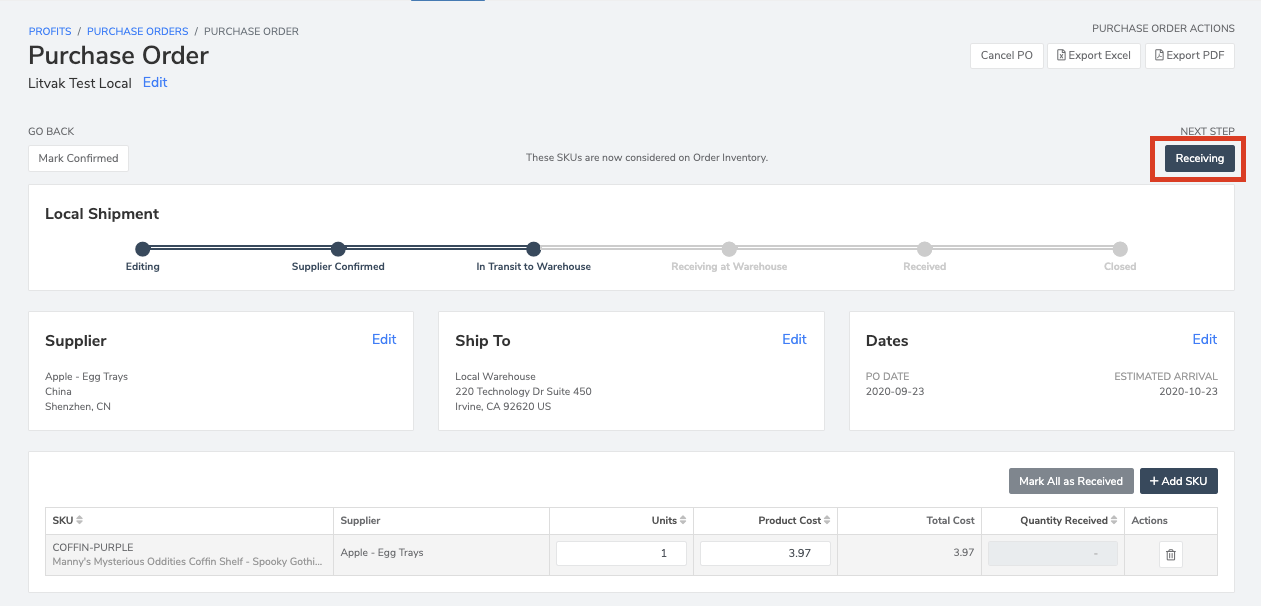
13. Once a purchase order is in Receiving, update the Quantity Received field for each item on the purchase order. Make sure you enter all related data before moving to the next step.
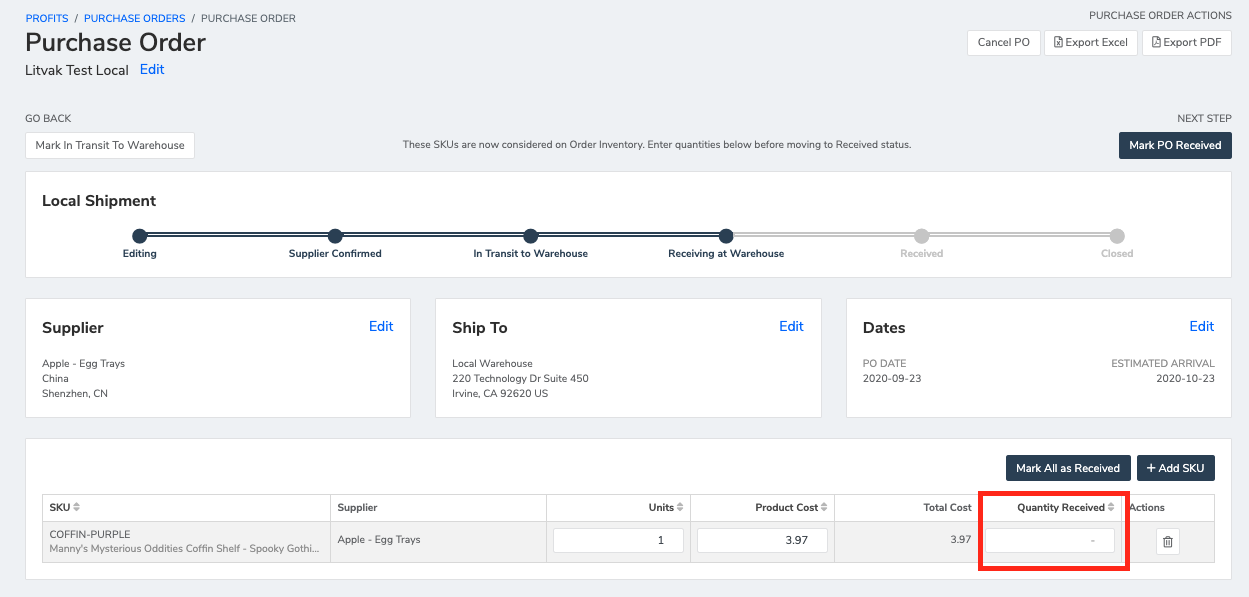
14. The Quantity Received field updates your local inventory data as soon as you click the Mark PO Received button. Once a PO has been marked as Received it will no longer be editable. Double check your entered data, and if it is accurate, Click Mark PO Received.

At this time, your local quantities will be updated based on the quantity received field for each item on the PO.
15. Click the Close button.

Once you have closed your Purchase Order, it will no longer be listed on the Purchase Orders screen by default. To review closed purchase orders, you can use the Show Archived filter on the Purchase Order Screen.
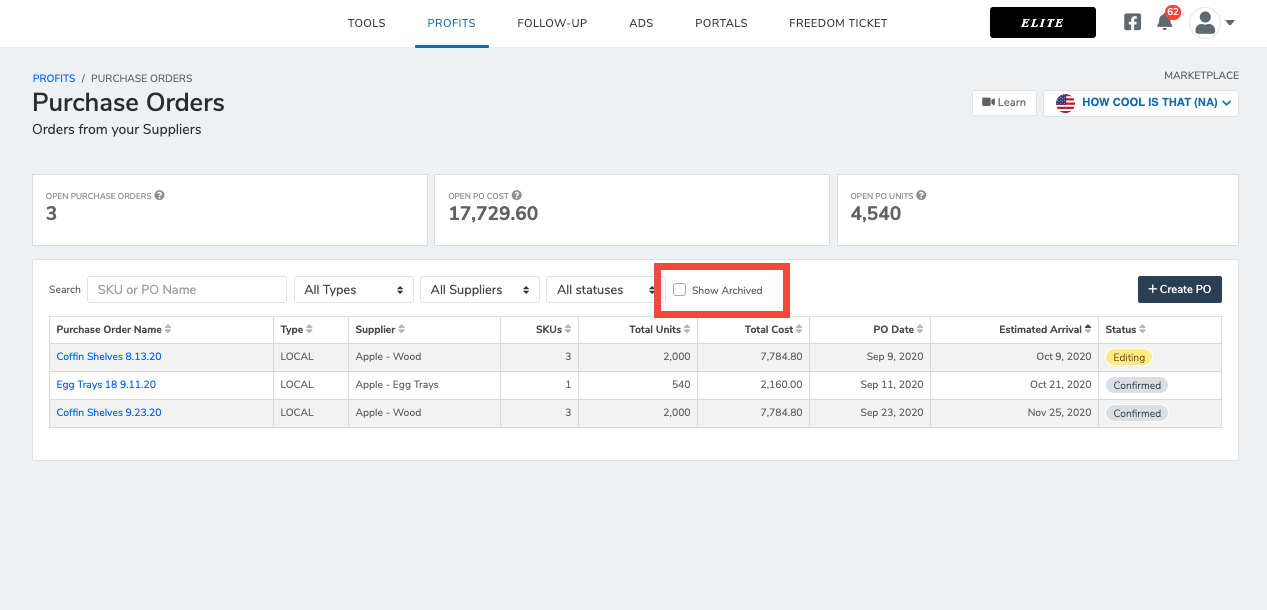
In addition to the Show Archived Filter, you can also
- Search for POs with a specific SKU on them
- Search for POs by the PO Name
- Filter the list by PO Type (Direct or Local)
- Filter the list by the Supplier
- Filter the list for POs in a specific Status
Finally, Inventory Management provides summary information on all of your Purchase Orders at the top of the Purchase Orders window.
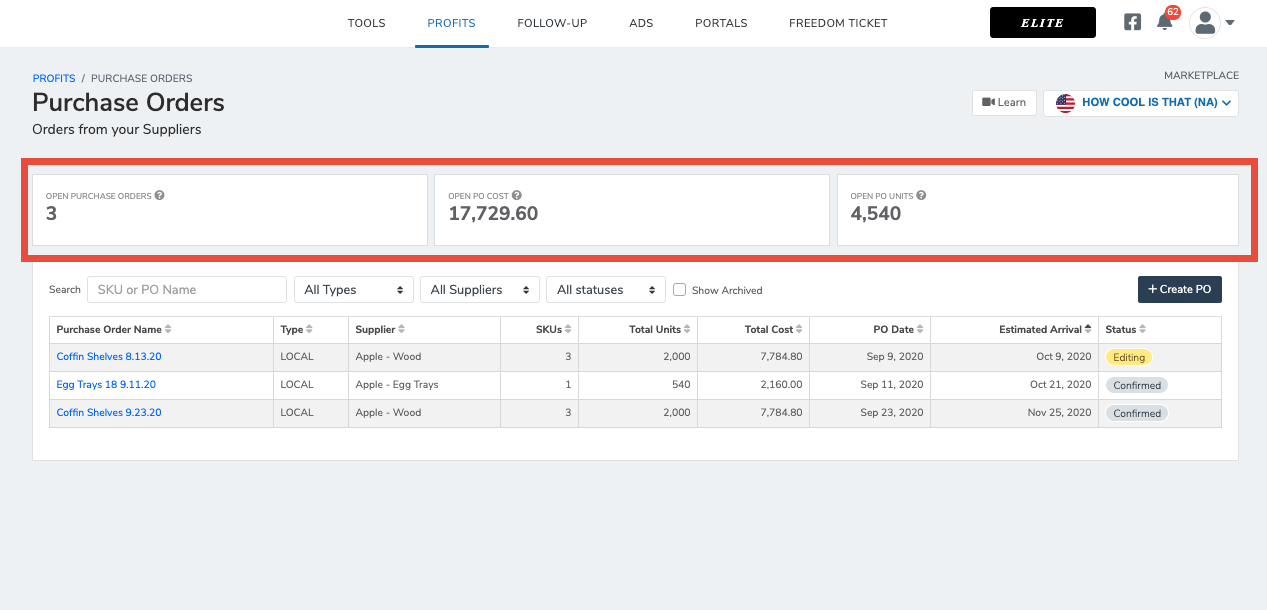
- Open Purchase Orders: the number of active POs
- Open PO Cost : the total cost for all active POs
- Open PO Units: the total number of units included in active POs
IV. How PO Statuses Affect Inventory Quantities
As you update the status of your Purchase Orders, Inventory Management also updates the count of your inventory on the Restock Suggestions page.
Local Purchase Orders

Direct Purchase Orders

Once a Direct Purchase Order has an Inbound Shipment created, the inventory will be treated as Inbound.
As Amazon marks units as received, they will be converted to Current Inventory. Once all units have been received and the PO is closed, Inventory Management converts all units to Current Inventory.
Comments
Article is closed for comments.