
Amazon needs to be notified in advance of any upcoming shipments of your products to their fulfillment centers. If your inventory will be sent directly from your Supplier to Amazon, this is accomplished by creating an Inbound Shipment directly from your Purchase Order. For more information on this process, see our article "How Do I Create and Manage Purchase Orders in Inventory Management?".
However, if you need to move inventory from your Local Warehouse to Amazon, you can create a Transfer Shipment.
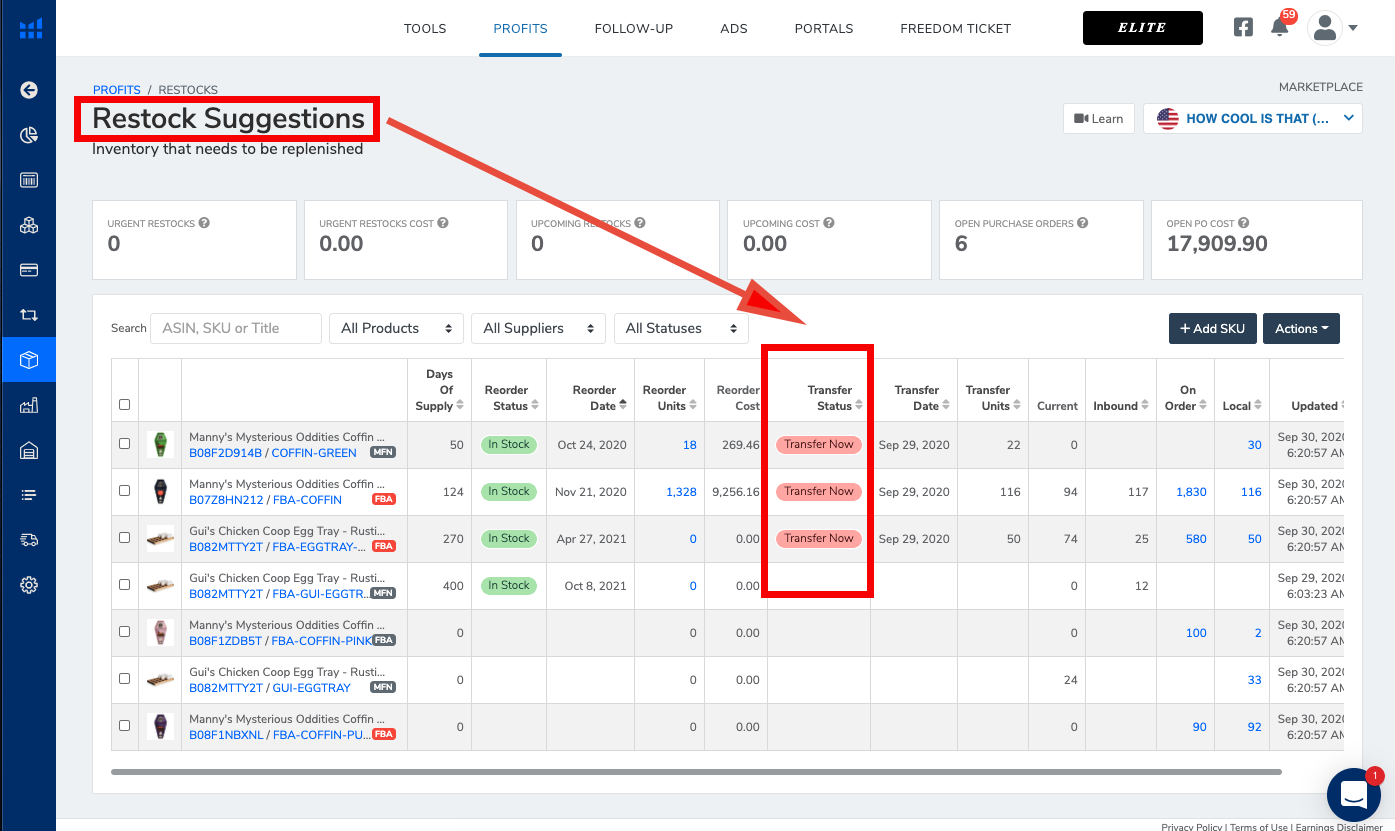
1. To create a Transfer Shipment, open the Restock Suggestions Page in Helium 10 to review whether you have any items that Inventory Management recommends be transferred from Local Inventory to Amazon.
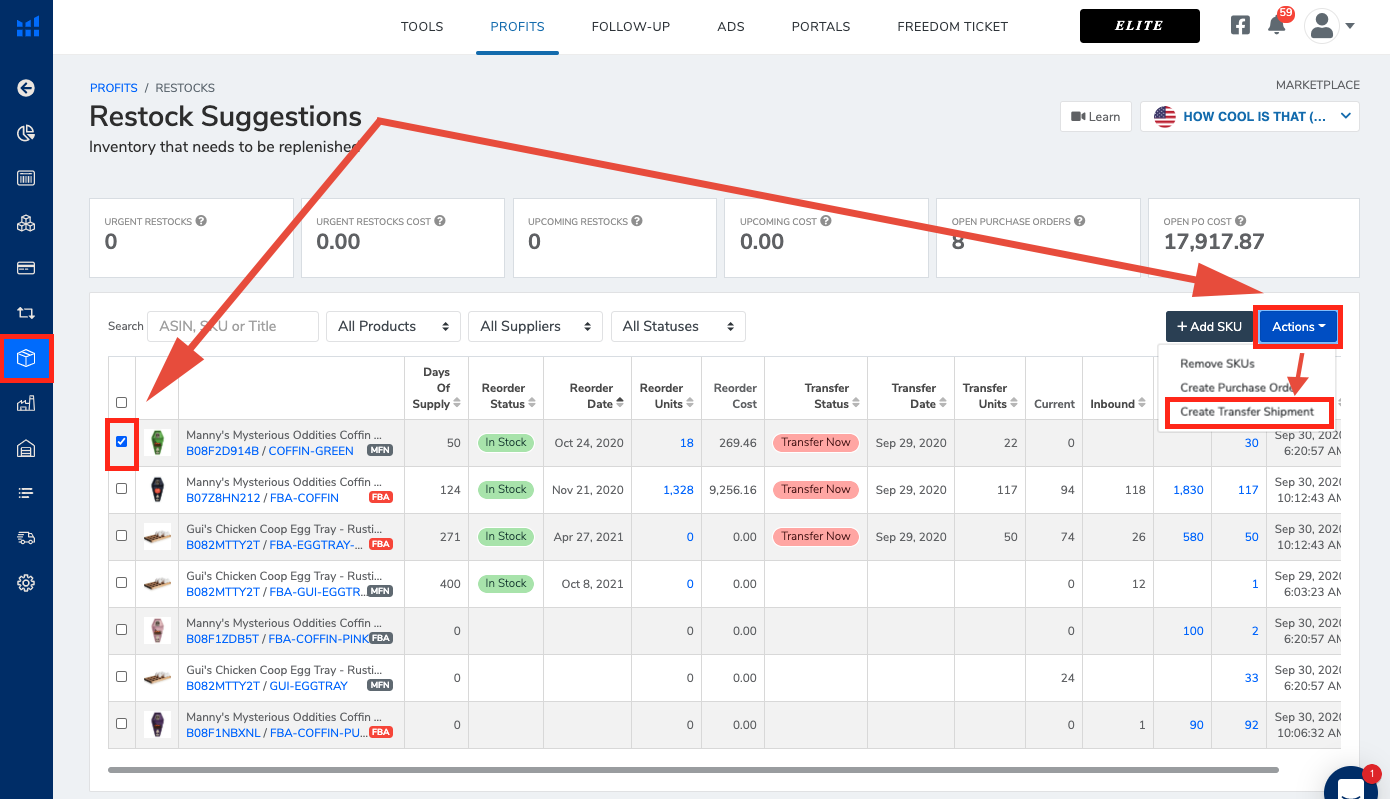
2. Next, select the product you would like to transfer, and use the Create Transfer Shipment selection in the Actions Menu.
3. The number of units will be pre-populated with Helium 10’s Transfer Units recommendation. This recommendation is based upon your Local Lead Time and the Reorder Frequency assumptions for each SKU.
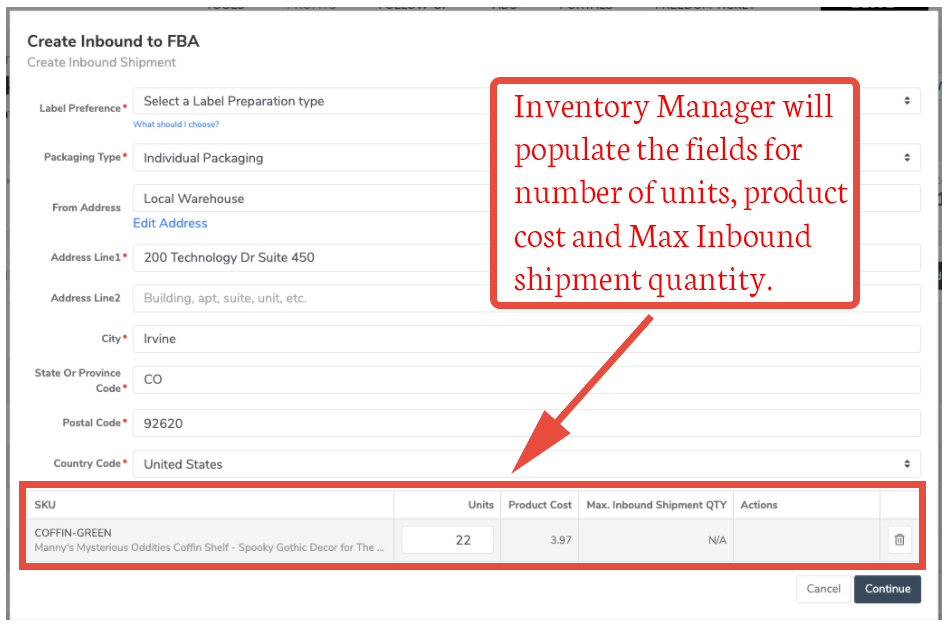
4. Select the Label Preference, and Packaging Type to proceed. The From Address will pull directly from your Local Warehouse Address, but if needed, you can edit this information on the Inbound Shipment by clicking the “Edit Address” text link.

Once you’ve completed the Inbound Shipment form, click the Continue button.
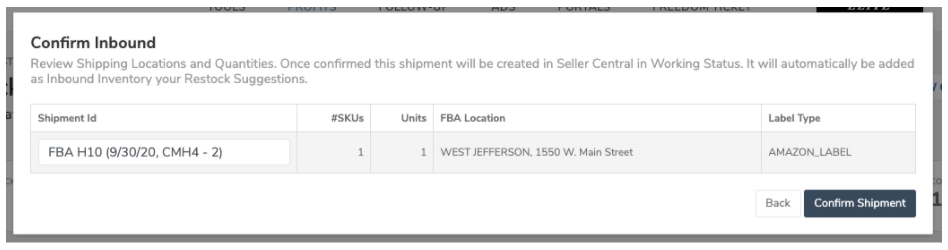
5. Next, check the details on the Shipment ID, FBA Location, and selected Label Type on the Confirm Inbound window. If the information looks accurate, confirm the Inbound Shipment by clicking on the Confirm Shipment button.
After confirming the shipment inside the Inventory Management, you will need to complete the shipment documentation inside Seller Central.
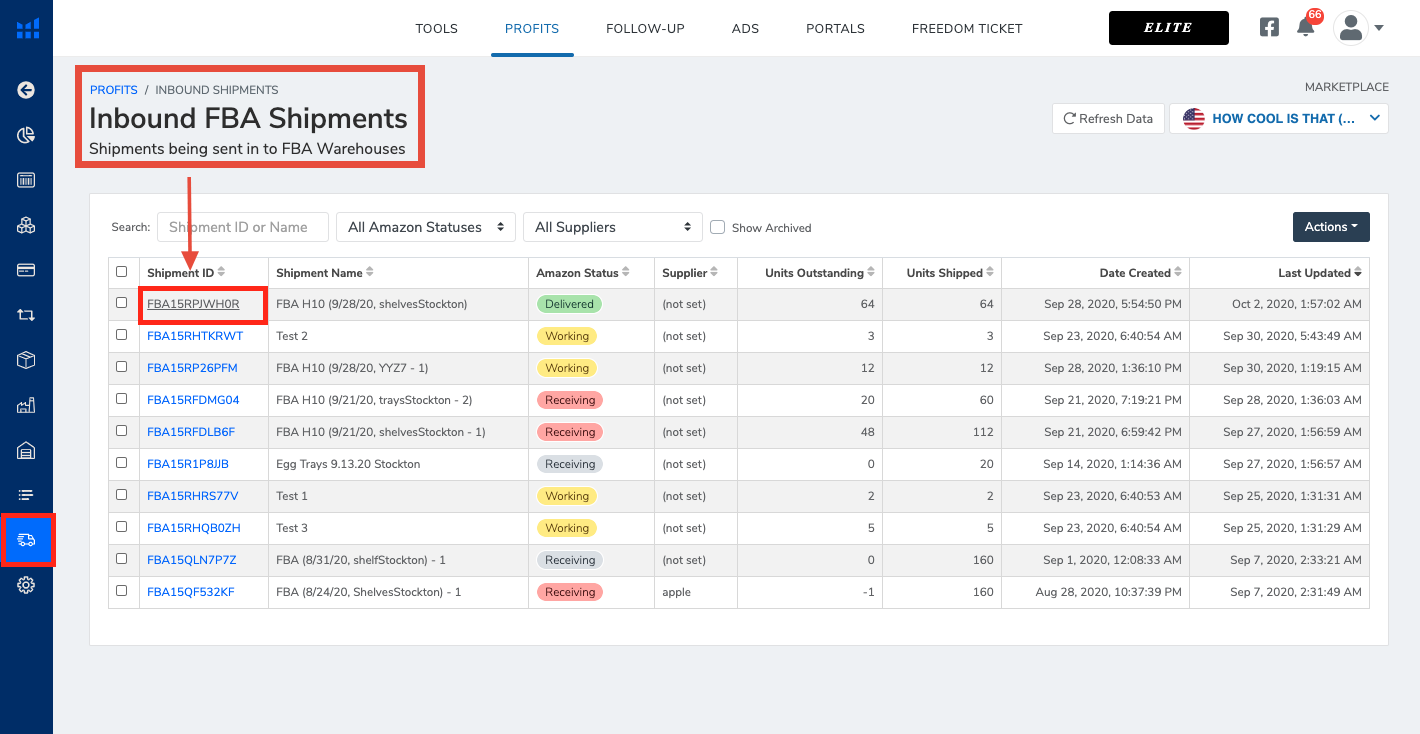
6. You can open the Inbound Shipment from Helium 10 by navigating to the Inbound Shipments page inside Inventory Management, finding and opening the Inbound Shipment you just created.
7. From the Inbound Shipment page, click on the Inbound Shipment ID located in the first column.
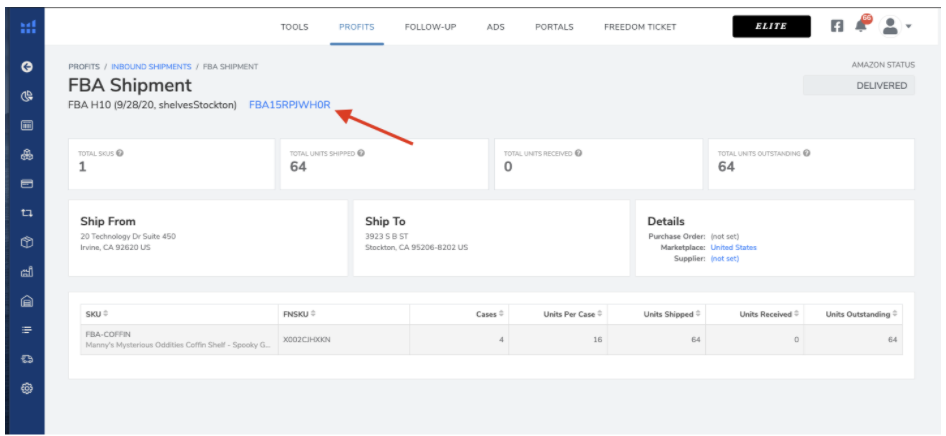
8. On the FBA Shipment page for the new shipment, click on the FBA Inbound Shipment ID, which will take you directly to your Seller Central account.
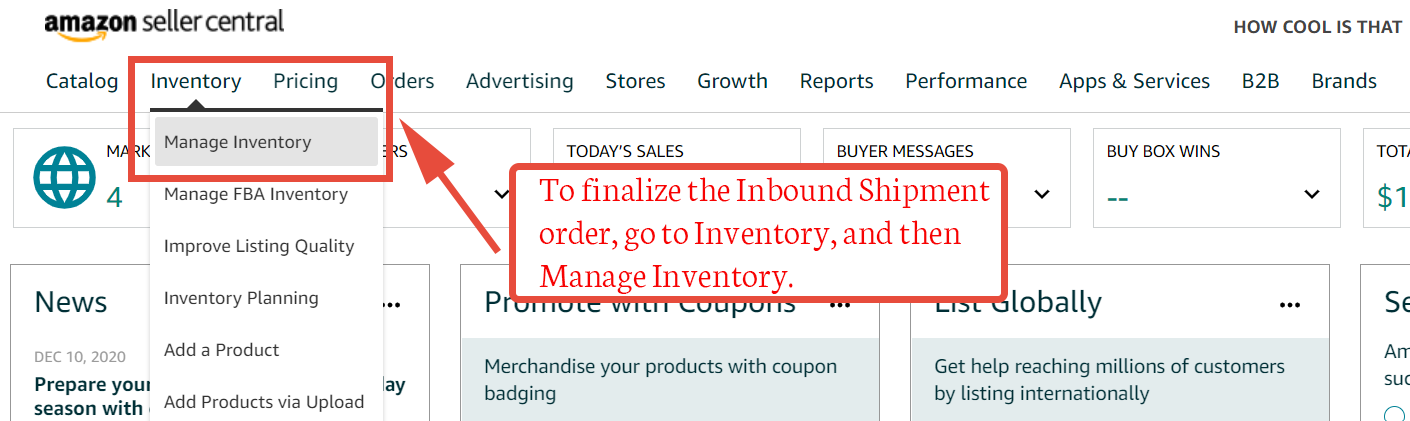
9. You can also navigate directly to the Inbound Shipment inside Seller Central by clicking on Inventory and then, Manage Inventory.
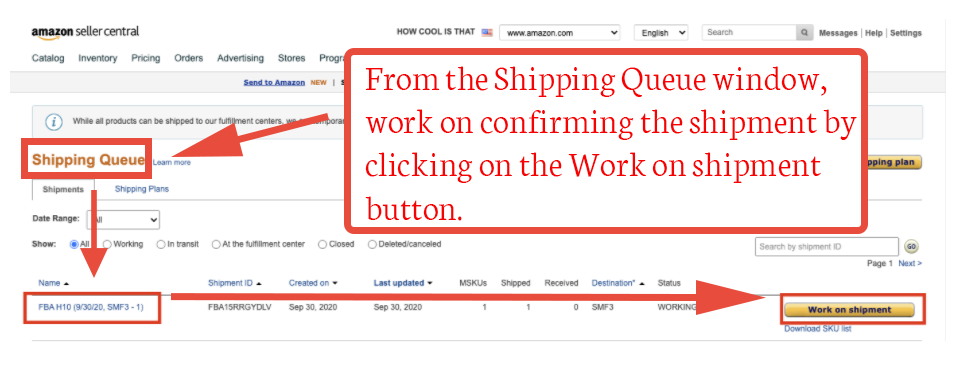
10. On the Manage Inventory window, click on Shipping Queue.
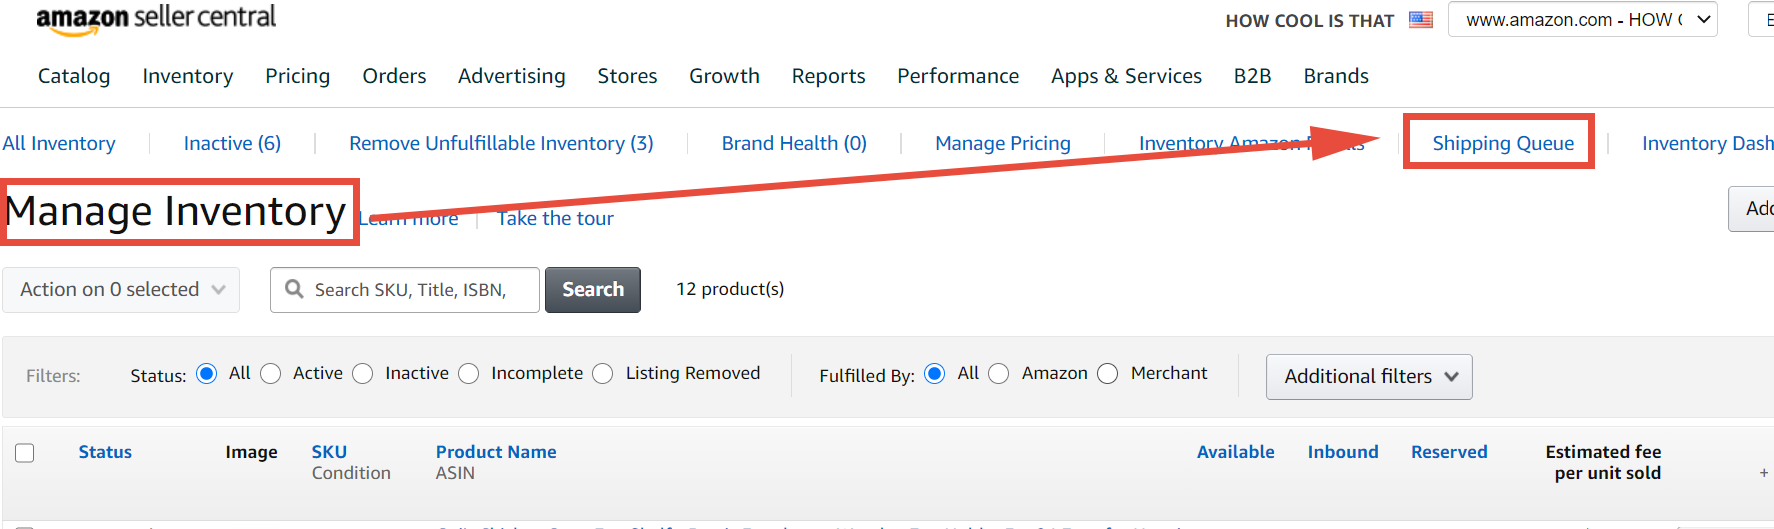
11. From the Shipping Queue page, find the shipment you created in Helium 10 using Inventory Management. Click on Work on Shipment to complete the confirmation process in Seller Central.
Comments
Article is closed for comments.